Local Businesses Blog in Texas

Author: Melinda Bates Page 1 of 73

How To Connect Highlander To Garage Door Opener – Tarrant County Door & Gate

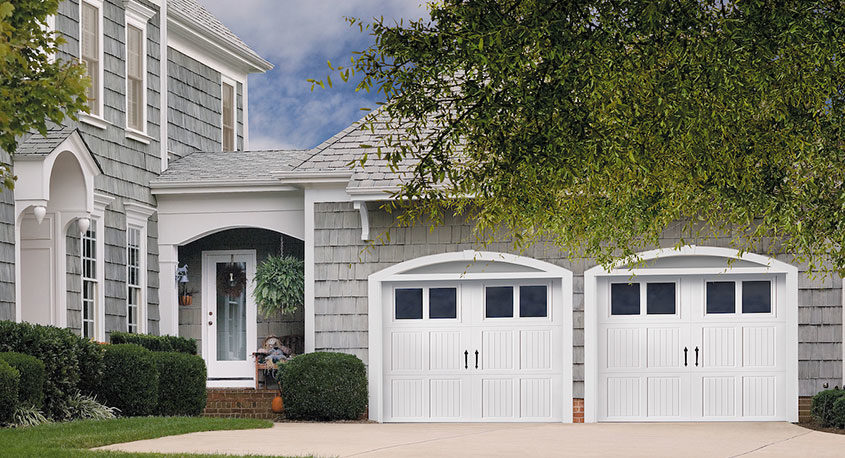
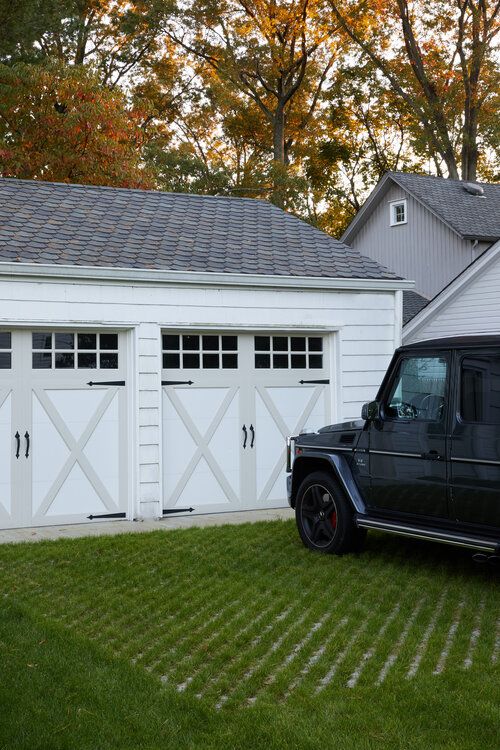
Toyota Highlanders offer the convenience of connecting to your Garage Door Repair North Richland Hills TX, allowing you to open and close your garage door with the touch of a button from inside your vehicle.

This feature, commonly known as HomeLink, eliminates the need for separate remote controls or keypads and adds convenience to your daily routine. In this comprehensive guide, we’ll walk you through the step-by-step process of connecting your Highlander to your garage door opener, ensuring seamless integration and effortless operation.

1. Verify Compatibility:

Before getting started, it’s essential to ensure that your garage door opener is compatible with the HomeLink feature in your Toyota Highlander. Most modern garage door openers are compatible with HomeLink, but it’s always a good idea to check the compatibility list on the HomeLink website or consult your vehicle’s owner’s manual to confirm compatibility.

2. Locate the HomeLink Buttons:

Next, locate the HomeLink buttons inside your Toyota Highlander. In most models, the HomeLink buttons are located on the overhead console near the rearview mirror or on the driver’s side sun visor. The buttons may be labeled with icons depicting a garage door, a house, or the HomeLink logo.

3. Put Your Garage Door Opener in Learning Mode:

Once you’ve located the HomeLink buttons in your Highlander, you’ll need to put your garage door opener into learning mode, allowing it to receive signals from your vehicle. Refer to the owner’s manual for your garage door opener to find instructions on how to enter learning mode. This typically involves pressing and holding a button on the opener until a light or indicator begins flashing, indicating that the opener is ready to receive programming signals.

4. Program the HomeLink Buttons:

With your garage door opener in learning mode, it’s time to program the HomeLink buttons in your Toyota Highlander. Follow these steps to program the buttons:

  • Press and hold the desired HomeLink button in your Highlander until the indicator light begins flashing rapidly. This indicates that the button is in programming mode and ready to receive signals.
  • While the indicator light is flashing, press and hold the button on your garage door opener remote control until the indicator light on the opener flashes, indicating that the signal has been received.
  • Release both buttons once the indicator light on the garage door opener stops flashing. This indicates that the HomeLink button in your Highlander has been successfully programmed to operate your garage door.

5. Test the HomeLink Buttons:

After programming the HomeLink buttons, it’s essential to test their operation to ensure that they open and close your garage door correctly. Park your Toyota Highlander within range of your garage door and press the programmed HomeLink button to open and close the door. Ensure that the door responds promptly and that there are no issues with operation.

6. Additional Troubleshooting and Tips:

If you encounter any issues during the programming process or experience difficulties with operation, refer to the owner’s manual for your vehicle or consult with a dealership or professional technician for assistance. Additionally, ensure that your garage door opener is properly maintained and that there are no obstructions blocking the signal between your Highlander and the opener.

Conclusion:

Connecting your Toyota Highlander to your garage door opener is a simple and straightforward process that can be completed in just a few easy steps. By following the step-by-step instructions provided in this guide and referring to the owner’s manual for your vehicle and garage door opener, you can enjoy the convenience and ease of opening and closing your garage door from inside your Highlander. With proper programming and testing, your HomeLink buttons will provide reliable operation and seamless integration with your vehicle for years to come.

Tarrant County Door & Gate

6408 Marlette Ct, North Richland Hills, TX 76182, United States

91-817-456-2958

How Long Do Liftmaster Garage Door Openers Last – Martin Garage Door

Garage Door Repair Parker CO are renowned for their durability, reliability, and innovative features, making them a popular choice among homeowners and businesses alike.

While the lifespan of a LiftMaster garage door opener can vary depending on various factors, understanding the typical lifespan, factors that influence longevity, signs of wear and tear, maintenance tips, and when to consider replacement can help ensure optimal performance and longevity of your garage door opener.

1. Typical Lifespan of LiftMaster Garage Door Openers

LiftMaster garage door openers are engineered to withstand years of daily use and provide reliable operation. On average, a well-maintained LiftMaster garage door opener can last anywhere from 10 to 15 years or more, depending on factors such as:

  • Usage: The frequency of use significantly impacts the lifespan of a garage door opener. Heavy usage, such as multiple openings and closings per day, may lead to more rapid wear and tear compared to occasional use.
  • Maintenance: Regular maintenance and care play a crucial role in prolonging the lifespan of a LiftMaster garage door opener. Proper lubrication, alignment adjustments, and timely repairs can help prevent premature wear and extend the operational life of the opener.
  • Installation Quality: The quality of the installation and adherence to manufacturer guidelines can affect the lifespan of a garage door opener. Professional installation by trained technicians ensures proper alignment, calibration, and integration with existing garage door systems, maximizing longevity and performance.
  • Environmental Factors: Environmental conditions, such as temperature extremes, humidity levels, and exposure to moisture, can impact the lifespan of electronic components and mechanical parts. Installing the garage door opener in a controlled environment and protecting it from harsh weather conditions can help prolong its lifespan.

2. Factors That Influence Longevity

Several factors can influence the longevity of LiftMaster garage door openers:

  • Quality of Components: LiftMaster garage door openers are built with high-quality materials and components designed for durability and reliability. Premium models feature advanced features such as DC motors, belt or chain drive systems, and battery backup options, which can contribute to longer lifespan and enhanced performance.
  • Maintenance Practices: Regular maintenance, including lubrication of moving parts, inspection of springs and cables, and adjustment of tension settings, can prevent premature wear and extend the lifespan of a LiftMaster garage door opener. Neglecting maintenance can lead to accelerated deterioration and potential failure of components.
  • Usage Patterns: The frequency and intensity of use impact the wear and tear on mechanical and electronic components of the garage door opener. Heavy usage, such as commercial applications or large families with multiple vehicles, may result in more frequent maintenance and shorter lifespan compared to residential use.
  • Environmental Conditions: Exposure to extreme temperatures, humidity, dust, and debris can affect the performance and longevity of LiftMaster garage door openers. Proper installation, ventilation, and protection from environmental hazards can help mitigate these factors and extend the lifespan of the opener.

3. Signs of Wear and When to Consider Replacement

It’s essential to recognize the signs of wear and deterioration in a LiftMaster garage door opener to address issues promptly and avoid unexpected failures. Common signs that indicate the need for repair or replacement include:

  • Excessive Noise: Grinding, scraping, or squealing noises during operation may indicate worn or damaged components, such as gears, bearings, or belts, requiring attention.
  • Slow Operation: A noticeable decrease in the speed or responsiveness of the garage door opener may signal issues with motor performance, drive system, or electrical components, necessitating inspection and repair.
  • Intermittent Operation: Inconsistent or unreliable operation, such as failure to open or close the door consistently, may indicate issues with sensors, circuitry, or programming that require troubleshooting and repair.
  • Visible Damage: Physical damage to the garage door opener, such as dents, cracks, or corrosion, can compromise its structural integrity and functionality, warranting assessment and potential replacement.

4. Maintenance Tips to Prolong Lifespan

To maximize the lifespan of your LiftMaster garage door opener and ensure reliable operation, consider the following maintenance tips:

  • Regular Inspection: Conduct periodic visual inspections of the garage door opener, including cables, springs, rollers, and tracks, to identify signs of wear, damage, or misalignment. Address any issues promptly to prevent further damage and maintain optimal performance.
  • Lubrication: Apply lubricant to moving parts, such as rollers, hinges, and springs, to reduce friction, minimize wear, and ensure smooth operation of the garage door opener. Use a silicone-based lubricant recommended by the manufacturer for best results.
  • Tension Adjustment: Check the tension settings of the garage door springs and cables regularly to ensure proper balance and alignment. Improper tension can lead to uneven wear, strain on components, and premature failure of the opener.
  • Sensor Alignment: Inspect and clean the safety sensors located near the bottom of the garage door tracks to ensure proper alignment and operation. Misaligned or obstructed sensors can prevent the door from closing properly and compromise safety.

Conclusion:

While the lifespan of a LiftMaster garage door opener can vary depending on usage, maintenance, and environmental factors, proper care and regular maintenance can help maximize its longevity and performance. By understanding the typical lifespan, factors that influence longevity, signs of wear and tear, maintenance tips, and when to consider replacement, homeowners can ensure reliable operation and durability of their garage door opener for years to come.

Martin Garage Door

10411 S Parker Rd, Parker, CO 80134, United States

1-303-663-1310

How To Get A Replacement Garage Door Remote – Garage Door Wizard

Losing or damaging your Garage Door Repair Cypress TX can be frustrating, but getting a replacement doesn’t have to be a hassle.

In this guide, we’ll walk you through the steps to get a replacement garage door remote, whether you need an exact match for your existing remote or you’re looking for an upgraded model with additional features.

1. Identify Your Garage Door Opener Brand and Model

Before purchasing a replacement garage door remote, you’ll need to identify the brand and model of your garage door opener. This information is typically printed on the opener itself or included in the owner’s manual. Common garage door opener brands include LiftMaster, Chamberlain, Genie, Craftsman, and others. Knowing the brand and model will help ensure compatibility with your new remote.

2. Determine the Type of Remote

Garage door remotes come in various types and configurations, so it’s essential to determine the type of remote you need:

  • Single-Button Remote: A basic remote with one button for opening and closing the garage door.
  • Multi-Button Remote: A remote with multiple buttons for controlling multiple garage doors or additional features such as lights or security.
  • Keychain Remote: A compact remote that attaches to your keychain for convenience.
  • Universal Remote: A versatile remote that works with multiple garage door opener brands and models, eliminating the need for separate remotes.

Choose the type of remote that best suits your needs and preferences.

3. Purchase a Replacement Remote

Once you’ve determined the brand, model, and type of remote you need, it’s time to purchase a replacement. Here are some options for acquiring a replacement garage door remote:

  • Order from the Manufacturer: Many garage door opener manufacturers offer replacement remotes for their products. Visit the manufacturer’s website or contact their customer service department to order a replacement remote directly.
  • Visit a Retail Store: Home improvement stores, hardware stores, and garage door specialists often carry replacement remotes for popular brands and models. Visit your local store to see if they have the remote you need in stock.
  • Online Retailers: Explore online retailers such as Amazon, eBay, and the websites of garage door opener manufacturers to find a wide selection of replacement remotes. Be sure to check customer reviews and ratings to ensure you’re purchasing a quality product.
  • Universal Remotes: Consider purchasing a universal remote that is compatible with multiple garage door opener brands and models. Universal remotes offer versatility and convenience, allowing you to control multiple garage doors with one remote.

When purchasing a replacement remote, double-check the compatibility with your garage door opener brand and model to ensure it will work correctly.

4. Program the Replacement Remote

Once you have your replacement remote, you’ll need to program it to work with your garage door opener. Programming instructions vary depending on the brand and model of your garage door opener and the type of remote you’re using. Refer to the programming instructions provided with your replacement remote or consult the manufacturer’s website for detailed programming instructions.

In general, the programming process involves pressing a sequence of buttons on the remote and the garage door opener unit itself to synchronize them. Follow the step-by-step instructions carefully to ensure successful programming.

5. Test the Replacement Remote

After programming the replacement remote, test it to ensure it works correctly. Stand within range of your garage door opener and press the button on the remote to open or close the garage door. Verify that the door responds as expected and that the remote functions properly.

If the replacement remote doesn’t work as expected, double-check the programming instructions and ensure that the remote is compatible with your garage door opener. If you continue to experience issues, contact the manufacturer or seek assistance from a professional garage door technician.

Conclusion:

Getting a replacement garage door remote involves identifying your garage door opener brand and model, determining the type of remote you need, purchasing a replacement, programming the remote, and testing its functionality. By following these steps and ensuring compatibility with your garage door opener, you can quickly and easily get a replacement remote and restore convenient access to your garage.

Garage Door Wizard

17302 House & Hahl Rd Suit 208, Cypress, TX 77433, United States

1-832-373-7681

Garage Door Opener Timer: Programming Tips – Superior Door

As a homeowner who has recently explored the convenience of a garage door opener timer, I understand the value of programming this feature to suit my lifestyle and needs. The garage door opener timer allows for automatic opening and closing of the garage door at predetermined times, providing added security, convenience, and peace of mind.

I’ll share my insights into programming tips and tricks from Garage Door Repair Omaha NE for maximizing the functionality of your garage door opener timer, offering valuable advice to help you make the most of this innovative feature.

Understanding the Benefits of a Garage Door Opener Timer

Before delving into programming tips, it’s essential to understand the benefits of a garage door opener timer. Here are some key advantages:

  1. Convenience: With a garage door opener timer, you can program your garage door to open and close automatically at specific times, eliminating the need to manually operate the door each time you come and go.
  2. Security: By scheduling the garage door to close automatically at night or when you’re away from home, you can enhance the security of your property and deter potential intruders.
  3. Energy Efficiency: Programming the garage door to close during periods of extreme heat or cold can help maintain a comfortable temperature inside the garage and reduce energy consumption.
  4. Peace of Mind: Knowing that your garage door is automatically opening and closing according to your schedule can provide peace of mind, especially when you’re away from home or unable to monitor the door manually.

Programming Tips and Tricks

Now, let’s explore some programming tips and tricks to help you make the most of your garage door opener timer:

  1. Read the Manual: Start by reading the owner’s manual for your garage door opener to familiarize yourself with the programming process and available features. Each manufacturer may have slightly different procedures for programming the timer, so it’s essential to follow the specific instructions provided.
  2. Set Daily Schedules: Determine your typical daily schedule and program the garage door opener timer to open and close the door accordingly. For example, you may want the door to open automatically in the morning when you leave for work and close again in the evening when you return home.
  3. Consider Security Needs: Take into account your security needs when programming the garage door opener timer. If you frequently forget to close the garage door at night, schedule it to close automatically at a specific time to ensure your home is secure.
  4. Use Vacation Mode: Many garage door opener timers offer a vacation mode feature, which allows you to program the door to open and close randomly during extended periods of absence. This can give the impression that someone is home and deter potential burglars.
  5. Test the Settings: Once you’ve programmed the garage door opener timer, test the settings to ensure they are functioning as intended. Open and close the door manually to verify that it operates according to the programmed schedule.
  6. Adjust for Seasonal Changes: As the seasons change, adjust the programming of the garage door opener timer to accommodate variations in daylight hours and temperature. For example, you may need to program the door to close earlier in the evening during the winter months.
  7. Consider Safety Features: Some garage door opener timers offer additional safety features, such as an automatic reversal mechanism that detects obstructions and prevents the door from closing. Ensure that these features are enabled and functioning correctly to prevent accidents or damage.
  8. Keep Remote Controls Handy: While the garage door opener timer provides added convenience, it’s essential to keep remote controls handy in case you need to manually operate the door outside of the programmed schedule.

Troubleshooting Tips

If you encounter any issues or difficulties when programming your garage door opener timer, here are some troubleshooting tips to help you resolve them:

  1. Check Power Supply: Ensure that the garage door opener is receiving power from a reliable power source. Verify that the power cord is plugged in securely and that there are no tripped circuit breakers or blown fuses.
  2. Reset the Timer: If the garage door opener timer is not responding correctly, try resetting it to its factory default settings. Consult the owner’s manual for instructions on how to perform a reset.
  3. Inspect Sensors: Check the sensors and safety features of the garage door opener to ensure they are functioning correctly. Clean any dirt or debris from the sensors and ensure that they are properly aligned and unobstructed.
  4. Update Firmware: If your garage door opener timer is equipped with smart features or connectivity options, check for firmware updates and ensure that the latest version is installed. Updating the firmware can resolve compatibility issues and improve performance.
  5. Contact Customer Support: If you’re unable to resolve the issue on your own, contact the manufacturer’s customer support for assistance. They can provide troubleshooting guidance or arrange for repairs or replacements if necessary.

Conclusion

In conclusion, according to Garage Door Repair Omaha NE, programming your garage door opener timer is a simple yet effective way to enhance the convenience, security, and energy efficiency of your home. By following these programming tips and troubleshooting strategies, you can make the most of this innovative feature and enjoy the peace of mind that comes with knowing your garage door is operating smoothly and reliably according to your schedule. Whether you’re heading off to work, going on vacation, or simply want to improve the functionality of your garage door system, the garage door opener timer is a valuable tool that can streamline your daily routine and make life just a little bit easier.

Superior Door

8840 S 137th Cir #3, Omaha, NE 68138, United States

402-571-2999

How Do You Reprogram A Genie Intellicode Garage Door Opener – Team Taylor Doors

Garage Door Repair Lee’s Summit MO is a straightforward process that allows you to update security codes, add new remotes, or troubleshoot issues with your garage door system.

Genie Intellicode technology enhances security by generating a new access code each time the garage door is operated, preventing unauthorized access. In this comprehensive guide, we will walk you through the step-by-step process of reprogramming a Genie Intellicode garage door opener, ensuring smooth and hassle-free operation.

Understanding Your Genie Intellicode Garage Door Opener

Before attempting to reprogram your Genie Intellicode garage door opener, it’s essential to understand its components and operation:

  • Remote Control: The remote control is a handheld device used to operate the garage door opener wirelessly.
  • Keypad: The keypad is an optional accessory that allows you to enter a PIN code to open or close the garage door.
  • “Learn” Button: The “Learn” button is located on the main unit of the garage door opener and is used to initiate the programming mode for remotes and keypads.
  • Intellicode Technology: Genie Intellicode technology utilizes a rolling code system to generate a new access code each time the garage door is operated, enhancing security and preventing code theft.

Steps to Reprogram a Genie Intellicode Garage Door Opener

1. Clear Existing Programming (Optional)

If you are reprogramming the Genie Intellicode garage door opener due to lost remotes or security concerns, you may need to clear the existing programming before adding new codes:

  1. Locate the “Learn” button on the main unit of the garage door opener.
  2. Press and hold the “Learn” button for approximately 10 seconds until the indicator light blinks or flashes, indicating that the programming has been cleared.

2. Program Remote Controls

Once the existing programming has been cleared (if necessary), you can program remote controls to operate the garage door opener:

  1. Press the “Learn” button on the main unit of the garage door opener. The indicator light will begin to blink or flash, indicating that the opener is in programming mode.
  2. Within 30 seconds, press the button on the remote control that you wish to program. The indicator light on the opener will blink or flash to confirm that the remote control has been successfully programmed.
  3. Repeat this process for each additional remote control that you want to program.

3. Program Keypad (If Applicable)

If your Genie Intellicode garage door opener is equipped with a keypad, you can program it to operate the garage door opener using a PIN code:

  1. Enter the existing PIN code on the keypad (if applicable).
  2. Within 30 seconds, press and release the “Learn” button on the main unit of the garage door opener.
  3. Enter a new PIN code of your choice on the keypad, followed by the “Enter” or “OK” button. The indicator light on the opener will blink or flash to confirm that the keypad has been successfully programmed.

4. Test the Programming

Once you have programmed the remote controls and keypad (if applicable), it’s essential to test the programming to ensure that the garage door opener responds correctly to commands:

  1. Stand within range of the garage door opener with the remote control or keypad.
  2. Press the button on the remote control or enter the PIN code on the keypad to open or close the garage door.
  3. Observe the garage door opener’s response to ensure that it operates smoothly and without any issues.

5. Finalize Programming (Optional)

Depending on your Genie Intellicode garage door opener model, there may be additional features or settings that you can customize, such as the closing speed, force sensitivity, and automatic lighting. Refer to the manufacturer’s instructions for guidance on finalizing the programming and adjusting these settings as needed.

Conclusion:

Reprogramming a Genie Intellicode garage door opener is a simple process that can be completed in a few easy steps. By following this comprehensive guide, you can clear existing programming, program remote controls and keypads, test the programming, and finalize any additional settings to ensure smooth and reliable operation. Whether you’re updating security codes, adding new remotes, or troubleshooting issues, reprogramming your Genie Intellicode garage door opener allows you to maintain convenience and security for your home.

Team Taylor Doors

210 SW Market St Suite 144, Lee’s Summit, MO 64063, United States

1-816-408-6999

How To Change Bulb In Chamberlain Garage Door Opener – Atlas Door Company

A well-lit garage is crucial for safety and convenience, especially during nighttime activities. If you’ve noticed that the bulb in your Garage Door Repair Joshua TX needs replacing, you’ve come to the right place.

Changing the bulb in your garage door opener is a simple task that you can easily accomplish with a few basic tools and some guidance. In this detailed guide, we’ll walk you through each step of the process to ensure a successful bulb replacement and a well-lit garage space.

1. Safety First

Before you begin the bulb replacement process, it’s essential to prioritize safety. Here are some safety precautions to keep in mind:

  • Turn off the power: Locate the power source for your garage door opener and switch it off to prevent electrical accidents.
  • Allow the bulb to cool: If the bulb has been recently used, give it some time to cool down before attempting to remove it.
  • Wear safety goggles: Protect your eyes from any debris that may fall during the bulb replacement process.

2. Gather Your Materials

Before you start replacing the bulb in your Chamberlain garage door opener, gather the necessary materials:

  • Replacement bulb: Make sure to purchase a bulb that is compatible with your Chamberlain garage door opener. Refer to the owner’s manual for the correct bulb type.
  • Step ladder or stool: Use a stable and secure ladder or stool to reach the bulb compartment safely.
  • Gloves: Wear gloves to protect your hands from any sharp edges or potential glass breakage.
  • Screwdriver (if necessary): Depending on the model of your Chamberlain garage door opener, you may need a screwdriver to access the bulb compartment.

3. Locate the Bulb Compartment

The next step is to locate the bulb compartment on your Chamberlain garage door opener. The bulb compartment is usually located near the motor unit of the opener.

  • Use your step ladder or stool to access the motor unit safely.
  • Look for a small cover or panel that protects the bulb compartment. This cover may have screws holding it in place.

4. Remove the Cover

Once you’ve located the bulb compartment, it’s time to remove the cover:

  • If the cover is held in place by screws, use a screwdriver to loosen and remove them.
  • Carefully lift the cover away from the motor unit and set it aside in a safe place.

5. Remove the Old Bulb

With the cover removed, you’ll now have access to the old bulb. Follow these steps to remove it:

  • If the bulb is still hot, allow it to cool down completely before handling it.
  • Grip the base of the bulb firmly and twist it counterclockwise to remove it from the socket.
  • Once the old bulb is removed, dispose of it properly according to local regulations.

6. Install the New Bulb

Now it’s time to install the new bulb:

  • Take the new bulb out of its packaging and handle it carefully to avoid damaging it.
  • Insert the base of the new bulb into the socket and twist it clockwise until it is securely in place.
  • Ensure that the bulb is seated properly and that there are no gaps between the bulb and the socket.

7. Replace the Cover

After installing the new bulb, it’s time to replace the cover:

  • Position the cover over the bulb compartment and align it with the mounting holes.
  • If the cover was held in place by screws, reinsert the screws and tighten them securely.

8. Restore Power

The final step is to restore power to your Chamberlain garage door opener:

  • Locate the power source for your garage door opener and switch it back on.
  • Test the new bulb by activating the garage door opener and ensuring that the bulb illuminates properly.

9. Final Checks

Before completing the bulb replacement process, take a moment to perform some final checks:

  • Ensure that the bulb is securely installed and that there are no loose connections.
  • Check the area around the bulb compartment for any debris or tools that may have been left behind.
  • Test the garage door opener to ensure that it is functioning correctly and that the bulb remains illuminated during operation.

10. Maintenance Tips

To prolong the life of your Chamberlain garage door opener bulb and ensure optimal performance, consider the following maintenance tips:

  • Regularly clean the bulb and its surrounding area to remove any dust or debris that may accumulate over time.
  • Check the bulb periodically for signs of dimming or discoloration, which may indicate that it needs to be replaced.
  • If you notice any issues with the bulb or the garage door opener itself, consult the owner’s manual or contact Chamberlain customer support for assistance.

By following these simple steps and maintenance tips, you can easily change the bulb in your Chamberlain garage door opener and ensure a well-lit and safe garage environment for years to come.

Atlas Door Company

6817 Sundance Cir W, Joshua, TX 76058, United States

1-817-295-3660

How to Choose the Right Garage Door Replacement – Hi-Country Dock & Door LLC

Being a homeowner, I understand the paramount importance of ensuring the safety and functionality of every aspect of my home. Among these, the garage door stands out as a crucial component, not just for convenience but also for security. Garage door sensors play a pivotal role in this regard, yet their significance is often underestimated.

I’ll share insights based from Garage Door Repair Roundup MT into why garage door sensor alignment is essential, and provide practical tips on how to ensure they work optimally, safeguarding both your property and loved ones.

Understanding Garage Door Sensors

Garage door sensors, also known as photoelectric sensors or safety sensors, are installed near the bottom of the garage door tracks. They work in pairs, emitting an invisible beam of light between them. When this beam is interrupted by an object or obstruction, such as a person, pet, or vehicle, the sensors trigger the garage door to stop closing or reverse its direction, preventing accidents or damage.

Importance of Proper Alignment

The proper alignment of garage door sensors is critical for the safe and reliable operation of your garage door. Misaligned sensors can fail to detect obstacles accurately, leading to malfunctions or safety hazards. Common issues resulting from misalignment include the door closing unexpectedly, failing to close entirely, or reversing for no apparent reason. These malfunctions compromise the security of your home and pose a risk to anyone in the vicinity of the garage door.

Ensuring Safety for Loved Ones

One of the primary reasons for maintaining garage door sensor alignment is to protect your family, pets, and visitors from accidents or injuries. Accidental garage door closures can result in serious consequences, especially for children or pets who may not be aware of the danger. By ensuring that the sensors are properly aligned and functioning correctly, you create a safer environment around your garage door, giving you peace of mind and avoiding potential accidents.

Preventing Property Damage

In addition to safeguarding lives, garage door sensor alignment also helps prevent property damage. A misaligned sensor may fail to detect an object in the door’s path, leading to collisions with vehicles, bicycles, or other items stored in the garage. These collisions can cause significant damage to both the garage door and the obstructing object, resulting in costly repairs or replacements. By maintaining proper sensor alignment, you minimize the risk of accidental damage to your property and belongings.

Avoiding False Alarms and Malfunctions

Misaligned garage door sensors often trigger false alarms or malfunctions, disrupting the smooth operation of your garage door system. These false alarms can be frustrating and inconvenient, especially if they occur frequently. By ensuring that the sensors are correctly aligned, you reduce the likelihood of false alarms and ensure that your garage door operates smoothly and efficiently, without unnecessary interruptions or delays.

How to Align Garage Door Sensors

Aligning garage door sensors is a relatively simple process that can be completed with basic tools and minimal effort. Here’s a step-by-step guide to help you ensure proper sensor alignment:

  1. Inspect Sensor Positioning: Start by visually inspecting the alignment of the sensors. Ensure that both sensors are mounted securely to the garage door tracks, facing each other, and positioned at the same height above the ground.
  2. Clean Sensor Lenses: Dust, dirt, or debris on the sensor lenses can interfere with the beam of light and affect sensor performance. Use a soft, dry cloth to clean the lenses thoroughly, removing any buildup or obstructions.
  3. Check Sensor Wiring: Inspect the wiring connections for both sensors to ensure they are secure and free of damage. Loose or damaged wiring can cause sensor malfunctions and should be repaired or replaced as needed.
  4. Adjust Sensor Alignment: If the sensors are misaligned, use a level to adjust their position gradually. Make small adjustments to the sensor brackets until they are perfectly aligned and facing each other. Use the level to ensure that both sensors are parallel to the ground.
  5. Test Sensor Operation: Once the sensors are properly aligned, test their operation by opening and closing the garage door. Place an object, such as a broomstick or cardboard box, in the path of the closing door to simulate an obstruction. The door should stop closing and reverse its direction immediately upon detecting the object.
  6. Fine-Tune Alignment if Necessary: If the sensors still fail to detect obstacles accurately, continue to make minor adjustments to their position until proper alignment is achieved. Test the sensors repeatedly to ensure consistent and reliable operation.

Conclusion: Prioritizing Garage Door Safety

In conclusion, as stated in Garage Door Repair Roundup MT, garage door sensor alignment is a crucial aspect of maintaining the safety and functionality of your garage door system. By ensuring that the sensors are properly aligned and functioning correctly, you minimize the risk of accidents, injuries, and property damage. Regular inspection and maintenance of garage door sensors should be a priority for every homeowner, as it not only enhances safety but also prolongs the lifespan of your garage door system. So take the time to inspect and align your garage door sensors regularly, and enjoy the peace of mind that comes with knowing your garage is safe and secure for you and your loved ones.

Hi-Country Dock & Door LLC

104 Cottonwood Rd, Roundup, MT 59072, United States

406-320-0518

How Tight Should A Garage Door Opener Belt Be – First Responder Garage Doors

Garage Door Repair Southlake TX play a crucial role in the smooth functioning of your garage door system. Proper tension ensures efficient operation and prolongs the lifespan of your opener.

In this guide, we’ll delve into the optimal tension for a garage door opener belt and how to achieve it.

Understanding the Importance of Belt Tension

The correct tension of a garage door opener belt is vital for smooth and reliable door operation. If the belt is too loose, it may slip or skip teeth on the pulley, resulting in jerky movements or even complete failure. Conversely, if the belt is too tight, it can strain the motor and other components, leading to premature wear and potential damage.

Determining the Right Tension

Achieving the correct tension for your garage door opener belt requires a balance between too loose and too tight. Here’s how to determine the optimal tension:

  1. Consult the Manufacturer’s Guidelines: Start by referring to the manufacturer’s instructions or owner’s manual for specific guidance on belt tension. Different models may have varying recommendations, so it’s essential to follow the instructions provided.
  2. Check Belt Deflection: Belt deflection refers to the amount of slack or movement in the belt when pressure is applied. Typically, the recommended deflection for a garage door opener belt is around 1/4 to 1/2 inch. To check the deflection, press down on the midpoint of the belt with moderate force. The belt should give slightly but not excessively.
  3. Adjust Tension Accordingly: If the belt is too loose, it will sag excessively when pressure is applied, indicating the need for tightening. Conversely, if the belt is too tight, there will be minimal or no deflection, suggesting the need for loosening. Adjust the tension as needed using the adjustment mechanism provided by the manufacturer.
  4. Test Door Operation: After adjusting the belt tension, test the operation of the garage door to ensure smooth and consistent movement. The door should open and close without any hesitation or jerking motion. If you notice any issues, readjust the tension until optimal performance is achieved.

Common Mistakes to Avoid

When adjusting the tension of your garage door opener belt, avoid the following common mistakes:

  • Over-Tightening: Excessive tension can strain the motor and other components, leading to premature wear and potential damage. Aim for a moderate amount of tension that allows for smooth operation without unnecessary strain.
  • Under-Tightening: If the belt is too loose, it may slip or skip teeth on the pulley, resulting in unreliable door operation. Ensure that the belt is tightened sufficiently to prevent slippage while still allowing for smooth movement.

Conclusion:

Achieving the correct tension for your garage door opener belt is essential for optimal performance and longevity of your opener system. By following the guidelines outlined in this guide and consulting the manufacturer’s instructions, you can ensure that your garage door operates smoothly and reliably for years to come.

First Responder Garage Doors

180 State St Suite 225, Southlake, TX 76092, United States

1-817-991-5551

How Often Should I Have My Air Conditioning Unit Serviced? – Veterans AC & Heating

Regular maintenance of your Air Conditioning Repair Euless TX is essential for ensuring optimal performance, energy efficiency, and longevity. One of the most common questions homeowners have is how often they should have their air conditioning unit serviced.

In this guide, we’ll explore the factors that influence the frequency of air conditioning service, the benefits of regular maintenance, signs that your AC unit needs servicing, and tips for finding a reliable HVAC technician.

Factors Influencing Service Frequency

Several factors can influence how often you should have your air conditioning unit serviced, including:

  1. Age of the Unit: Older air conditioning units may require more frequent servicing to ensure they continue to operate efficiently and reliably.
  2. Usage: The frequency of use of your air conditioning unit can impact how often it needs servicing. Units that run frequently, such as those in hot climates or households with high cooling demands, may require more frequent maintenance.
  3. Environmental Conditions: Environmental factors such as dust, dirt, pollen, and debris can affect the performance of your air conditioning unit. If you live in an area with high levels of air pollution or allergens, you may need to have your unit serviced more often to keep it running smoothly.
  4. Manufacturer Recommendations: Some air conditioning manufacturers provide guidelines for how often their units should be serviced. It’s essential to follow these recommendations to maintain the warranty and ensure optimal performance.

Benefits of Regular Maintenance

Regular maintenance of your air conditioning unit offers several benefits, including:

  1. Improved Energy Efficiency: Regular servicing helps keep your air conditioning unit running efficiently, reducing energy consumption and lowering utility bills.
  2. Extended Lifespan: Proper maintenance can extend the lifespan of your air conditioning unit, delaying the need for costly replacements.
  3. Enhanced Comfort: A well-maintained air conditioning unit provides consistent cooling and improved indoor air quality, ensuring a comfortable living environment.
  4. Prevention of Costly Repairs: Regular servicing helps identify and address minor issues before they escalate into major problems, saving you money on costly repairs down the line.

Signs That Your AC Unit Needs Servicing

It’s essential to be aware of the signs that indicate your air conditioning unit may need servicing. These signs include:

  1. Poor Airflow: Reduced airflow from the vents can indicate issues with the blower motor, air filter, or ductwork.
  2. Warm Air: If your air conditioning unit is blowing warm air instead of cold air, it may indicate a refrigerant leak or compressor malfunction.
  3. Strange Noises: Unusual noises such as grinding, squealing, or banging can indicate mechanical issues that require immediate attention.
  4. Foul Odors: Foul odors coming from the air conditioning vents may indicate mold or mildew growth in the system, which can affect indoor air quality and trigger respiratory issues.
  5. Increased Energy Bills: A sudden increase in energy bills without a corresponding increase in usage may indicate that your air conditioning unit is not operating efficiently and may require servicing.

Tips for Finding a Reliable HVAC Technician

When selecting an HVAC technician to service your air conditioning unit, consider the following tips:

  1. Check Credentials: Look for technicians who are licensed, insured, and certified by reputable organizations such as the North American Technician Excellence (NATE) or the Air Conditioning Contractors of America (ACCA).
  2. Read Reviews: Read online reviews and testimonials from past customers to gauge the quality of service provided by the technician or company.
  3. Ask for References: Request references from the technician and contact past clients to inquire about their experience and satisfaction with the service provided.
  4. Get Multiple Quotes: Obtain quotes from multiple HVAC technicians to compare prices and services offered before making a decision.
  5. Inquire About Maintenance Plans: Some HVAC companies offer maintenance plans that include regular servicing of your air conditioning unit at predetermined intervals. These plans can provide peace of mind and help you stay on top of maintenance tasks.

Conclusion:

In conclusion, the frequency of servicing your air conditioning unit depends on factors such as the age of the unit, usage, environmental conditions, and manufacturer recommendations. Regular maintenance offers several benefits, including improved energy efficiency, extended lifespan, enhanced comfort, and prevention of costly repairs. Be sure to be aware of the signs that indicate your AC unit needs servicing and take proactive steps to find a reliable HVAC technician to keep your unit running smoothly.

Veterans AC & Heating

615 N Main St #155, Euless, TX 76039, United States

1-817-858-9301

Are There Any Special Maintenance Requirements For Replacement Windows? – North Texas Home Exteriors

Windows Replacement North TX are an excellent investment for homeowners looking to improve energy efficiency, enhance curb appeal, and increase comfort and security in their homes.

While replacement windows require less maintenance compared to older windows, proper care and upkeep are essential to ensure their longevity and optimal performance. In this guide, we’ll explore the special maintenance requirements for replacement windows and provide tips on how to keep them in top condition.

Cleaning and Care

Regular cleaning is essential to maintain the appearance and functionality of replacement windows. Here are some tips for cleaning and caring for replacement windows:

  1. Regular Cleaning: Clean the glass surfaces of your replacement windows regularly using a mild detergent or glass cleaner and a soft, lint-free cloth or sponge. Avoid using abrasive cleaners or harsh chemicals, as these can damage the glass and window frames.
  2. Cleaning Frames and Tracks: Clean the window frames, sills, and tracks periodically to remove dirt, dust, and debris. Use a vacuum cleaner with a brush attachment or a soft brush to loosen dirt, then wipe the surfaces with a damp cloth or sponge. Be sure to dry the surfaces thoroughly to prevent water damage.
  3. Lubrication: Lubricate the moving parts of your replacement windows, such as hinges, locks, and rollers, annually or as needed. Use a silicone-based lubricant or spray lubricant to ensure smooth operation and prevent rust and corrosion.
  4. Inspect Seals and Weatherstripping: Regularly inspect the seals and weatherstripping around your replacement windows for signs of wear, damage, or deterioration. Replace any damaged or worn seals to prevent drafts, moisture intrusion, and energy loss.
  5. Check for Damage: Periodically inspect your replacement windows for signs of damage, such as cracks, chips, or warping. Address any issues promptly to prevent further damage and ensure the continued functionality of your windows.

Special Maintenance Considerations

In addition to regular cleaning and care, replacement windows may have special maintenance requirements depending on factors such as the window material, design, and manufacturer. Here are some special maintenance considerations for replacement windows:

  1. Vinyl Windows:
    • Vinyl windows are low-maintenance and require minimal care compared to other window materials. However, it’s essential to avoid using abrasive cleaners or solvents on vinyl surfaces, as these can damage the material and cause discoloration or warping.
    • Periodically inspect the vinyl frames for signs of fading, discoloration, or deterioration. Vinyl windows may be prone to UV damage over time, so consider applying a UV-resistant coating or paint to protect the frames from sun exposure.
  2. Wood Windows:
    • Wood windows require more maintenance compared to vinyl or aluminum windows due to their natural susceptibility to moisture, insects, and rot.
    • Regularly inspect the wood frames and sills for signs of moisture damage, rot, or insect infestation. Repair any damaged or deteriorated wood using wood filler, epoxy, or replacement pieces as needed.
    • Consider applying a protective finish or sealant to the wood surfaces to enhance durability and resistance to moisture and UV damage. Reapply the finish or sealant every few years or as recommended by the manufacturer.
  3. Aluminum Windows:
    • Aluminum windows are durable and corrosion-resistant but may require occasional cleaning and maintenance to remove dirt, oxidation, and mineral deposits.
    • Clean aluminum window frames and tracks regularly using a mild detergent or aluminum cleaner and a soft brush or sponge. Rinse the surfaces thoroughly with water and dry them with a clean cloth to prevent water spots and corrosion.
    • Inspect the aluminum frames for signs of corrosion or pitting, especially in coastal areas or regions with high humidity or salt exposure. Treat any corrosion spots with a rust remover or aluminum polish to restore the appearance and protect against further damage.
  4. Energy Efficiency Upkeep:
    • Ensure that replacement windows maintain their energy efficiency by checking for proper insulation and weatherstripping. Inspect the seals around the window frames and sashes for gaps or leaks and replace any worn or damaged weatherstripping as needed.
    • Consider upgrading to energy-efficient glass options such as low-emissivity (Low-E) coatings, gas fills, or insulated glass units to improve thermal performance and reduce heating and cooling costs.

Conclusion:

In conclusion, replacement windows require regular cleaning and care to maintain their appearance, functionality, and energy efficiency. By following the tips and special maintenance considerations outlined in this guide, homeowners can ensure that their replacement windows remain in top condition for years to come.

North Texas Home Exteriors

1-817-201-6800

Page 1 of 73

Powered by WordPress & Theme by Anders Norén