Local Businesses Blog in Texas

Tag: garage door repair Grapevine TX Page 1 of 2

How Garage Door Works – Grapevine Gates & Garage Doors

A Grapevine Garage Door Repair might seem like a simple component of a home, but its functionality involves a sophisticated interplay of mechanical, electrical, and structural elements.

Understanding how a garage door works requires delving into the intricate details of its design and operation.

At its core, a garage door operates on the principles of physics and mechanics. The primary goal is to provide a secure barrier for the garage while allowing convenient access for vehicles and other items. Let’s break down the key components and mechanisms that enable a garage door to function seamlessly.

1. Structural Framework: The foundation of a garage door system lies in its structural framework. This typically includes a durable frame made of metal or wood, designed to withstand the stresses of daily operation and external forces.

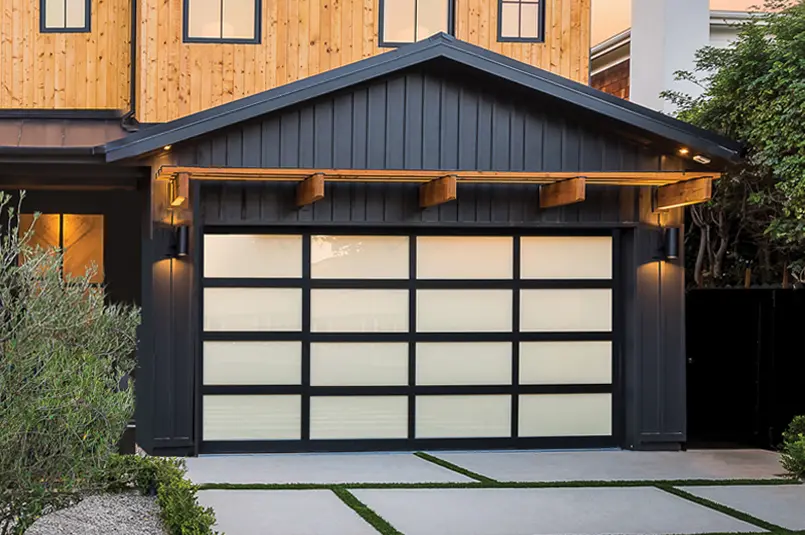
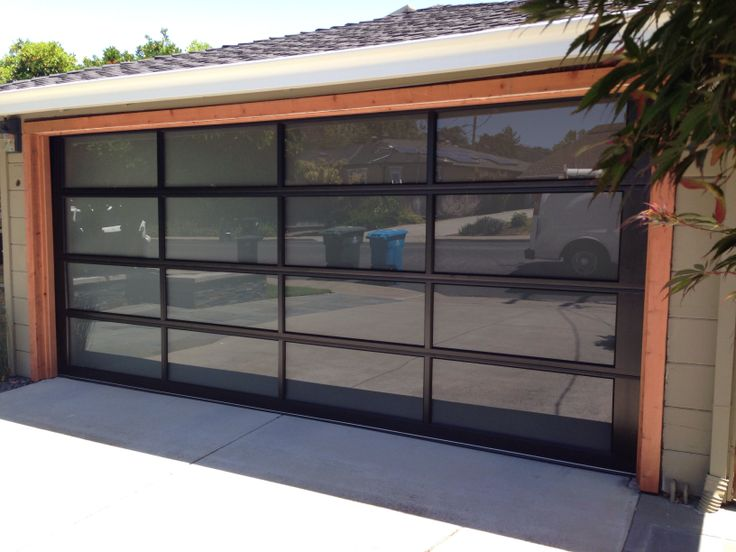
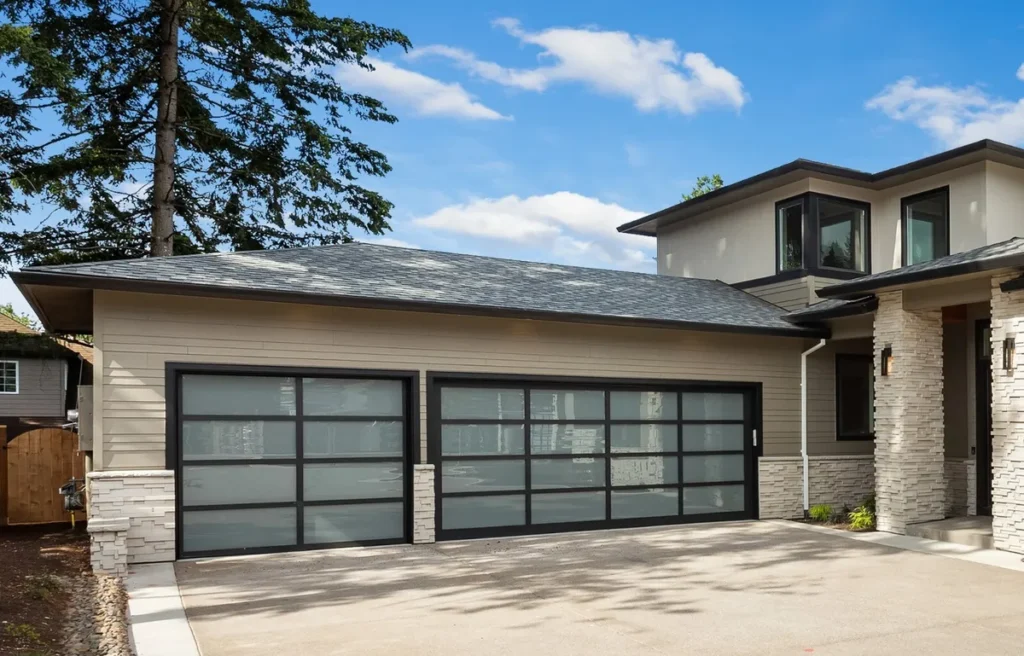
2. Door Panels: Garage doors are often composed of multiple panels hinged together. These panels contribute to the door’s flexibility, allowing it to roll up or down smoothly along a set of tracks. Common materials for panels include steel, aluminum, or wood.

3. Springs: Torsion and extension springs are crucial components that counterbalance the weight of the garage door. Torsion springs are usually mounted above the door, while extension springs are located on the sides. These springs store and release energy to assist in the lifting or lowering of the door.

4. Tracks and Rollers: The door panels move along tracks that guide their path. Rollers, attached to the sides of each panel, move within these tracks, ensuring a stable and smooth movement. Proper alignment of tracks is essential for the door to operate correctly.

5. Motorized Opener: Many modern garage doors are equipped with electric openers, adding a layer of convenience. The opener consists of an electric motor attached to a drive mechanism, which can be a chain, belt, or screw. This motorized system automates the process of raising and lowering the door.

6. Sensors and Safety Features: Safety is paramount in garage door design. Sensors are installed to detect obstacles in the door’s path, preventing accidents or damage. Additionally, safety features like auto-reverse mechanisms ensure that the door stops and reverses its direction if it encounters an obstruction.

7. Control Systems: Garage door openers come with control systems that allow users to operate the door conveniently. This can include wall-mounted buttons, remote controls, or even smartphone apps, providing flexibility and ease of use.

8. Cables and Pulleys: Cables and pulleys play a critical role in the lifting and lowering process. The cables are attached to the bottom of the door and run through a system of pulleys, working in tandem with the springs to manage the door’s weight distribution.

9. Limit Switches: Limit switches dictate the open and close positions of the garage door. These switches trigger the motor to stop when the door reaches its fully open or closed position, preventing unnecessary strain on the system.

10. Maintenance and Lubrication: Regular maintenance is essential to ensure the longevity and smooth operation of a garage door. Lubrication of moving parts, inspection of springs, and adjustment of tension contribute to a well-maintained system.

In conclusion, the functionality of a Grapevine Garage Door Repair is a harmonious blend of mechanical precision and technological innovation. From the robust structure to the intricate interplay of springs, cables, and sensors, each element plays a crucial role in creating a reliable and user-friendly garage door system. Whether manually operated or motorized, a well-designed garage door seamlessly combines form and function to meet the diverse needs of homeowners.

Grapevine Gates & Garage Doors

601 W Wall St, Grapevine, TX 76051

817-790-9634

How To Remove Cover From Garage Door Opener – Grapevine Gates & Garage Doors

Garage Door Repair Grapevine TX are a modern convenience that many of us take for granted until an issue arises. One common task that might come your way is removing the cover from your garage door opener.

Whether you need to perform maintenance, replace a part, or troubleshoot a problem, this step-by-step guide will walk you through the process.

Safety First

Before undertaking any DIY project, safety is paramount. This section emphasizes the importance of disconnecting power, using personal protective equipment, and taking precautions to avoid accidents.

: Power Off the Opener

Begin with safety in mind. Turn off the power supply to the garage door opener to prevent any electrical mishaps.

: Identify Screws and Fasteners

Locate and identify the screws or fasteners securing the cover. This step breaks down the types of fasteners commonly used and provides tips on the right tools for the job.

: Remove Screws Carefully

Executing this step with precision ensures that you don’t damage the cover or the opener itself. We’ll guide you on the correct technique and the importance of organizing screws.

: Lift Off the Cover

With the screws removed, gently lift the cover. This section covers potential challenges and how to overcome them, ensuring a seamless process.

Maintenance Tips

Now that the cover is off, it’s time to inspect the internal components. From gears to circuits, we’ll guide you on what to look for and how to address common issues.

Cleaning and Lubrication

Routine maintenance is key to a well-functioning garage door opener. Learn how to clean and lubricate essential parts for optimal performance.

Troubleshooting

This section addresses issues you might encounter during inspection and provides troubleshooting tips. From strange noises to unresponsive controls, we’ve got you covered.

When to Seek Professional Help

While a DIY approach is excellent, certain problems require professional intervention. Learn when it’s time to call in the experts and how to choose a reliable garage door repair service.

Conclusion:

Removing the cover from your Garage Door Repair Grapevine TX might seem daunting at first, but with the right guidance, it becomes a manageable task. Regular maintenance not only extends the life of your opener but also ensures the safety and security of your home.

Grapevine Gates & Garage Doors

817-631-6355

How To Lubricate Garage Door – Grapevine’s Maid Pros

Maintaining your Garage Door Repair Grapevine TX by regularly lubricating its moving parts is essential for smooth and quiet operation. Lubrication not only reduces friction but also helps prevent wear and tear on the various components, extending the life of your garage door system. Here’s a comprehensive guide on how to lubricate your garage door:

Step 1: Gather the Necessary Supplies

Before you start, ensure you have the following supplies:

  • Silicone-based lubricant or garage door lubricant spray
  • Rag or cloth
  • Stepladder
  • Safety glasses
  • Work gloves

Step 2: Identify Moving Parts

Know the different parts of your garage door that require lubrication. These typically include:

  • Rollers (both metal and nylon)
  • Hinges
  • Springs (extension and torsion)
  • Tracks
  • Bearings
  • Locks and handles

Step 3: Safety First

Ensure your safety by wearing safety glasses and work gloves. If your garage door has extension springs, be cautious as they are under tension and can cause injury. If you’re unsure, it’s always a good idea to consult a professional.

Step 4: Clean the Surfaces

Use a rag or cloth to clean the surfaces of the moving parts. Remove any accumulated dirt, dust, or old lubricant. This step is crucial as it prepares the components for proper lubrication.

Step 5: Lubricate Rollers

Apply lubricant to the rollers, which are the wheels attached to the sides of the door. If you have metal rollers, apply lubricant directly to the rollers and wipe off any excess. For nylon rollers, apply lubricant to the bearings at the center of the rollers.

Step 6: Lubricate Hinges

Apply lubricant to all the hinges, which are the points where the door panels are connected. Open the door to access all the hinges easily. Move the door to different positions to ensure that each hinge is adequately lubricated.

Step 7: Lubricate Springs

If you have extension springs, apply lubricant to the pivot points on each side. For torsion springs, lightly lubricate the springs along their length. Exercise caution while doing this, as torsion springs are under tension.

Step 8: Lubricate Tracks

Apply lubricant to the inside of the tracks on both sides of the door. Use a cloth to wipe away any excess lubricant. Lubricating the tracks helps reduce friction and allows the rollers to move smoothly.

Step 9: Lubricate Bearings

If your garage door has bearings, apply lubricant to them. Bearings are typically found in the rollers and pulleys. Ensure that the lubricant reaches the moving parts within the bearings.

Step 10: Lubricate Locks and Handles

If your garage door has locks and handles, apply lubricant to the keyhole and moving parts. This ensures that they operate smoothly.

Step 11: Check for Tightened Bolts and Screws

Inspect all the bolts and screws on the garage door system. Tighten any that may have become loose over time. A well-maintained and secure door is essential for safe and efficient operation.

Step 12: Test the Door

After lubricating all the moving parts and ensuring that everything is tightened, open and close the door a few times to distribute the lubricant evenly. Listen for any unusual noises, as proper lubrication should result in a quieter operation.

Step 13: Regular Maintenance Schedule

Create a regular maintenance schedule for lubricating your garage door. Depending on the climate and frequency of use, it’s advisable to lubricate the door at least once or twice a year.

Conclusion

Regularly lubricating your Garage Door Repair Grapevine TX is a simple yet effective way to ensure its smooth and quiet operation. Taking the time to maintain the moving parts not only extends the life of your garage door system but also contributes to its safety and reliability. Follow these steps, and your garage door will continue to function optimally for years to come.

Grapevine’s Maid Pros

1527 W State Hwy 114, Grapevine, TX 76051, United States

1-817-442-2239

How To Attach Banner To Garage Door – Grapevine Gates & Garage Doors

Attaching a banner to a  Garage Door Repair Grapevine TX can be a creative and visually appealing way to personalize your space, celebrate an event, or promote a message. Whether it’s for a birthday party, a holiday celebration, or advertising a garage sale, here’s a comprehensive guide on how to attach a banner to your garage door effectively.

: Choose the Right Banner

Start by selecting a banner that suits the occasion or purpose. Banners come in various materials, sizes, and designs. Consider the dimensions of your garage door and choose a banner that fits well without being too overwhelming or too small.

: Gather Materials

Before you begin attaching the banner, gather the necessary materials. You’ll likely need:

  • Banner
  • Adhesive hooks or clips
  • Double-sided tape or adhesive strips
  • Scissors
  • Measuring tape
  • Cleaning supplies (if needed)

: Clean the Garage Door Surface

Ensure that the surface of your garage door is clean and free of dust or debris. Use a mild detergent and water solution to clean any dirt or grime. Allow the door to dry completely before proceeding.

: Measure and Plan Placement

Measure the width and height of your garage door to determine the optimal placement for the banner. Consider the design of the banner and any other decorations you plan to add. Aim for a centered and balanced look.

: Choose Attachment Points

Decide where you want to attach the banner. Depending on the type of banner and the material of your garage door, you can use adhesive hooks, clips, or double-sided tape. Choose attachment points that won’t damage the door’s surface.

: Apply Adhesive Hooks or Clips

If you’re using adhesive hooks or clips, follow the manufacturer’s instructions for application. Clean the chosen attachment points with rubbing alcohol to ensure a secure bond. Attach the hooks or clips evenly along the top edge of the garage door.

: Cut Banner to Size

If your banner is larger than the garage door or has excess material, use scissors to trim it to the desired size. Be careful to maintain a clean and straight edge for a polished look.

: Use Double-Sided Tape or Adhesive Strips

For banners with a lightweight material, consider using double-sided tape or adhesive strips in addition to hooks or clips. Apply the tape or strips to the back of the banner, especially at the corners and edges, to ensure it stays in place.

: Hang the Banner

Carefully hang the banner on the installed hooks or clips. Start from one end and work your way across, ensuring that the banner is straight and aligned. Smooth out any wrinkles or bubbles as you go.

: Adjust and Secure

Step back and assess the placement of the banner. Make any necessary adjustments to ensure it’s centered and level. If using hooks or clips, ensure they are securely holding the banner in place.

: Consider Weather Conditions

If your banner is exposed to outdoor elements, consider the weather conditions in your area. If strong winds or adverse weather are expected, take precautions to secure the banner more effectively. Additional clips or reinforced adhesive may be necessary.

: Monitor and Maintain

Regularly check the banner to ensure it remains securely attached and in good condition. If necessary, make adjustments or reinforce the attachment points to prevent the banner from falling or getting damaged.

In conclusion, attaching a banner to a  Garage Door Repair Grapevine TX is a simple yet impactful way to enhance the visual appeal of your space. By following these steps and considering the type of banner and your garage door material, you can create a festive and eye-catching display for various occasions.

Grapevine Gates & Garage Doors

817-631-6355

How To Install Genie 7055 Garage Door Opener – Grapevine’s Best Garage Doors

Installing a Genie 7055 Garage Door Repair involves several steps, from assembling the unit to mounting it properly and configuring the settings.

While I’ll do my best to provide comprehensive instructions in keep in mind that safety should be your top priority throughout the installation process. Always follow the manufacturer’s instructions included with your Genie 7055 opener.

1. Gather Necessary Tools and Materials:

Before you begin, make sure you have the following tools and materials ready:

  • Genie 7055 garage door opener kit
  • Ladder
  • Power drill
  • Screwdriver
  • Wrenches
  • Level
  • Tape measure
  • Pencil
  • Safety glasses
  • Helper (optional)

2. Prepare the Garage Door:

Ensure that your garage door is in good working condition, properly balanced, and operates smoothly without any obstructions. If your door needs maintenance, perform it before installing the opener.

3. Assemble the Genie 7055 Opener:

Follow the manufacturer’s instructions to assemble the opener. Typically, this involves connecting the rail sections, installing the motor unit, and attaching the belt or chain.

4. Install the Mounting Bracket:

  • Locate the ceiling joists in your garage ceiling using a stud finder.
  • Use the provided template to mark the position for the mounting bracket on the ceiling.
  • Drill pilot holes into the ceiling joists and attach the mounting bracket using appropriate hardware. Ensure the bracket is level.

5. Attach the Rail to the Bracket:

  • Slide the rail into the mounting bracket.
  • Secure it in place with the provided hardware. Make sure it is level and parallel to the garage door track.

6. Install the Header Bracket:

  • Use the provided template to mark the position for the header bracket on the wall above the garage door.
  • Drill pilot holes into the wall and attach the header bracket using the provided hardware.

7. Hang the Opener Unit:

  • Lift the motor unit and hang it from the mounting bracket on the ceiling.
  • Make sure it is securely attached and level.

8. Attach the Trolley to the Rail:

  • Slide the trolley onto the rail.
  • Connect the trolley to the motor unit according to the manufacturer’s instructions.

9. Install the Door Arm and Bracket:

  • Attach the door arm to the garage door using the provided hardware.
  • Connect the other end of the door arm to the trolley using the provided bracket.

10. Install Safety Sensors:

  • Mount the safety sensors on each side of the garage door, about 6 inches above the floor. They should be aligned and facing each other.
  • Connect the sensor wires to the motor unit following the manufacturer’s instructions.

11. Install the Wall Console and Control Panel:

  • Mount the wall console inside the garage, near the entry door, at a convenient height.
  • Connect the wires from the wall console and control panel to the motor unit.

12. Electrical Connections:

  • Connect the power cord to the motor unit.
  • Plug the power cord into a grounded electrical outlet.

13. Program the Opener:

Follow the manufacturer’s instructions to program the opener, which may include setting the travel limits and configuring remote controls and keypads.

14. Adjust the Travel Limits:

  • Use the control panel or remote to close the garage door.
  • If the door doesn’t close or open fully, adjust the travel limits on the motor unit until the door operates correctly.

15. Test the Safety Features:

  • Test the safety sensors by obstructing the door’s path while closing it. The door should reverse immediately.
  • Verify that the emergency release cord works by pulling it to disconnect the opener from the door.

16. Secure Any Loose Wires:

Tuck and secure any loose wires out of the way to prevent them from interfering with the garage door’s operation.

17. Lubricate Moving Parts:

Apply lubricant to the garage door’s rollers, tracks, and any moving parts to ensure smooth operation.

18. Final Adjustments:

  • Test the opener’s operation a few times to ensure it works correctly.
  • Make any necessary adjustments to ensure smooth and balanced door movement.

19. Safety Precautions:

  • Install a photoelectric sensor or edge sensor, if required by local building codes.
  • Educate family members about the safe operation of the garage door opener.

20. Enjoy Your Genie 7055 Garage Door Opener:

Your Genie 7055 Garage Door Repair should now be properly installed and ready for use. Remember to periodically perform maintenance and safety checks to ensure its continued reliable operation.

Grapevine’s Best Garage Doors

820 Kings Canyon Dr, Grapevine, TX 76051, United States

1-817-790-9634

Garage Door Safety Features You Should Know About – Grapevine Gates & Garage Doors

As a homeowner, I’ve always been fascinated by the intricate systems that make our lives easier and more convenient. One such system that often goes unnoticed but plays a critical role in our daily lives is the garage door. It’s not just a large metal contraption that protects our vehicles and belongings; it’s also a complex piece of machinery that requires careful consideration when it comes to safety.

By following Grapevine Gates & Garage Doors, I’ll share my insights into the garage door safety features that every homeowner should know about.

  1. Automatic Reverse Mechanism: One of the most crucial safety features in modern garage doors is the automatic reverse mechanism. This feature uses sensors to detect if there’s an obstruction in the path of the closing door. If an object or person is detected, the door automatically reverses its course. This prevents accidents and injuries, especially for children and pets who might unknowingly stand in the door’s way. Knowing that my garage door has this feature gives me peace of mind every time I use it.
  2. Rolling Code Technology: In today’s digital age, security is a top concern for homeowners. Rolling code technology is a safety feature that enhances the security of your garage door opener. Each time you use your remote control to open or close the door, a new code is generated. This makes it nearly impossible for would-be thieves to intercept and duplicate the code to gain unauthorized access to your home.
  3. Manual Release System: While we rely on our garage door openers for convenience, there might be times when the power goes out or the opener malfunctions. In such situations, a manual release system is a lifesaver. It allows you to disengage the motor and manually open or close the door. Being aware of this feature and knowing how to use it can be invaluable during emergencies.
  4. Motion Detection Lighting: Safety isn’t just about preventing accidents; it’s also about feeling secure. Many modern garage door openers come with motion detection lighting. These lights automatically illuminate the area around your garage door when they sense movement. This not only enhances safety by helping you see clearly in the dark but also acts as a deterrent to potential intruders.
  5. Battery Backup: Power outages can happen unexpectedly, and it’s frustrating when you can’t access your garage during such times. Garage door openers equipped with a battery backup feature ensure that your door can still operate even when the electricity is out. Knowing that I can rely on my garage door during emergencies gives me a sense of preparedness.
  6. Keyless Entry: Keyless entry systems offer an extra layer of convenience and security. Instead of fumbling for keys or a remote control, you can enter a unique PIN code to access your garage. This feature is handy when you’re out for a run or a walk and don’t want to carry keys or a remote with you.
  7. Force Sensor: Garage doors are heavy, and if they come down with excessive force, they can cause serious harm. Force sensors are designed to prevent this by detecting any resistance when the door is closing. If resistance is detected, the door stops and reverses its direction, ensuring that no one is trapped or injured by the closing door.
  8. Visual and Audible Alerts: Some garage door openers are equipped with visual and audible alerts that indicate when the door is in motion. These alerts serve as a reminder to everyone in the vicinity that the door is about to open or close. They are particularly useful in homes with children and elderly family members.
  9. Timer-to-Close Functionality: This feature allows you to set a specific time for your garage door to close automatically after it has been left open for a certain period. It’s a great way to ensure that your garage door is not accidentally left open, which can be an invitation to thieves or a safety hazard for curious children.
  10. Regular Maintenance: While not a feature in itself, regular maintenance is essential for keeping your garage door safe and functional. Having the door inspected, lubricated, and serviced by a professional at least once a year can help identify and address any potential safety issues before they become serious problems.

In conclusion, based from Grapevine Gates & Garage Doors, garage door safety features are an often-overlooked aspect of home security and convenience. As a homeowner, understanding these features and how they work can make a significant difference in keeping your family and property safe. From automatic reverse mechanisms to rolling code technology and motion detection lighting, these features not only prevent accidents but also provide peace of mind. So, the next time you use your garage door, take a moment to appreciate the technology that keeps you and your loved ones safe.

Grapevine Gates & Garage Doors

601 W Wall St, Grapevine, TX 76051, United States

817-631-6355

How to Program Craftsman Garage Door Opener – Grapevine Gates & Garage Doors

A Craftsman Garage Door Repair Grapevine,TX is a convenient device that allows you to open and close your garage door with ease.

To program it, you’ll typically need a remote control, a ladder, and some patience. Below are the steps to program your Craftsman garage door opener.

Step 1: Gather Your Tools and Materials Before you start, make sure you have the following items:

  • Craftsman garage door opener unit
  • Craftsman garage door opener remote control
  • A ladder
  • A flashlight (optional, but helpful in low light)
  • A notepad and pen (for recording codes)

Step 2: Locate the “Learn” Button The first thing you need to do is find the “Learn” button on your Craftsman garage door opener unit. This button is typically located near the light bulb on the unit. It may be labeled as “Learn” or “Program.” The color of the button may vary depending on your model, but it’s usually yellow, purple, or red.

Step 3: Clear Existing Codes Before you can program new codes, it’s a good idea to clear any existing ones. To do this, press and hold the “Learn” button on the garage door opener unit until the indicator light next to it turns off. This may take about 6-10 seconds.

Step 4: Program the Remote Control Now, it’s time to program your remote control to work with the garage door opener. Follow these steps:

  1. Stand on your ladder and point the remote control toward the garage door opener unit.
  2. Locate the “Program” or “Learn” button on the remote control (it’s usually on the back).
  3. Press and hold the remote control’s “Program” button until the LED light on the remote starts blinking or flashes.
  4. Release the “Program” button on the remote control.

Step 5: Press the “Learn” Button Quickly, within 30 seconds of completing Step 4, go to the garage door opener unit and press the “Learn” button once. The indicator light on the unit will light up.

Step 6: Test the Remote Control To ensure that the remote control is programmed correctly, press the button on the remote. The garage door should respond by moving (either opening or closing). If it does, the programming was successful. If not, repeat Steps 4 and 5.

Step 7: Repeat for Additional Remote Controls If you have more than one remote control or want to program a keypad, repeat Steps 4-6 for each additional device. Remember to press the “Learn” button on the garage door opener unit before programming each new device.

Step 8: Programming a Keypad (Optional) If you have a wireless keypad, you can program it for access to your garage. Here’s how:

  1. Locate the keypad on the outside of your garage, near the door.
  2. Open the cover to reveal the keypad buttons.
  3. Enter your desired PIN (personal identification number) using the keypad. Most Craftsman keypads allow for a 4 to 6-digit PIN.
  4. Press and hold the “Enter” button on the keypad.
  5. While holding the “Enter” button, also press and hold the “Program” or “Learn” button on the garage door opener unit.
  6. Release both buttons when the garage door opener’s indicator light blinks.
  7. Test the keypad by entering your PIN and pressing “Enter” to open the garage door.

Step 9: Final Testing After programming all your devices, it’s crucial to conduct final tests. Ensure that each remote control and the keypad, if applicable, work correctly to open and close the garage door.

Conclusion:

Programming your Craftsman Garage Door Repair Grapevine,TX isn’t difficult, but it does require following the steps carefully. Remember to clear existing codes, program your remote controls, and test each device to ensure everything works as expected. With a little patience and attention to detail, you’ll have your garage door opener programmed in no time, providing you with convenient access to your garage.

Grapevine Gates & Garage Doors

601 W Wall St, Grapevine, TX 76051, United States

1-817-631-6355

How To Pick Up Garage Door Rust – Grapevine Gates & Garage Doors

Removing rust from a Garage Door Repair Grapevine TX is an important maintenance task to prevent further deterioration and maintain the door’s appearance. Rust can form on metal parts due to exposure to moisture and the elements.

Here’s a comprehensive guide on how to pick up garage door rust:

Step 1: Gather Your Tools and Materials

Before you begin, gather all the necessary tools and materials:

Tools:

  • Safety glasses
  • Gloves
  • Wire brush or steel wool
  • Sandpaper (medium and fine grit)
  • Scraper
  • Paintbrush
  • Clean cloth or rag
  • Bucket of water with mild soap
  • Rust converter or rust remover
  • Primer
  • Exterior-grade paint or spray paint

Materials:

  • Drop cloth or tarp (to protect the ground)
  • Masking tape or painters’ tape (if needed)

Step 2: Safety Precautions

  1. Wear Safety Gear: Wear safety glasses and gloves to protect your eyes and hands during the rust removal process.

Step 3: Prepare the Area

  1. Protect Surroundings: Lay down a drop cloth or tarp to protect the ground from rust particles, dust, and debris.
  2. Ventilation: If you’re using chemical rust removers, ensure proper ventilation in the area.

Step 4: Remove Loose Rust

  1. Scrape Surface: Use a scraper to gently remove any loose or flaking rust from the surface of the garage door. Be careful not to damage the underlying metal.
  2. Wire Brush or Steel Wool: Use a wire brush or steel wool to scrub the rusted areas, applying light pressure. This will help remove rust particles and prepare the surface for further treatment.

Step 5: Sand the Surface

  1. Sand the Area: Use medium-grit sandpaper to sand the rusted areas. Sanding helps smooth the surface and removes any remaining rust.
  2. Smooth Edges: Feather the edges of the sanded area to blend it seamlessly with the surrounding surface.

Step 6: Clean the Surface

  1. Clean with Soapy Water: Mix mild soap with water in a bucket. Dip a clean cloth or rag into the soapy water and use it to clean the sanded area, removing dust, debris, and any remaining rust particles.

Step 7: Apply Rust Converter or Rust Remover

  1. Apply Rust Converter: If the rust is deep or extensive, consider using a rust converter. Follow the manufacturer’s instructions to apply the converter to the rusted areas. The converter chemically reacts with the rust to form a stable surface.
  2. Use Rust Remover: If you’re not using a rust converter, you can apply a rust remover to dissolve the remaining rust. Follow the product instructions for application.

Step 8: Allow to Dry

  1. Drying Time: Allow the rust converter or rust remover to dry according to the manufacturer’s instructions. This may take a few hours.

Step 9: Apply Primer

  1. Apply Primer: Once the surface is dry, apply a coat of primer to the treated areas. Primer helps create a solid base for the paint and improves its adhesion.

Step 10: Paint the Treated Area

  1. Select Matching Paint: Choose an exterior-grade paint or spray paint that matches the color of your garage door.
  2. Paint the Area: Apply the paint to the treated areas using a paintbrush or paint roller. Follow the manufacturer’s instructions for drying times between coats.
  3. Blend the Paint: If necessary, blend the painted area with the surrounding door surface to achieve a seamless appearance.

Step 11: Regular Maintenance

  1. Inspect Regularly: Perform regular inspections of your garage door to identify and address any signs of rust formation promptly.
  2. Keep the Door Clean: Regularly clean the garage door surface to prevent the accumulation of dirt, debris, and moisture that can contribute to rust formation.

In conclusion, picking up rust from a Garage Door Repair Grapevine TX involves removing loose rust, sanding the surface, cleaning the area, applying a rust converter or rust remover, applying primer, and painting the treated area. By following these steps and taking proper safety precautions, you can effectively remove rust from your garage door and prevent further corrosion. Remember that regular maintenance and protection are essential to prolonging the life and appearance of your garage door.

Grapevine Gates & Garage Doors

601 W Wall St, Grapevine, TX 76051, United States

1-817-631-6355

Quality Assurance: Why Hiring Garage Door Professionals Should Be Your Priority – Grapevine Gates & Garage Doors

In the journey of homeownership, I’ve come to understand the significance of every component that makes up my property. One aspect that often gets overlooked is the garage door. It’s not just a functional entryway; it’s a critical element that contributes to the safety, security, and overall aesthetic of my home. When it came to garage door projects, I quickly realized that hiring professionals should be at the top of my list.

In this guide, I want to share my personal reasons for prioritizing garage door professionals and why the quality assurance they bring is paramount as stated from Garage Door Near Me.

1. Expertise and Experience

When it comes to my garage door, I’m not an expert. Garage door professionals, however, are. Their expertise and experience in handling a wide range of garage door systems are simply unparalleled. They’ve undergone rigorous training and have spent countless hours working on different types of doors. From diagnosing issues to executing repairs with precision, their knowledge is a game-changer. Their familiarity with various garage door mechanisms ensures that the job is done correctly and efficiently.

2. Safety Comes First

One thing I’ve learned is that safety should always be a top priority. Dealing with heavy garage doors and intricate mechanisms can be risky. Garage door professionals are well-versed in safety protocols and come equipped with the necessary tools and gear. Attempting DIY repairs without the proper know-how can lead to accidents and potential damage. With professionals, I can rest easy knowing that they have the skills to identify and address potential safety risks.

3. Access to Quality Materials and Tools

Garage door professionals have access to high-quality materials and specialized tools that are essential for top-notch results. They know which materials are best suited for my specific door type and the unique conditions of my area. This ensures that my garage door not only looks good but also functions reliably for years to come. Using the right tools is just as crucial. Garage door professionals come equipped with a wide array of tools designed for specific tasks, ensuring efficient and precise work.

4. Tailored Solutions

Every garage door is different, and a one-size-fits-all approach simply doesn’t cut it. Garage door professionals take the time to assess my unique needs and tailor solutions accordingly. They consider factors like the type of door, its size, weight, and existing mechanisms. This personalized approach ensures that the solution is tailored to my specific requirements, ensuring optimal performance and longevity.

5. Long-Term Cost-Effectiveness

While I initially hesitated due to potential costs, I quickly realized that hiring garage door professionals is a smart investment in the long run. DIY attempts can lead to mistakes that result in expensive repairs or even the need for a complete replacement. Professionals, with their expertise, quality materials, and precise workmanship, help me avoid unnecessary expenses down the road. Plus, their warranties or guarantees offer added protection, giving me peace of mind.

6. Time Savings and Convenience

Being a homeowner means juggling various responsibilities, and tackling garage door projects on my own can be time-consuming and frustrating. Garage door professionals save me valuable time and effort. They efficiently diagnose issues, provide accurate solutions, and complete tasks promptly. Instead of spending hours researching and gathering materials, I can trust their expertise to get the job done efficiently.

7. Compliance with Regulations

Dealing with building codes and regulations can be overwhelming, but garage door professionals are well-versed in these requirements. They ensure that my project adheres to all necessary codes, eliminating the risk of potential legal issues. Their understanding of permits and documentation ensures a hassle-free and legally compliant garage door project, which is a weight off my shoulders.

8. Comprehensive Services and Guidance

Garage door professionals offer more than just installation and repairs. They provide comprehensive maintenance plans to keep my garage door in top shape. Regular maintenance prevents unexpected breakdowns, extends the lifespan of my door, and keeps it looking and functioning like new. Additionally, they’re a valuable resource for advice and guidance, providing insights into best practices, new technologies, and ways to maximize the efficiency of my garage door system.

In summary, based from Garage Door Near Me and for me, hiring garage door professionals was an easy choice. The quality assurance, safety, expertise, and long-term cost savings they bring to the table far outweigh any initial concerns. I’ve come to realize that my garage door is a significant part of my home, deserving of the attention and care that professionals can provide. By entrusting garage door projects to the experts, I’m investing in the security, functionality, and visual appeal of my property. When it comes to my garage door, I’ll always prioritize hiring professionals who offer quality assurance and the peace of mind that my home deserves.

Grapevine Gates & Garage Doors

601 W Wall St, Grapevine, TX 76051, United States

817-6316355

How to Program Garage Door Opener Remote-Grapevine Garage Door & Gates

Programming a Garage Door Repair Grapevine TX opener remote is a relatively straightforward process that involves a few key steps.

In this guide, we’ll outline the general procedure for programming a garage door opener remote. Keep in mind that the specific instructions may vary depending on the make and model of your garage door opener, so it’s always best to consult the owner’s manual for detailed instructions.

Step 1: Clear Existing Codes Before programming a new remote, it’s important to clear any existing codes from your garage door opener. To do this, locate the “Learn” or “Program” button on your garage door opener motor unit. Press and hold this button until the indicator light turns off, usually after about 10-15 seconds. This clears all previously programmed remote codes.

Step 2: Prepare the Remote Next, make sure the remote is ready for programming. Remove the battery cover on the back of the remote and insert the required batteries as specified in the owner’s manual. Replace the battery cover securely.

Step 3: Access the Programming Mode To access the programming mode on your garage door opener, you’ll need to locate the “Learn” or “Program” button once again. This button is usually located on the motor unit, near the antenna wire. Press and release the “Learn” or “Program” button. The indicator light on the motor unit will turn on, indicating that the opener is ready to receive a new remote signal.

Step 4: Program the Remote With the garage door opener in programming mode, you’ll need to program the remote. Press and release the button on the remote that you want to use to operate the garage door. You may need to press and hold the button for a few seconds, depending on the specific instructions for your opener. The indicator light on the motor unit should flash or blink to confirm that the remote has been successfully programmed.

Step 5: Test the Remote Once you’ve programmed the remote, it’s important to test it to ensure it’s working correctly. Stand within range of the garage door opener and press the programmed button on the remote. The garage door should start moving, either opening or closing, depending on its current position. If the door doesn’t respond, repeat the programming process from step 3.

Step 6: Repeat for Additional Remotes If you have multiple garage door opener remotes that you want to program, you’ll need to repeat steps 3 and 4 for each additional remote. Most openers can accommodate several remotes, but refer to the owner’s manual for any limitations on the number of remotes that can be programmed.

Step 7: Finalize the Programming Once you have programmed all the remotes you need, press the “Learn” or “Program” button on the motor unit one more time to exit programming mode. The indicator light should turn off, indicating that the programming process is complete.

Remember, these are general instructions, and the specific steps for programming your Garage Door Repair Grapevine TX opener remote may vary. Always consult your owner’s manual for accurate instructions and troubleshooting tips.

Grapevine Garage Door & Gates

Grapevine Doors and Gates
Grapevine, TX

817-809-2507

Page 1 of 2

Powered by WordPress & Theme by Anders Norén