Local Businesses Blog in Texas

Tag: garage door repair ramona ca

How Often Should I Lubricate My Garage Door? – Ramona Valley Garage Door & Gates

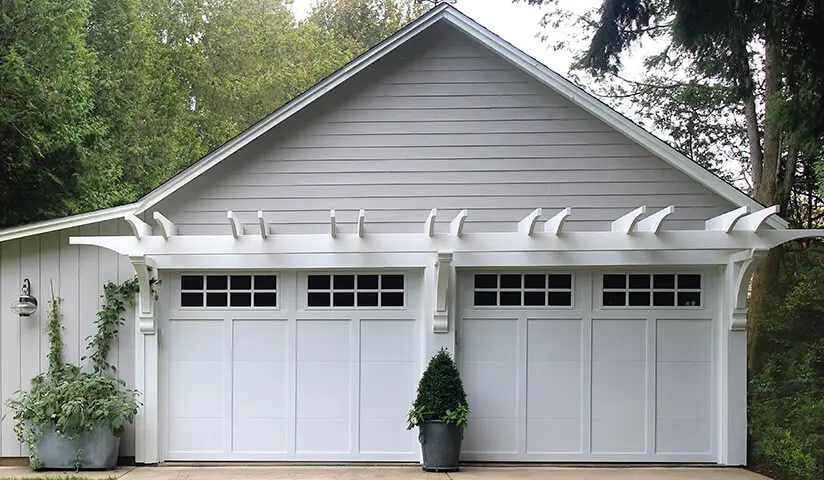
As a diligent homeowner, the rhythmic hum of my garage door opening and closing has become the soundtrack of daily life. Yet, behind this seamless performance lies a silent hero – lubrication. Maintaining the health of my garage door hinges on a well-orchestrated lubrication routine.

In this comprehensive guide I got from Garage Door Repair, I’ll share the insights I’ve gained on how often to lubricate a garage door, unveiling the secrets to a smooth and silent door operation.

**1. Understanding the Importance of Garage Door Lubrication

Before delving into the frequency of lubrication, it’s crucial to grasp why this maintenance task is essential for the overall well-being of your garage door.

**a. Reducing Friction:

The various moving parts of a garage door – hinges, rollers, springs, and tracks – are prone to friction, especially during frequent use. Lubrication acts as a protective barrier, minimizing friction and wear.

**b. Preventing Corrosion:

Garage doors are exposed to the elements, and metal components can be susceptible to rust and corrosion. Lubricants create a barrier that shields against moisture, preventing corrosion and extending the lifespan of the door.

**c. Ensuring Smooth Operation:

Proper lubrication contributes to the smooth operation of the garage door. A well-lubricated system operates quietly, with minimal resistance, and experiences fewer malfunctions.

**2. Factors Influencing the Frequency of Lubrication

The ideal lubrication frequency for your garage door depends on various factors, including climate, usage, and the type of lubricant used.

**a. Climate:

In regions with extreme temperatures or high humidity, the need for lubrication may be more frequent. Harsh weather conditions can accelerate wear and corrosion, requiring more frequent application of lubricants.

**b. Usage:

The frequency of garage door use directly impacts the need for lubrication. A door used multiple times a day will require more frequent lubrication compared to one used infrequently.

**c. Type of Lubricant:

The type of lubricant used plays a significant role. High-quality garage door lubricants are designed to provide long-lasting protection, requiring less frequent application compared to generic or lightweight alternatives.

**3. Establishing a Regular Lubrication Schedule

To maintain the optimal performance of your garage door, it’s advisable to establish a regular lubrication schedule. While individual circumstances may vary, a general guideline is to lubricate the door at least twice a year.

**a. Spring and Fall Routine:

Choosing the spring and fall seasons for lubrication aligns with the natural transition between temperature extremes. This schedule allows for protection against both cold and warm weather conditions.

**b. Biannual Inspection:

Incorporate lubrication into your biannual garage door inspection routine. This practice ensures that you assess the overall condition of the door while addressing any emerging issues promptly.

**c. Monitor Usage Patterns:

Pay attention to your garage door’s usage patterns. If the door experiences heavy daily use, consider more frequent lubrication, potentially every three to four months.

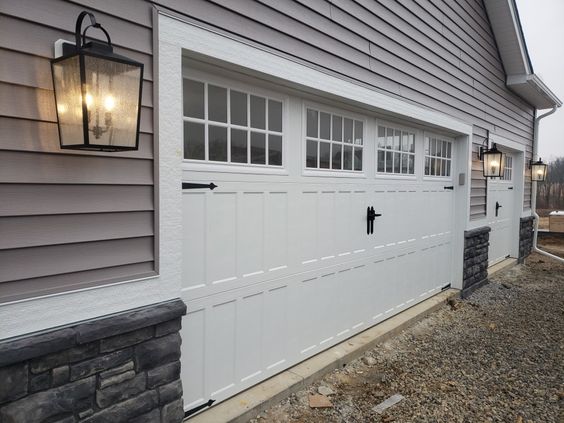
**4. Step-by-Step Guide to Garage Door Lubrication

When it comes to lubricating your garage door, the process involves a few straightforward steps. Here’s a comprehensive guide to help you navigate this maintenance task effectively:

**a. Gather Necessary Supplies:

Before you begin, gather the required supplies. You’ll need a high-quality garage door lubricant, a rag, and possibly a stepladder for access to high areas.

**b. Clean the Components:

Start by cleaning the components that require lubrication. Use a rag to remove dirt, dust, and old lubricant from hinges, rollers, and other moving parts.

**c. Apply Lubricant to Hinges:

Apply a small amount of lubricant to each hinge, focusing on the pivot points. Move the door up and down to allow the lubricant to penetrate and spread evenly.

**d. Lubricate Rollers:

Apply lubricant to the rollers, ensuring that each one is coated. Rollers with ball bearings may require a more precise application to reach the bearings.

**e. Address Springs:

If your garage door has torsion springs, apply lubricant to each coil. Extension springs may benefit from a light coating as well.

**f. Lubricate Tracks:

Apply a thin layer of lubricant to the inside of the vertical and horizontal tracks. Be cautious not to overapply, as excess lubricant can attract dirt.

**g. Check Seals and Weather Stripping:

Inspect the seals and weather stripping for any signs of wear or damage. Apply a silicone-based lubricant to maintain flexibility and prevent cracking.

**h. Operate the Door:

After lubricating all components, operate the garage door several times to ensure that the lubricant is evenly distributed. Listen for any unusual noises or resistance.

**i. Wipe Excess Lubricant:

Using a clean rag, wipe away any excess lubricant. This prevents the accumulation of dirt and maintains a clean appearance.

**5. Choosing the Right Lubricant

Selecting the right lubricant is crucial for effective garage door maintenance. Consider the following factors when choosing a lubricant:

**a. Silicone-Based Lubricants:

Silicone-based lubricants are versatile and perform well in various temperatures. They provide long-lasting protection and are less likely to attract dirt.

**b. Avoid Heavy Greases:

Avoid using heavy greases, as they can attract dust and debris, leading to a buildup that may hinder the door’s operation.

**c. Specialized Garage Door Lubricants:

Invest in lubricants specifically formulated for garage doors. These products often include rust inhibitors and protective additives tailored to the unique needs of garage door components.

**6. Signs That Your Garage Door Needs Immediate Lubrication

While adhering to a regular lubrication schedule is essential, certain signs may indicate an immediate need for lubrication between scheduled maintenance sessions.

**a. Squeaking or Grinding Noises:

Unusual noises during the operation of your garage door, such as squeaking or grinding, suggest increased friction and may indicate a lack of lubrication.

**b. Stiff or Jerky Movement:

If your garage door exhibits stiff or jerky movement, it may be a sign that the moving parts are not adequately lubricated.

**c. Visible Rust or Corrosion:

Visible rust or corrosion on metal components is a clear indication that lubrication is required to protect against further deterioration.

**d. Difficulty in Opening or Closing:

If you encounter increased resistance or difficulty in opening or closing your garage door, it’s a signal that lubrication is needed to address friction issues.

Conclusion: A Well-Tuned Symphony for Your Garage Door

Lubricating your garage door is not just a routine maintenance task; it’s a symphony that ensures the seamless operation and longevity of this essential home feature. As a homeowner who has embraced the melody of a well-tuned garage door, I’ve experienced firsthand the transformative effects of a consistent lubrication routine. By understanding the factors influencing lubrication frequency, establishing a regular schedule, and choosing the right lubricant, you empower yourself to keep your garage door performing at its best.

Overall, as per Garage Door Repair, the silent hero behind your garage door’s daily performance deserves attention and care. By following these guidelines, you can create a harmonious relationship with your garage door, ensuring that it continues to open and close effortlessly, providing convenience and security for years to come. As the conductor of your home’s orchestra, let the rhythm of regular lubrication resonate through the metal and mechanisms, creating a symphony of reliability every time your garage door takes center stage.

Ramona Valley Garage Door & Gates

842 B St #6, Ramona, CA 92065, United States

760-970-8367

How To Program Liftmaster MYQ Garage Door Opener – Ramona Valley Garage Door & Gates

Programming a LiftMaster MyQ Garage Door Repair Ramona CA involves setting up the MyQ technology, which allows you to control and monitor your garage door remotely using a smartphone or other smart devices.

This comprehensive guide will walk you through the process in detail to ensure a successful setup for your LiftMaster MyQ garage door opener.

1. Install and Power Up the MyQ Hub: Start by installing the LiftMaster MyQ Hub according to the provided instructions. Connect the hub to a power source and ensure it is within range of your Wi-Fi network. The MyQ Hub serves as the central communication point for your garage door opener and the MyQ app.

2. Download the MyQ App: On your smartphone, download the LiftMaster MyQ app from the App Store (for iOS devices) or Google Play (for Android devices). Install the app and open it to create an account or log in if you already have one.

3. Add a New Device in the MyQ App: In the MyQ app, navigate to the “Add Device” or similar section. Select “Garage Door Opener” as the device type. Follow the on-screen instructions to link the MyQ app with your LiftMaster MyQ Hub.

4. Connect the MyQ Hub to Wi-Fi: Follow the prompts in the MyQ app to connect the MyQ Hub to your Wi-Fi network. Enter your Wi-Fi credentials as required. Ensure that the MyQ Hub is successfully connected to Wi-Fi before proceeding.

5. Locate the MyQ-Compatible Garage Door Opener: LiftMaster offers a range of garage door openers, some of which are MyQ-compatible. Ensure that your garage door opener supports MyQ technology. You can find this information in your garage door opener’s manual or by checking LiftMaster’s official website.

6. Activate the Learn Mode on the Garage Door Opener: Access your garage door opener’s control panel and activate the “Learn” or “Learn Code” mode. This mode allows the opener to learn and sync with the MyQ Hub.

7. Connect the MyQ Hub to the Garage Door Opener: In the MyQ app, follow the instructions to link the MyQ Hub with your garage door opener. This often involves pressing a button on the MyQ Hub or scanning a QR code provided in the app. The app will guide you through the process.

8. Test Remote Control via the MyQ App: Once the MyQ Hub is successfully connected to your garage door opener, test the remote control feature using the MyQ app. Open and close the garage door from your smartphone to ensure that the communication is seamless.

9. Set Up Alerts and Notifications: Take advantage of MyQ’s features by configuring alerts and notifications. You can receive notifications when the garage door is opened, closed, or left open for a specified duration. Adjust these settings in the MyQ app according to your preferences.

10. Share Access with Others (Optional): If desired, you can share access to your garage door with family members or trusted individuals through the MyQ app. This allows multiple users to control the garage door opener remotely.

11. Troubleshooting: If you encounter any issues during the setup process, consult the MyQ app’s help section or refer to the user manual that came with your MyQ Hub and garage door opener. LiftMaster’s customer support is also available for assistance.

12. Final Checks: Perform a final check by testing the MyQ app’s remote control features, ensuring that alerts and notifications are working correctly. Make any necessary adjustments or reprogramming as needed.

Conclusion:

Programming your LiftMaster MyQ Garage Door Repair Ramona CA enhances the convenience and security of your home. Following these detailed steps will ensure a successful setup, allowing you to control and monitor your garage door remotely with ease. Enjoy the benefits of MyQ technology and the peace of mind that comes with knowing your garage is secure, even when you’re away from home. If you ever encounter difficulties, consult the MyQ app’s resources or reach out to LiftMaster’s customer support for assistance.

Ramona Valley Garage Door & Gates

842 B St #6, Ramona, CA 92065, United States

760-970-8367

How To Frame A Garage Door Opening – Ramona Valley Garage Door & Gates

Framing a Garage Door Repair Ramona CA opening is a crucial step in the construction process that ensures the proper installation and functionality of the garage door. Proper framing provides structural support, aligns the door correctly, and creates a secure and weather-tight opening.

Here’s a comprehensive guide on how to frame a garage door opening:

1. Gather Tools and Materials: Before you start framing, gather the necessary tools and materials, including a tape measure, framing square, level, circular saw, hammer, nails, screws, framing lumber (such as 2x4s), and a header board.

2. Measure and Mark: Measure the width of your garage door, including the door itself and any necessary clearance. Mark the center of the opening on the top of the garage door opening using a pencil.

3. Determine the Header Size: Calculate the size of the header, which is the horizontal beam that spans the width of the opening and supports the weight of the structure above the door. The header size depends on the load-bearing requirements of your garage and the type of roof structure.

4. Cut and Install King and Jack Studs: The king studs run vertically on both sides of the garage door opening, while the jack studs support the ends of the header. Cut and install king and jack studs using the following steps:

Step-by-Step Guide:

  • Measure and Cut King Studs: Measure the height from the garage floor to the top of the header, and cut two king studs to this length. Nail them vertically on either side of the center mark you made earlier.
  • Measure and Cut Jack Studs: Measure from the bottom of the header to the garage floor, and cut two jack studs to this length. Nail them vertically alongside the king studs.

5. Install the Header: The header is a critical component that provides support for the weight of the wall above the garage door opening. It’s typically made from doubled-up 2x lumber or a manufactured header.

Step-by-Step Guide:

  • Measure Header Length: Cut the header board to the same width as the garage door opening.
  • Install the Header: Place the header on top of the jack studs. Ensure it’s level and flush with the outer edges of the king and jack studs. Nail or screw the header to the studs securely.

6. Add Temporary Supports: To maintain stability while you complete the framing, install temporary supports on either side of the opening.

Step-by-Step Guide:

  • Cut and Install Support Boards: Cut two pieces of 2×4 lumber to fit vertically between the header and the garage floor. Nail them in place on each side of the opening.

7. Frame the Sides and Top: Complete the framing by adding horizontal and diagonal members that provide additional structural support and help secure the opening.

Step-by-Step Guide:

  • Add Top Plate: Nail a piece of 2×4 lumber horizontally across the top of the king studs. This is known as the top plate.
  • Add Diagonal Bracing: Cut and install diagonal braces from the top plate to the bottom of the header on both sides of the opening. These braces provide additional stability.

8. Check for Level and Square: Use a level and framing square to ensure that the opening is level and square. Adjust the framing as needed to achieve proper alignment.

9. Secure the Frame: Nail or screw all the framing components securely in place. Use appropriate fasteners for the type of lumber you’re using.

10. Inspect and Verify: Inspect the framing to ensure it’s securely in place, level, and aligned. Check all measurements to confirm that the garage door will fit properly.

11. Install Garage Door Hardware: After framing the opening, you can proceed to install the necessary hardware, such as tracks, rollers, hinges, and springs, for the garage door system.

12. Complete Other Construction Steps: Once the framing is complete, continue with other construction steps, including adding siding, insulation, and interior finishes as needed.

In conclusion, framing a Garage Door Repair Ramona CA opening requires careful measurement, precise cutting, and proper installation techniques. The process involves installing king and jack studs, a header, temporary supports, top plate, and diagonal bracing. Ensuring that the opening is level, square, and properly aligned is essential for the successful installation and functionality of the garage door. If you’re not experienced in carpentry, it’s recommended to seek the assistance of a professional contractor to ensure the framing is done correctly and meets local building codes and safety standards.

Ramona Valley Garage Door & Gates

842 B St #6, Ramona, CA 92065, United States

1-760-970-8367

Customizing Your Garage Door with Decorative Hardware – Ramona Valley Garage Door & Gates

As a homeowner, I take great pride in maintaining the curb appeal of my property and creating a welcoming atmosphere for visitors and guests. The garage door plays a significant role in the overall aesthetics of my home’s exterior, and I’ve discovered that adding decorative hardware can make a world of difference. Not only does it enhance the visual appeal of the garage door, but it also allows me to add a personal touch and customize its appearance to match my style and architectural theme.

According to the Garage Door Near Me, one of the primary benefits I’ve experienced with decorative hardware is the instant boost in curb appeal. The addition of handles, pulls, hinges, and other decorative elements adds a touch of charm and character to the garage door, making it stand out and catch the eyes of passersby. It’s remarkable how such simple additions can transform the look of the entire home.

The ability to personalize my garage door is another reason I love using decorative hardware. With a wide range of options available, I can choose elements that reflect my personality and preferences. Whether I want to add a touch of elegance, vintage flair, or a contemporary look, there’s a decorative hardware style to match my vision perfectly. It’s truly a creative and fulfilling way to put my stamp on my home.

Moreover, incorporating decorative hardware is a cost-effective way to upgrade the appearance of my garage door. Compared to other exterior home improvements, this DIY project provides significant visual impact without requiring a major financial investment. As a homeowner on a budget, this is a win-win situation.

Another aspect that appeals to me is the ease of installation. Most decorative hardware is designed for straightforward installation, making it a convenient and enjoyable DIY project. Armed with basic tools and a touch of creativity, I can take on this task and see the results almost immediately. It’s a satisfying and rewarding experience to see my garage door transform before my eyes.

I also appreciate the durability and resilience of high-quality decorative hardware. Materials like wrought iron, stainless steel, or cast aluminum ensure that the hardware can withstand the elements and maintain its appearance for years to come. Living in an area with varying weather conditions, this durability gives me peace of mind, knowing that the hardware will remain intact and beautiful despite rain or shine.

When it comes to the types of decorative hardware available, the options are vast and inspiring. Handles and pulls are among the most common types, and they come in various styles, from traditional to modern and rustic. I can choose the ones that best complement the style of my home and garage door. Additionally, I can opt for decorative hinges that create the illusion of traditional swing-out doors, adding a touch of vintage charm that I absolutely adore.

To further customize the look, I can incorporate decorative accents, such as studs or clavos. These small yet impactful elements add visual interest to the garage door without overwhelming the overall design. For a more dramatic change, faux hardware kits create the illusion of carriage-style doors, giving my home a classic and timeless look.

In the process of incorporating decorative hardware, I’ve learned some essential tips to achieve the best results. One crucial factor is choosing hardware that complements the style of the garage door. It’s essential to strike the right balance so that the hardware seamlessly integrates with the door’s design, rather than appearing out of place.

Investing in high-quality materials is a no-brainer for me. The hardware’s durability is critical, and I want to ensure that it remains in excellent condition for years to come. Stainless steel, wrought iron, and cast aluminum are among my preferred choices for their resilience and resistance to rust and weathering.

Accurate measurements and proper alignment are also key to achieving a polished look. Careful planning and precision during installation ensure that the hardware appears symmetrical and enhances the door’s visual appeal. This attention to detail pays off in the final result.

While decorative hardware is primarily about aesthetics, I don’t overlook its functionality. Handles and pulls should be placed at comfortable heights and positions for easy gripping and operation. Hinges and other elements should not obstruct the door’s movement or interfere with the auto-reverse mechanism’s function. I want to maintain the door’s functionality while enhancing its appearance.

As a homeowner with multiple garage doors, I aim for consistency in my choice of decorative hardware. Using the same style and finish across all doors creates a cohesive and harmonious look for the entire property. It ties everything together beautifully.

I also love the idea of mixing and matching different styles of decorative hardware. Combining elements like modern handles with rustic hinges or adding decorative accents to a faux hardware kit allows me to create a unique and personalized design. This approach adds an eclectic touch to my home’s exterior, reflecting my individuality and creativity.

In conclusion, according to Garage Door Near Me, customizing my garage door with decorative hardware has been a delightful journey of creative expression and home improvement. The benefits of enhanced curb appeal, personalization, cost-effectiveness, ease of installation, and durability make it a rewarding project for any homeowner. By incorporating essential tips and taking the time to plan and execute the design, I’ve succeeded in transforming my garage door into a beautiful and inviting feature of my home. As I continue to explore new ways to add character and charm to my living space, decorative hardware remains one of my favorite options for creating a welcoming and visually appealing exterior.

Ramona Valley Garage Door & Gates

842 B St #6, Ramona, CA 92065, United States

760-970-8367

How to Program a 2022 Jeep Garage Door Opener? – Ramona Valley Garage Door & Gates

To program the garage door opener in my 2022 Jeep, I first ensure that my garage door opener is compatible with the HomeLink system. I check the manual or manufacturer’s website to verify compatibility.

According to Garage Door Ramona CA, if I had previously programmed the HomeLink system, I clear any existing codes. I press and hold the first and third HomeLink buttons simultaneously until the indicator light starts flashing rapidly. Once it does, I release the buttons, and the codes are cleared.

Next, I locate the remote control for my garage door opener. I will need it during the programming process.

To begin programming, I park my Jeep within range of the garage door opener. I make sure the vehicle is stationary and turned off.

With everything in place, I turn the ignition switch to the “On/Run” position in my Jeep without starting the engine. I press and hold the desired HomeLink button that I want to program, whether it’s button 1, 2, or 3. While holding the button, I simultaneously press and hold the “P” (Program) button on the garage door opener remote. I continue holding both buttons for about 20 seconds until the HomeLink indicator light changes from a slow flash to a rapid flash.

Now, while the HomeLink indicator light is rapidly flashing, I take the garage door opener remote and point it towards the front of my vehicle, approximately 1-3 inches away from the HomeLink buttons. I press and hold the button on the remote that I want to program to the corresponding HomeLink button in my Jeep. At the same time, I press and hold the corresponding HomeLink button in my Jeep. I maintain both buttons pressed until the HomeLink indicator light changes from a rapid flash to a slow flash and then turns solid, indicating successful programming.

To confirm that the programming was successful, I press the programmed HomeLink button in my Jeep. I expect the garage door to activate, opening or closing depending on the button’s programmed function. If the door doesn’t respond, I repeat the programming process, making sure to follow the steps precisely.

If I want to program additional HomeLink buttons, I repeat the steps, starting from holding the desired HomeLink button in my Jeep.

The HomeLink system in my 2022 Jeep can also be used to control other compatible devices, such as gate operators or home lighting systems. To program these additional devices, I consult the vehicle’s manual for specific instructions, as the process may vary.

By following these steps from Garage Door Ramona CA, I can easily program the garage door opener in my 2022 Jeep using the HomeLink system. It provides a convenient and integrated way to control my garage door from within my vehicle. I always refer to the vehicle’s manual for any specific instructions or variations that may apply to my particular model.

Ramona Valley Garage Door & Gates

842 B St #6, Ramona, CA 92065, United States

760-970-8367

How to Repair Your Garage Door? – Ramona Valley Garage Door & Gates

As a professional garage door technician, I have repaired countless garage doors over the years. While it is possible for homeowners to attempt garage door repair themselves, I always recommend that they exercise caution and seek professional assistance if they are not experienced in the necessary techniques.

Based from Garage Door Ramona CA, if you do decide to attempt garage door repair yourself, the first step is to inspect the door thoroughly to identify any visible damage or other issues. This will help you to determine the cause of the problem and what repairs may be necessary.

One of the most common garage door repairs is spring replacement. However, this is not a task that should be attempted by those without experience, as garage door springs can be extremely dangerous. If you do attempt spring replacement yourself, it is essential that you take the necessary safety precautions and follow proper techniques.

Another common repair is cable replacement. If the cables are damaged or frayed, they will need to be replaced. This requires releasing the tension on the springs using a winding bar or pliers, and then removing the old cables and installing new ones.

Misaligned tracks can also cause problems with the garage door, so it is important to check the tracks and adjust them as necessary using a level and pliers.

Regular lubrication of the moving parts of the garage door is also important to ensure that the door operates smoothly and quietly.

Once you have made any necessary repairs, it is important to test the door to ensure that it is functioning properly. This includes checking that it opens and closes smoothly, and that the safety sensors are working correctly.

Overall, as per Garage Door Ramona CA, repairing a garage door requires knowledge, experience, and appropriate safety precautions. While some repairs can be attempted by homeowners, it is always best to seek the assistance of a professional garage door technician if you are unsure about any aspect of the repair process or if you encounter any unexpected issues.

Ramona Valley Garage Door & Gates

842 B St #6, Ramona, CA 92065, United States

760-970-8367

Powered by WordPress & Theme by Anders Norén