Local Businesses Blog in Texas

Tag: garage door repair bedford tx

How To Insulate Garage Doors With Rigid Foam – DFW Garage Door Experts


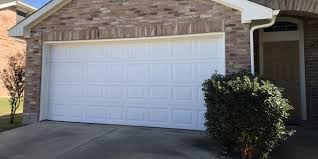
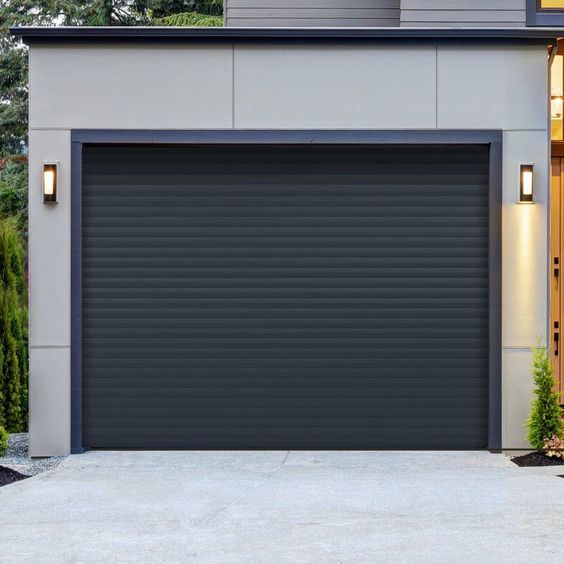
Insulating your Garage Door Repair Bedford TX with rigid foam panels is an effective way to improve energy efficiency, temperature regulation, and noise reduction within your garage. In this detailed guide, I’ll walk you through the step-by-step process of insulating your garage door with rigid foam panels, ensuring a well-insulated and comfortable garage environment.

Step 1: Gather Necessary Tools and Materials

  1. Rigid Foam Panels: Purchase rigid foam insulation panels with a thickness suitable for your garage door. Common thicknesses include 1/2 inch, 3/4 inch, and 1 inch.
  2. Utility Knife: Use a sharp utility knife for cutting the foam panels to size.
  3. Straight Edge: A straight edge, such as a ruler or level, helps ensure accurate and straight cuts.
  4. Measuring Tape: Measure the dimensions of your garage door panels accurately to determine the size of the foam panels needed.
  5. Construction Adhesive: Use construction adhesive to adhere the foam panels to the garage door.
  6. Caulk Gun: A caulking gun is necessary for applying construction adhesive to the foam panels.
  7. Foam Sealant: Foam sealant is used to fill gaps and cracks around the edges of the foam panels for improved insulation.
  8. Protective Gear: Wear gloves, safety goggles, and a dust mask to protect yourself from dust and debris while working with foam insulation.

Step 2: Measure and Cut Foam Panels

  1. Measure Garage Door Panels: Use a measuring tape to measure the dimensions of each garage door panel. Measure both the width and height accurately.
  2. Transfer Measurements: Transfer the measurements onto the rigid foam panels using a straight edge and pencil or marker.
  3. Cut Foam Panels: Use a sharp utility knife to cut the foam panels along the marked lines. Ensure clean, straight cuts for a precise fit.

Step 3: Prepare Garage Door Surface

  1. Clean Surface: Thoroughly clean the surface of each garage door panel to remove any dirt, dust, or debris. Use a damp cloth or mild detergent if necessary.
  2. Dry Surface: Allow the surface of the garage door panels to dry completely before proceeding with the insulation installation.

Step 4: Apply Construction Adhesive

  1. Apply Adhesive: Apply a generous amount of construction adhesive to the back of each foam panel using a caulking gun. Ensure even coverage across the entire surface of the panel.
  2. Position Panels: Position the foam panels onto the garage door panels, pressing firmly to adhere them in place. Start from one corner and work your way across the panel.

Step 5: Secure Panels and Fill Gaps

  1. Secure Panels: Use temporary fasteners, such as nails or screws, to hold the foam panels in place while the adhesive sets. Place the fasteners along the edges of the panels.
  2. Fill Gaps: Apply foam sealant around the edges of the foam panels to fill any gaps or cracks between the panels and the garage door frame. Ensure a tight seal for maximum insulation.

Step 6: Allow Adhesive to Cure

  1. Curing Time: Allow the construction adhesive to cure and set according to the manufacturer’s instructions. This typically takes several hours to overnight, depending on the adhesive used.
  2. Remove Fasteners: Once the adhesive has cured, remove the temporary fasteners from the foam panels.

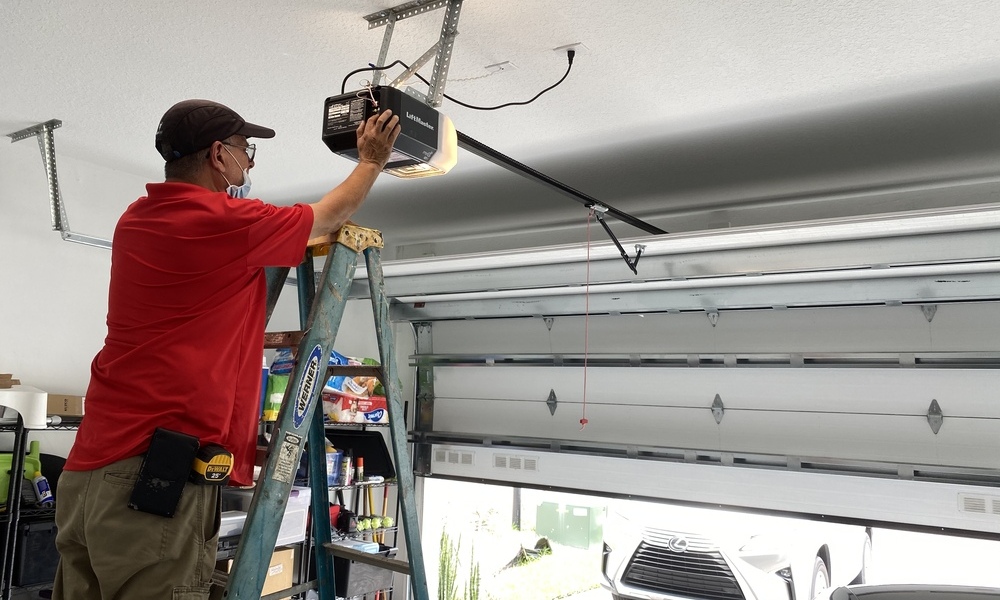
Step 7: Test and Inspect

  1. Test Operation: Test the operation of your garage door to ensure smooth movement and proper functionality with the insulated foam panels in place.
  2. Inspect Seal: Inspect the edges of the foam panels and sealant for any gaps or areas that may need additional sealing or touch-up.

Step 8: Additional Insulation (Optional)

  1. Weatherstripping: Consider installing weatherstripping along the edges of the garage door panels for additional insulation and draft protection.
  2. Reflective Barrier: For enhanced insulation, you can also install a reflective barrier or radiant barrier foil insulation on the interior side of the garage door panels.

Conclusion:

Garage Door Repair Bedford TX If you encounter any difficulties or have questions during the insulation process, consult a professional for assistance.

DFW Garage Door Experts

2165 Loma Alta Dr, Bedford, TX 76021, United States

https://maps.app.goo.gl/CJiQmxsf3p2hxXfYA

How To Reset Vivint Garage Door Opener – Bedford Gates & Garage Doors

Vivint Garage Door Repair Bedford TX are a marvel of modern technology, offering convenience and security at the touch of a button.

However, like any electronic device, they may occasionally need a reset. Knowing how to do this can save you time and ensure your garage door operates smoothly.

Understanding Vivint Garage Door Opener

Before diving into the reset process, let’s understand what makes Vivint garage door openers stand out. These devices boast cutting-edge features like remote access, real-time alerts, and smart home integration. Despite their advanced technology, users often encounter issues, prompting the need for a reset.

Reasons for Resetting

Your garage is a crucial entry point to your home. Resetting your Vivint garage door opener adds an extra layer of security, especially if you’ve faced unauthorized access issues.

Technical Glitches

Technology can be unpredictable. Resetting helps address glitches that might occur due to software updates or connectivity issues.

Changing User Settings

Perhaps you’ve changed your Wi-Fi password or upgraded your Vivint system. Resetting the garage door opener ensures it syncs seamlessly with your new settings.

Preparing for the Reset

Safety first! Before you embark on resetting your garage door opener, ensure you follow safety precautions. Disconnect the power source and gather essential information like your system credentials.

Vivint Garage Door Opener

1. Accessing the Control Panel

Locate the control panel of your garage door opener. This is usually near the motor unit. If you can’t find it, consult your Vivint user manual.

2. Initiating the Reset Process

Typically, there’s a reset button on the control panel. Press and hold it for at least 10 seconds. Be patient; this is the system rebooting.

3. Verifying Successful Reset

Once you release the reset button, wait for the garage door opener to complete the reset process. You might see indicator lights flashing. Test the door to confirm it’s working smoothly.

Troubleshooting Tips

If, after following the steps, your garage door opener still misbehaves, don’t panic. Check your internet connection and ensure your Vivint system is online. If issues persist, it’s time to contact Vivint support.

Conclusion:

In conclusion, understanding how to reset your Vivint Garage Door Repair Bedford TX is a valuable skill for any homeowner. It ensures the security and functionality of this essential access point to your home. Make it a part of your regular maintenance routine, and enjoy the peace of mind that comes with a smoothly operating garage door.

Bedford Gates & Garage Doors

817-886-3064

How To Set Up Myq Garage Door Opener – Bedford Gates & Garage Doors

In this digital age, smart home technology has become increasingly prevalent, revolutionizing the way we interact with our living spaces.

One such innovation is the MyQ Garage Door Repair Bedford TX designed to bring convenience and security to your home. This article will guide you through the process of setting up your MyQ Garage Door Opener seamlessly.

Understanding MyQ Technology

Before diving into the setup process, let’s grasp the basics of MyQ technology. MyQ allows you to control and monitor your garage door opener remotely through a smartphone app, offering unparalleled convenience and peace of mind.

MyQ Components Overview

To begin, let’s explore the essential components of the MyQ system. This includes the hub, sensors, and the MyQ app itself.

Step-by-Step Setup Guide

Now, let’s get into the nitty-gritty of setting up your MyQ Garage Door Opener.

1. Unboxing and Inspection

Start by carefully unboxing your MyQ Garage Door Opener. Ensure all components are present and in good condition.

2. Hub Installation

Install the MyQ hub in a central location within your garage. This hub acts as the communication center for your garage door opener.

3. Sensor Placement

Strategically place the door sensor on your garage door. This sensor communicates with the hub, providing real-time information about the door’s status.

4. Connecting to Wi-Fi

Using the MyQ app, connect the hub to your home Wi-Fi network. This step is crucial for remote access and control.

5. Syncing with Garage Door Opener

Follow the manufacturer’s instructions to sync the MyQ system with your existing garage door opener. This usually involves pairing the hub with the opener unit.

6. Testing the System

Before relying on MyQ for daily use, conduct thorough tests to ensure proper communication between the hub, sensors, and your garage door opener.

Troubleshooting Common Issues

Even with the simplicity of the MyQ setup, issues may arise. Let’s address some common troubleshooting scenarios.

1. Connectivity Problems

If you encounter connectivity issues, double-check your Wi-Fi settings and ensure the hub is within range.

2. Sensor Calibration

Calibrate the door sensor if you notice discrepancies in door status reporting.

Maximizing MyQ Features

Beyond the basic setup, explore additional features offered by MyQ to enhance your overall garage door experience.

1. Scheduling and Automation

Take advantage of scheduling options to automate your garage door’s opening and closing based on your routine.

2. Integration with Smart Home Systems

Explore possibilities for integrating MyQ with other smart home systems, such as voice assistants and security cameras.

Conclusion:

Setting up your MyQ Garage Door Repair Bedford TX may seem daunting initially, but the benefits of convenience and security far outweigh the effort. Embrace the future of garage door control and experience a seamless integration into your smart home ecosystem.

Garage Door Repair in Bedford, TX

817-886-3064

How To Release Spring On Garage Door – Bedford Gates & Garage Doors

Your Garage Door Repair Bedford TX, often overlooked, plays a crucial role in the safety and security of your home. Among its many components, the garage door spring stands out as a silent hero, facilitating the smooth opening and closing of the door.

In this guide, we will delve into the essential steps on how to release the spring on your garage door, ensuring its longevity and your family’s safety.

Understanding Garage Door Springs

Garage door springs come in two main types: torsion and extension. Torsion springs are mounted above the garage door, while extension springs are located on either side. Both play a pivotal role in counteracting the weight of the door, making it easy to lift manually or with a garage door opener.

Signs of a Faulty Spring

Identifying a faulty spring is crucial for preventing potential accidents and ensuring the longevity of your garage door. Signs include unusual sounds during operation, uneven movement, or visible wear and tear on the spring itself. Ignoring these signs can lead to more significant issues, including a sudden failure of the spring.

Importance of Timely Spring Release

Releasing the garage door spring at regular intervals is akin to giving it a breath of fresh air. This simple act can significantly extend the lifespan of the spring and, consequently, the entire garage door system. Neglecting this maintenance step may result in unexpected failures, potentially causing damage to property or, worse, posing a risk to personal safety.

Tools Needed for Safe Release

Before you embark on releasing the spring, gather the necessary tools. A winding bar, pliers, and a ladder are essential for the process. Each tool serves a specific purpose in ensuring a safe and effective spring release.

Step-by-Step Guide to Release Spring

Now, let’s dive into the step-by-step process of releasing the garage door spring. Remember, precision and adherence to safety guidelines are paramount.

  1. Disconnect the Garage Door Opener
    • Ensure the door is in the closed position.
    • Disconnect the opener to prevent any accidental operation during the release.
  2. Secure the Door in Place
    • Use a locking plier to secure the door in the closed position.
    • This prevents any sudden movement while releasing the spring.
  3. Locate the Torsion Spring
    • Identify the torsion spring, usually situated above the garage door.
    • Exercise caution and stay clear of the spring while working.
  4. Insert the Winding Bars
    • Insert the winding bars into the winding cone of the torsion spring.
    • Keep a firm grip on the bars to prevent slippage.
  5. Rotate the Spring
    • Rotate the spring in the direction that unwinds the coils.
    • Do this gradually, keeping an eye on the tension.
  6. Test the Balance
    • Test the balance of the door by lifting it manually.
    • The door should remain in place when partially open.
  7. Repeat the Process for Extension Springs
    • If your garage door has extension springs, repeat the process on both sides.
    • Exercise caution, as extension springs are under tension even in the closed position.

Common Mistakes to Avoid

While releasing the garage door spring, several common mistakes can lead to accidents or damage to the door system. Avoid the following:

  • Skipping Safety Precautions
    • Always prioritize safety. Use safety glasses and gloves during the process.
  • Overlooking Regular Maintenance
    • Regularly release the spring as part of routine garage door maintenance.
  • Ignoring Signs of Wear
    • Address any signs of wear or damage promptly to prevent further issues.

Professional Assistance

For straightforward spring release tasks, a DIY approach is suitable. However, if you encounter complex issues or are unsure about the process, seeking professional assistance is recommended. Garage Door Repair Bedford TX systems can be intricate, and a professional touch ensures the job is done safely and accurately.

Bedford Gates & Garage Doors

817-886-3064

Expert Guidance on Choosing the Right Garage Door Material – Bedford Gates & Garage Doors

As a homeowner who has recently gone through the process of selecting a new garage door, I’ve come to realize that choosing the right material for your garage door is a decision that requires careful consideration. It’s not just about aesthetics; it’s about functionality, durability, and maintenance.

In this article, I’ll share my experience on the expert guidance I received from Bedford Gates & Garage Doors when choosing the right garage door material.

1. The Importance of the Garage Door Material

Before diving into the decision-making process, it’s essential to understand why the choice of garage door material matters. Garage doors are a significant part of your home’s exterior and play a crucial role in security, insulation, and curb appeal. The material you choose will impact not only the door’s appearance but also its performance.

My Experience: When I began the process of replacing my garage door, I initially focused solely on aesthetics. However, I soon realized that the material would affect not only the door’s appearance but also its functionality and maintenance requirements.

2. Wood: The Classic Choice

One of the first materials I explored was wood. Wood garage doors have a timeless appeal and can enhance the overall aesthetics of your home. They provide a warm, natural look that complements various architectural styles.

Expert Guidance: According to the garage door expert I consulted, wood doors are an excellent choice for homeowners who prioritize aesthetics and are willing to invest in regular maintenance. However, they cautioned that wood doors require periodic refinishing to protect against weathering and potential pest damage.

My Experience: While I was drawn to the classic elegance of wood, the prospect of ongoing maintenance made me hesitant, given my busy lifestyle.

3. Steel: Durability and Security

Steel garage doors are known for their durability and security. They are resistant to weather, pests, and dents, making them an attractive option for those seeking low maintenance and enhanced security.

Expert Guidance: The garage door expert emphasized that steel doors are an excellent choice for homeowners looking for a balance between durability and aesthetics. They come in various designs and can be customized to match your home’s style. Additionally, steel doors often have insulation options for improved energy efficiency.

My Experience: The idea of a low-maintenance, durable steel door appealed to me, especially since I wanted a door that could withstand the occasional bumps from sports equipment and bicycles.

4. Aluminum: Lightweight and Modern

Aluminum garage doors are lightweight, corrosion-resistant, and offer a modern look. They are ideal for contemporary homes and can be a suitable choice for those seeking a sleek appearance.

Expert Guidance: The garage door expert pointed out that aluminum doors are an excellent option for homeowners who prioritize a modern aesthetic and don’t want the weight of a steel door. However, they noted that aluminum doors may not provide as much insulation as some other materials.

My Experience: While I appreciated the modern look of aluminum, I realized that insulation was a critical factor for maintaining a comfortable temperature in my garage.

5. Vinyl: Low Maintenance and Versatile

Vinyl garage doors are known for their low maintenance and versatility. They are resistant to dents, rust, and fading, making them an excellent choice for homeowners seeking a hassle-free option.

Expert Guidance: According to the expert, vinyl doors are a practical choice for those who want a material that requires minimal maintenance. They are available in various styles and colors, allowing for customization to match your home’s exterior.

My Experience: I was intrigued by the low-maintenance aspect of vinyl doors, especially because I wanted a hassle-free solution. The ability to choose from various styles was a bonus.

6. Fiberglass: Lightweight and Resilient

Fiberglass garage doors are lightweight and resilient. They are resistant to moisture and can mimic the look of wood without the maintenance requirements.

Expert Guidance: The garage door expert highlighted that fiberglass doors are an excellent choice for coastal areas or regions with high humidity. They are less likely to warp or rust compared to other materials. However, they may not provide the same level of insulation as some alternatives.

My Experience: While I didn’t live in a coastal area, the idea of a moisture-resistant door that could mimic the look of wood without the maintenance was appealing.

7. Composite: The Best of Both Worlds

Composite garage doors are a blend of materials, often combining wood fibers and resins. They aim to offer the aesthetic appeal of wood with the durability and low maintenance of other materials.

Expert Guidance: The garage door expert explained that composite doors are an excellent choice for homeowners who desire the beauty of wood but want to avoid the high maintenance associated with it. They are resistant to moisture and insects and provide good insulation.

My Experience: The idea of a composite door seemed like a perfect compromise between the elegance of wood and the low maintenance of other materials. It was quickly becoming a top contender in my decision-making process.

8. Insulation Considerations

Another crucial aspect the garage door expert brought to my attention was insulation. The level of insulation a door provides can significantly impact the energy efficiency of your home. Insulated doors help regulate the temperature in your garage and can even affect your home’s overall energy consumption.

Expert Guidance: The expert stressed the importance of considering insulation options, especially if I intended to use my garage for purposes other than vehicle storage. Insulated doors help maintain a comfortable temperature and reduce energy costs.

My Experience: I realized that an insulated door would not only benefit the energy efficiency of my home but also provide a more comfortable environment in my garage, which I occasionally used as a workshop.

9. Customization and Design

One of the most enjoyable aspects of choosing a garage door material was the opportunity for customization. Garage doors are available in a wide range of designs, styles, and colors, allowing homeowners to match their home’s aesthetic.

Expert Guidance: The garage door expert emphasized that the design and style of the door should complement the overall architecture of my home. They also encouraged me to consider the impact of color and decorative elements on curb appeal.

My Experience: Exploring the various design options was a fun and creative process. I wanted a door that not only performed well but also enhanced the visual appeal of my home.

Conclusion

In summary, according to Bedford Gates & Garage Doors, choosing the right garage door material is a decision that requires expert guidance and careful consideration. Each material has its advantages and drawbacks, and the choice should align with your priorities, lifestyle, and home’s requirements. The expert advice I received helped me make an informed decision, ultimately leading to a garage door that not only enhances my home’s curb appeal but also provides the functionality and durability I need. Whether you prioritize aesthetics, durability, low maintenance, or insulation, there’s a garage door material that can meet your specific needs and preferences.

Bedford Gates & Garage Doors

2201 Harwood Rd, Bedford, TX 76021, United States

817-886-3064

How Do I Reset My Garage Door Opener – Bedford Gates & Garage Doors

Resetting a Garage Door Repair Bedford TX is a relatively straightforward process that involves clearing the existing codes and programming new ones.

This can be necessary for various reasons, such as security concerns or when you get a new remote control. Here’s a step-by-step guide with detailed explanations that should cover most garage door opener models:

Important Safety Precautions: Before you start, ensure your safety by disconnecting the power to the garage door opener. Consult your opener’s manual or locate the power source and unplug it. It’s also a good idea to have a helper with you, as some steps may require two people.

1. Gather Necessary Supplies: You’ll need the following items:

  • A ladder
  • A flathead screwdriver
  • A pen or small tool for pressing buttons
  • A new remote control (if you’re reprogramming it)
  • Your garage door opener’s manual (if available)

2. Access the Garage Door Opener Unit: Locate the garage door opener motor unit. This is typically attached to the ceiling of the garage. Use the ladder to reach it if necessary.

3. Locate the “Learn” or “Program” Button: On the garage door opener unit, you should find a button labeled “Learn” or “Program.” This button is usually near the antenna wire or a small LED light. Refer to your opener’s manual if you can’t find it.

4. Clear Existing Codes: Press and hold the “Learn” or “Program” button for about 10-15 seconds until the LED light on the garage door opener blinks or goes out. This action erases all the existing codes stored in the opener’s memory.

5. Reprogram the Remote Control: If you have a new remote control or need to reprogram an existing one, follow these steps: a. Press the “Learn” or “Program” button on the garage door opener. b. Within 30 seconds, press the button on your remote control that you want to program. Hold the button down until you see the garage door opener’s light flash, confirming the successful programming.

6. Test the Remote Control: Test the remote control to ensure it operates the garage door opener correctly. Press the button, and the door should open or close. If it doesn’t work, repeat the programming process for the remote control.

7. Reprogram Keypad Entry (If Applicable): If your garage door opener has a keypad for entry, you may need to reprogram it as well. Refer to your opener’s manual for specific instructions on programming the keypad.

8. Reconnect Power: After completing the programming, plug the garage door opener back in or restore power to it.

9. Test the System: Test the remote control and keypad entry (if applicable) to make sure they are functioning correctly. Also, check if the wall-mounted button inside your garage still operates the door.

10. Adjust Opener Settings (Optional): If needed, refer to your garage door opener’s manual for instructions on adjusting settings such as the force, travel limits, and auto-reverse mechanisms.

11. Record Codes: Keep a record of the codes for your remote controls and keypad entry for future reference. Store this information in a safe place.

12. Regular Maintenance: To ensure your garage door opener continues to work correctly, perform regular maintenance, including lubricating moving parts and inspecting safety sensors.

Remember that these instructions provide a general guideline for resetting most Garage Door Repair Bedford TX. If you encounter any issues or have a unique opener model, it’s essential to consult your specific opener’s manual for precise instructions or seek professional assistance if needed.

Bedford Gates & Garage Doors

2201 Harwood Rd, Bedford, TX 76021, United States

1-817-886-3064

How To Cut A Garage Door Panel – Bedford Gates & Garage Doors

Cutting a Bedford Gates & Garage Doors panel is a task that requires precision and careful execution to ensure that the door remains functional and safe. Whether you need to resize the panel to accommodate a specific opening or make room for a window installation, following the proper steps is essential.

Here’s a detailed guide on how to cut a garage door panel:

Materials You’ll Need:

  • Measuring tape
  • Pencil or chalk
  • Straight edge or level
  • Circular saw with a fine-tooth blade
  • Sawhorses or workbench
  • Safety goggles
  • Ear protection
  • Dust mask
  • Clamps
  • Metal file or sandpaper
  • Touch-up paint (matching the garage door color)
  • Silicone sealant (for finishing, if needed)

Step-by-Step Guide:

1. Safety Precautions:

  • Before you begin, make sure you’re wearing appropriate safety gear, including safety goggles, ear protection, and a dust mask. Safety should always be your top priority.

2. Measure and Mark:

  • Determine the exact dimensions you need for the garage door panel. Measure and mark the area on the panel where you’ll be making the cut. Use a straight edge or level to ensure accurate markings.

3. Prepare the Panel:

  • Remove any hardware or accessories attached to the panel, such as handles or hinges, that could obstruct the cutting process.

4. Set Up Your Workspace:

  • Place the garage door panel on sawhorses or a sturdy workbench. This provides stability and prevents damage to the panel.

5. Secure the Panel:

  • Use clamps to secure the panel in place. This prevents it from moving during the cutting process and ensures accurate results.

6. Cut the Panel:

  • Using a circular saw with a fine-tooth blade, carefully follow the marked lines to make the cut. Take your time and maintain a steady, even pace. Let the saw do the work, and avoid applying excessive pressure.

7. Smooth Edges:

  • After cutting, use a metal file or sandpaper to smooth any rough or sharp edges left by the saw. This step ensures that the panel is safe to handle and minimizes the risk of injury.

8. Paint and Finish:

  • If the cut edge of the panel is exposed metal, apply touch-up paint that matches the color of the garage door. This helps prevent rust and maintains the appearance of the door.

9. Reattach Hardware (if applicable):

  • If you removed any hardware or accessories before cutting, reattach them to the door panel using the appropriate screws and fasteners.

10. Inspect and Test:

  • Thoroughly inspect the cut panel to ensure that it’s smooth, safe, and properly finished. Open and close the garage door to test its functionality.

11. Consider Sealing (if applicable):

  • If you’ve cut an exterior-facing garage door panel, consider applying silicone sealant around the edges of the cut. This helps prevent moisture infiltration and maintains the door’s integrity.

12. Seek Professional Help (if needed):

  • If you’re not confident in your ability to cut the garage door panel accurately or if the door has specific structural features, consider hiring a professional garage door technician for assistance.

13. Regular Maintenance:

  • Periodically inspect the cut panel for any signs of rust, damage, or wear. Address any issues promptly to maintain the door’s functionality and appearance.

Conclusion:

Cutting a Bedford Gates & Garage Doors panel requires careful planning, precise execution, and attention to safety. By following the steps outlined above and using the appropriate tools and safety gear, you can successfully cut a garage door panel to the desired dimensions while maintaining its structural integrity and functionality. Always prioritize safety and accuracy to achieve the best results.

Bedford Gates & Garage Doors

2201 Harwood Rd, Bedford, TX 76021, United States

1-817-886-3064

Navigating Garage Door Insurance: My Insight into How It Works in the United States – Bedford Gates & Garage Doors

As a homeowner in the United States, I’ve come to understand that safeguarding my property and loved ones involves a complex web of considerations. Amidst the various aspects of homeownership, one feature stands out for its significance—the garage door. Beyond being a mere entrance, it’s a vital component of my home’s security. While I’m well-acquainted with homeowners’ insurance, the realm of garage door insurance has always intrigued me.

In this article, I’m excited to share my insights into the mechanics of garage door insurance in the United States—how it operates, the coverage it offers, and the factors that influence its effectiveness according to Garage Door Near Me.

Deciphering Garage Door Insurance

To comprehend garage door insurance, it’s important to recognize that it’s a specialized facet of homeowners’ insurance. It’s designed to address the unique risks associated with garages and their essential components, including the garage door itself.

Unveiling Coverage Options

Garage door insurance coverage isn’t a one-size-fits-all concept; it varies depending on the policy and provider. Some common coverage types include:

  1. Physical Damage Coverage: This encompasses damage resulting from covered events like fire, vandalism, or falling objects. Accidents such as vehicle collisions might also fall under this category.
  2. Theft Coverage: This extends protection not only to the garage door but also to items stored within the garage. Bicycles, tools, and even vehicles may be covered against theft.
  3. Liability Coverage: In the unfortunate event of an injury occurring on my property, including the garage or garage door, liability coverage steps in to shield me from potential legal and medical expenses.
  4. Natural Disaster Coverage: Depending on the policy, garage door insurance might encompass damage caused by natural disasters like storms, floods, or earthquakes.
  5. Equipment Breakdown Coverage: If the garage door’s mechanical or electrical components malfunction, this coverage could include repair or replacement expenses.
  6. Contents Coverage: Beyond the garage door itself, some policies extend coverage to items stored within the garage, providing an additional layer of protection.

Factors Influencing Garage Door Insurance Coverage

Several elements contribute to the extent of garage door insurance coverage:

  1. Policy Limits: These determine the maximum amount an insurance policy will pay out in case of a covered claim. It’s crucial to review these limits and ensure they align with my property’s value.
  2. Deductibles: Deductibles involve the amount I’m responsible for paying before insurance coverage kicks in. Opting for higher deductibles can lead to lower premiums, but it also requires a larger upfront financial commitment.
  3. Location Matters: The geographical area I reside in impacts coverage options and costs. Factors like the prevalence of natural disasters or crime rates can influence the coverage landscape.
  4. Garage Door Value: The type, age, and value of my garage door play a role in determining coverage options and premium costs. High-end or customized garage doors might require extra coverage.
  5. Security Measures: Implementing security measures such as alarm systems, motion sensors, or smart locks can lead to discounts on premiums, incentivizing proactive security enhancement.
  6. Garage Usage: How I utilize my garage—whether it’s for vehicle storage, as a workshop, or additional living space—can influence the coverage I need and associated costs.

Navigating the Claim Process with Garage Door Insurance

In case of damage or loss involving my garage door, the claim process typically follows these steps:

  1. Reporting the Incident: Promptly notifying my insurance provider about the incident initiates the claims process. Providing detailed information and any available photographs is essential.
  2. Assessment and Inspection: An insurance adjuster evaluates the extent of the damage or loss. For garage door-related claims, they may inspect not only the door but also its components and the contents of the garage.
  3. Documentation Gathering: Presenting relevant documentation, such as repair estimates or receipts for damaged items, ensures a smooth claims process.
  4. Claim Determination: Based on policy terms and the extent of the damage or loss, the insurance provider determines coverage and payout.
  5. Resolution: If the claim is approved, the insurance provider collaborates with me to facilitate repairs, replacements, or compensation in line with policy provisions.

Garage Door Insurance’s Benefits

Investing in garage door insurance offers a range of advantages:

  1. Peace of Mind: The assurance that my garage door and its components are covered grants me peace of mind, allowing me to focus on other aspects of homeownership.
  2. Financial Safeguarding: Garage door insurance shields me from unexpected expenses, mitigating the financial burden that may arise due to damage or loss.
  3. Comprehensive Protection: By customizing coverage to my specific needs, I ensure that all aspects of my garage door and its contents are safeguarded.
  4. Strategic Security Enhancement: Garage door insurance encourages the implementation of security measures, incentivizing proactive steps toward bolstering my property’s safety.

In summary, as per Garage Door Near Me, garage door insurance, an intriguing facet of homeownership, adds a layer of protection to an element of my property that’s often taken for granted. Understanding how garage door insurance operates empowers me to make informed decisions about coverage, deductibles, and security enhancements. As a homeowner, I’ve realized that the garage door is more than just an entryway—it’s a gateway to security and convenience. With garage door insurance, I’m not only safeguarding a functional component; I’m actively participating in creating a safe haven for my loved ones and possessions. It’s a tangible expression of my commitment to responsible homeownership, where every detail, including the garage door, contributes to the overall well-being of my family and my property.

Bedford Gates & Garage Doors

2201 Harwood Rd, Bedford, TX 76021, United States

817-886-3064

Can a Garage Door Be Painted-Bedford Best Garage & Overhead Doors

Introduction:

The Garage Door Repair Bedford TX is often overlooked when it comes to home improvement projects.

However, a simple coat of paint can completely transform the look and feel of this essential feature of your home. In this essay, we will explore the process of painting a garage door and the numerous benefits it can bring to your property. From enhancing curb appeal to increasing durability, painting your garage door is a worthwhile investment that can breathe new life into your home.

Body:

  1. Enhancing Curb Appeal: Your garage door occupies a significant portion of your home’s exterior facade. By painting it, you can instantly enhance the curb appeal of your property. Choose a color that complements the overall aesthetic of your home, creating a cohesive and inviting look. A freshly painted garage door can make a powerful first impression and significantly boost the overall attractiveness of your home.
  2. Protection against the Elements: Garage doors are exposed to various weather conditions, including rain, snow, and harsh sunlight. Over time, these elements can cause the door to fade, crack, or deteriorate. Painting your garage door provides an extra layer of protection against the elements, preventing premature damage and extending its lifespan. Opt for high-quality exterior paint that offers excellent weather resistance for long-lasting results.
  3. Color Psychology and Personalization: Color has a profound impact on our emotions and can evoke specific feelings and moods. When choosing a paint color for your garage door, consider the psychological effects different shades can have. Vibrant colors such as red or yellow can add energy and excitement, while more subdued colors like blue or gray can create a sense of calm and serenity. Use this opportunity to personalize your home’s exterior and reflect your individual taste.
  4. Cost-Effective Upgrade: Painting your garage door is a cost-effective way to upgrade the appearance of your home. Compared to replacing the entire door, painting requires fewer resources and is significantly more affordable. With a small investment in paint and supplies, you can achieve a remarkable transformation that adds value to your property without breaking the bank.
  5. DIY or Professional Assistance: Depending on your level of experience and available time, you can choose to paint your garage door yourself or seek professional assistance. Painting a garage door requires proper preparation, including cleaning, sanding, and priming, to ensure a smooth and long-lasting finish. Professionals can offer expertise, ensuring that the paint adheres correctly and the final result is flawless. However, if you enjoy DIY projects and have the necessary tools and knowledge, painting the garage door can be a rewarding and satisfying task.
  6. Step-by-Step Process: To paint your garage door, follow these general steps:

a. Clean the door thoroughly: Remove dirt, dust, and any loose paint using a mild detergent and water. Rinse well and allow it to dry completely.

b. Sand the surface: Lightly sand the entire door to create a smooth surface for the paint to adhere to. Use fine-grit sandpaper and be sure to remove any sanding dust afterward.

c. Prime the door: Apply a coat of high-quality primer designed for exterior use. Primer helps the paint bond better and provides additional protection.

d. Choose the paint: Select a paint specifically formulated for exterior surfaces, ideally one that offers weather resistance and durability. Consider using a paint sprayer for an even application.

e. Apply the paint: Start by painting the edges and corners using a brush. Then, use a roller or sprayer for the larger flat areas, working from top to bottom. Apply multiple thin coats, allowing each coat to dry completely before applying the next.

f. Finishing touches: Once the final coat is dry, inspect the

g. Finishing touches: Once the final coat is dry, inspect the garage door for any missed spots or uneven areas. Touch up any imperfections with a brush or roller, ensuring a seamless finish.

h. Clean up: Properly clean and store your painting tools and dispose of any leftover materials according to local regulations.

i. Maintenance: To maintain the freshly painted look of your garage door, regularly clean it with a mild detergent and water. Avoid using abrasive cleaners or harsh chemicals that could damage the paint. Additionally, inspect the door periodically for any signs of peeling or chipping and promptly address any issues to prevent further damage.

Conclusion:

In conclusion, painting your Garage Door Repair Bedford TX is a simple yet powerful way to enhance the aesthetics of your home while providing protection against the elements. It allows you to personalize your property, increase curb appeal, and extend the life of your garage door. Whether you choose to take on the project yourself or enlist the help of professionals, the process involves proper preparation, quality materials, and attention to detail. By investing time and effort into painting your garage door, you can achieve a remarkable transformation that adds value and beauty to your home. Don’t underestimate the impact a coat of paint can have on your garage door—it’s a small investment that yields significant rewards. So, unleash your creativity, choose the perfect color, and watch your garage door become a stunning focal point that elevates the overall appearance of your home.

Bedford Best Garage & Overhead Doors

2200 Airport Fwy Suite 555, Bedford, TX 76022

817-373-5968

How to Reprogram Your Own Garage Door Opener – Bedford Overhead & Garage Door

Reprogramming a garage door opener is a straightforward process that can be completed in just a few simple steps.

Follow these instructions from Garage Door Bedford TX to reprogram your garage door opener:

  1. Locate the “learn” button on the opener: The “learn” button is typically located on the back of the garage door opener motor unit. It may be labeled as “learn,” “program,” or “smart.”
  2. Press and hold the “learn” button: Press and hold the “learn” button until the indicator light on the opener blinks. This usually takes about 10 seconds. Release the button once the light starts blinking.
  3. Press the button on the remote: Press the button on the remote control that you want to use to operate the garage door. Hold the button down until the indicator light on the opener blinks again. This usually takes about 1-2 seconds. Release the button once the light starts blinking.
  4. Test the remote: Test the remote by pressing the button again. The garage door should open or close, depending on the button you pressed.
  5. Repeat for additional remotes: If you have multiple remotes, repeat the process for each remote. You can program up to three remotes with most garage door openers.
  6. Test the wall switch: Test the wall switch to ensure that it still operates the garage door. If it doesn’t, you may need to reprogram it as well.
  7. Repeat if necessary: If the remote control does not work after reprogramming, repeat the process from step 2.

Note: Some garage door openers may have slightly different reprogramming instructions, so it’s always a good idea to consult your owner’s manual for specific instructions. Additionally, if you experience any issues during the reprogramming process, it’s recommended to contact a professional garage door technician for assistance.

In summary, as stated in Garage Door Bedford TX, reprogramming your garage door opener is a simple and quick process that can be completed in just a few minutes. By following these steps, you can ensure that your garage door opener is working properly and that you can easily operate your garage door with your remote control.

Bedford Overhead & Garage Door

2200 Airport Fwy Suite 555, Bedford, TX 76022

817-373-5968

Powered by WordPress & Theme by Anders Norén