Local Businesses Blog in Texas

Tag: garage door repair carlsbad ca Page 1 of 2

Carlsbad Garage Doors: Elevate Your Home’s Appeal and Security

Welcome to the picturesque city of Carlsbad, where coastal beauty meets suburban charm. If you’re a homeowner in this thriving community, you understand the importance of maintaining and enhancing your property. In this guide, we’ll delve into everything you need to know about garage doors in Carlsbad – from choosing the right one to expert installation, maintenance, and repairs.

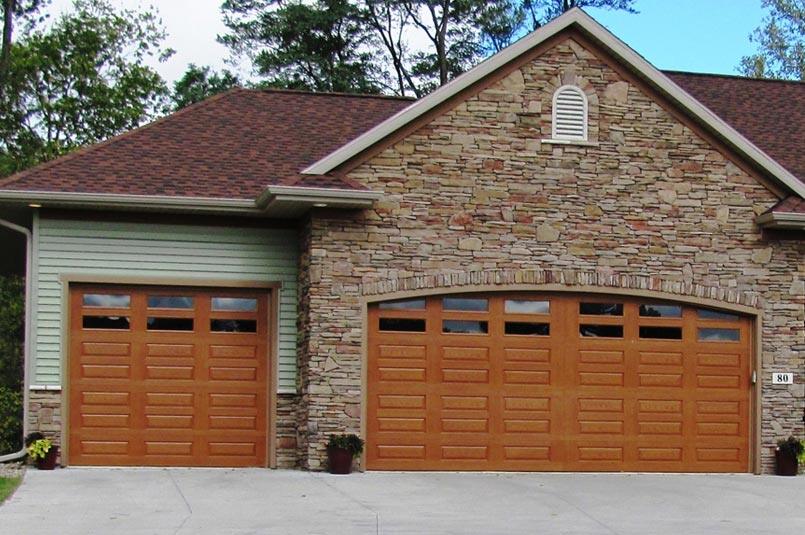
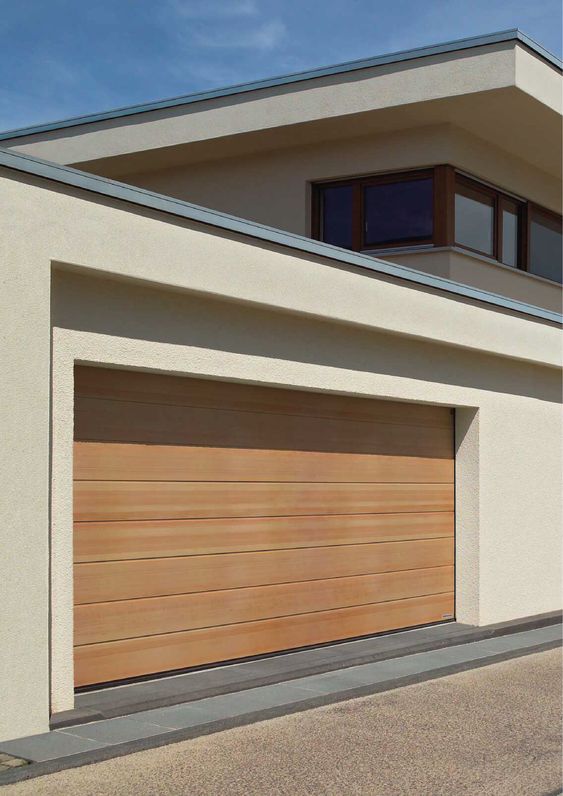
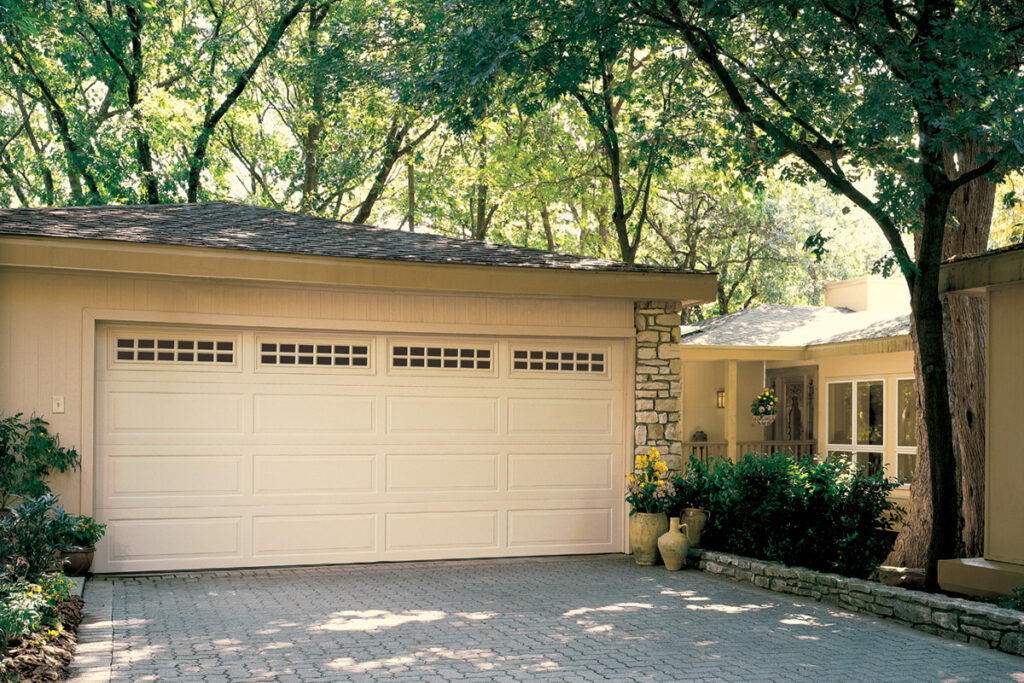
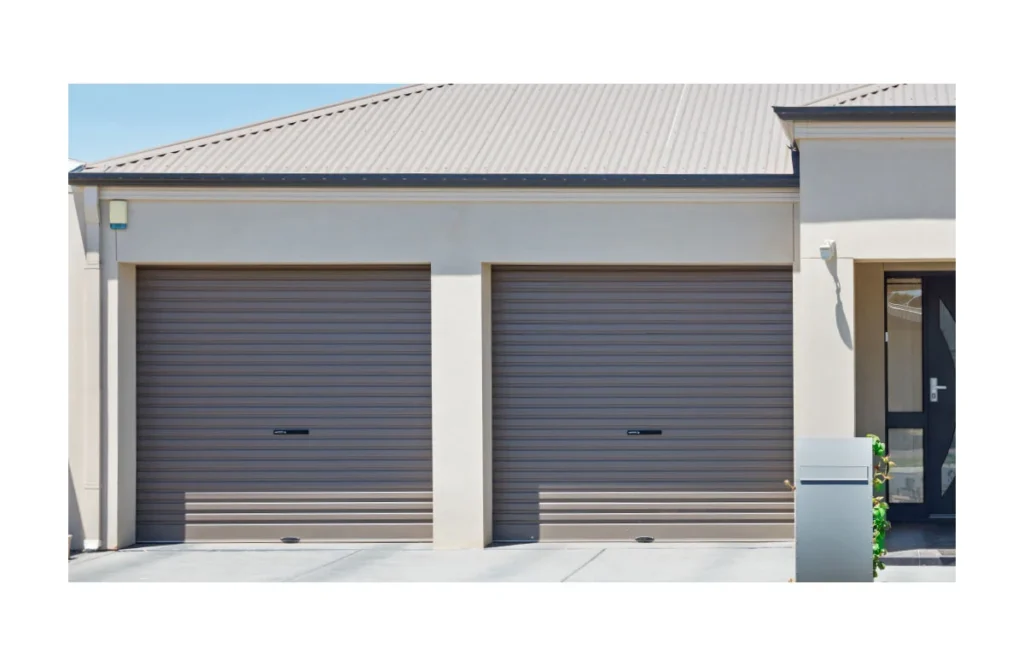
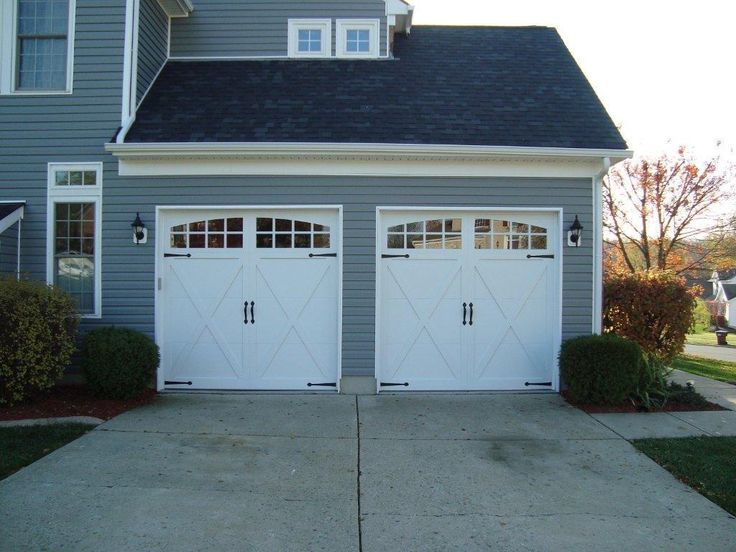
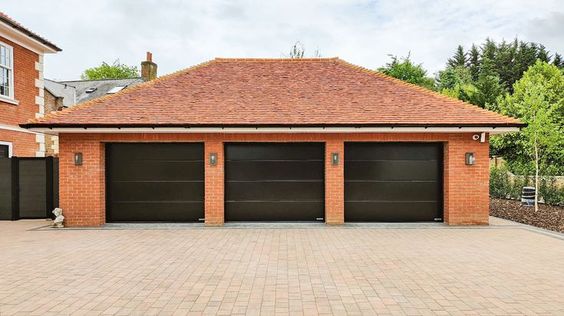
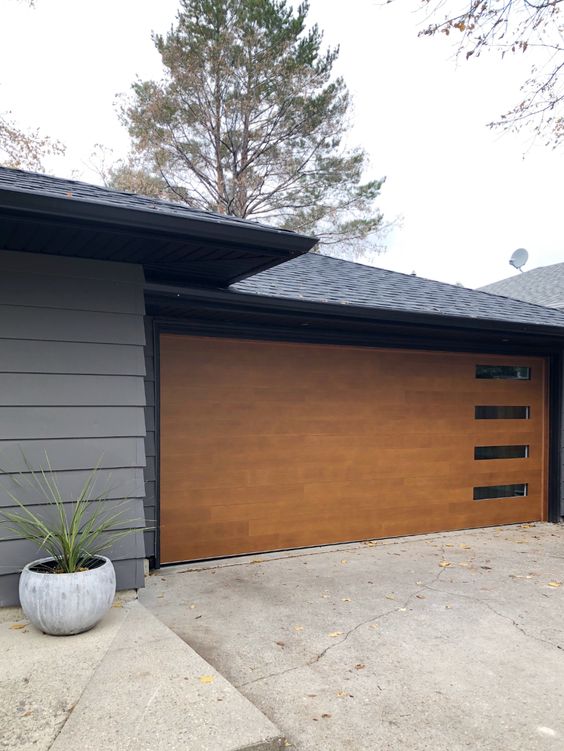
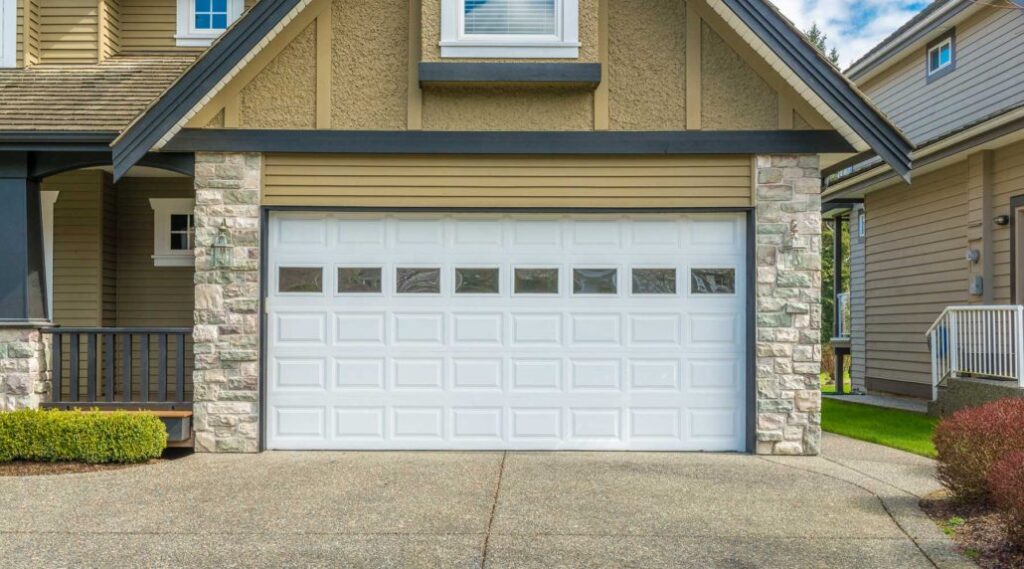
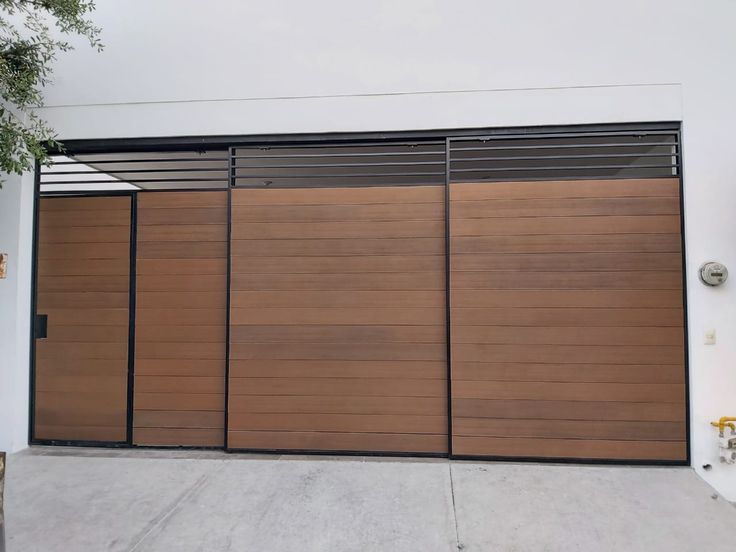
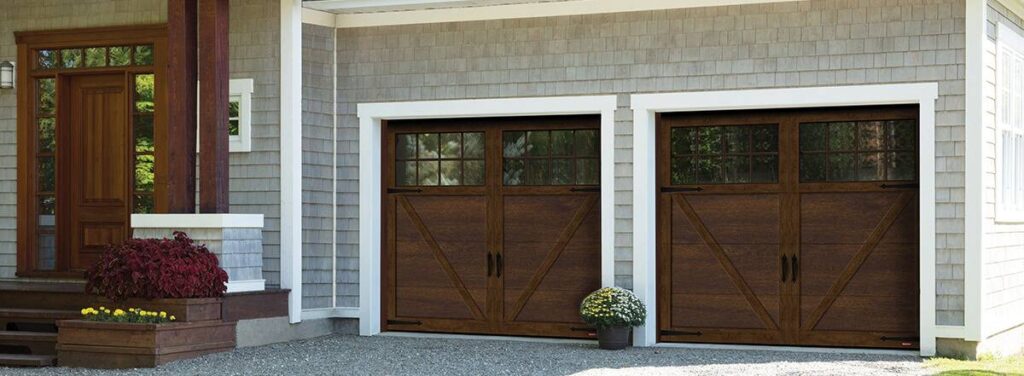
Chapter 1: The Carlsbad Aesthetic – Choosing the Perfect Garage Door

Carlsbad boasts a unique blend of architectural styles, and your garage door plays a crucial role in complementing the local aesthetic. Discover the garage door styles and materials that best align with Carlsbad’s diverse housing landscape. From contemporary designs to traditional favorites, we’ll guide you in selecting a garage door that not only adds curb appeal but also seamlessly integrates with the character of your Carlsbad home.

Chapter 2: Local Expertise – Professional Garage Door Installation in Carlsbad

When it comes to installing your new garage door, local expertise matters. Explore the benefits of hiring professionals in Carlsbad for your garage door installation needs. We’ll highlight reputable local companies, ensuring a seamless process from delivery to installation. Trust the experts who understand the specific requirements of Carlsbad’s climate and architecture, ensuring your garage door stands the test of time.

Chapter 3: Coastal Care – Maintaining Your Carlsbad Garage Door

Living in a coastal city like Carlsbad comes with its own set of challenges, and your garage door is no exception. Learn essential maintenance tips tailored to Carlsbad’s coastal climate. From protecting against salt air corrosion to seasonal checks for optimal performance, our guide will help you keep your garage door in pristine condition, ensuring it functions flawlessly year-round.

Chapter 4: Troubleshooting in the Sunshine – Common Garage Door Issues in Carlsbad

Even the most well-maintained garage doors can encounter issues. In this chapter, we’ll address common garage door problems specific to Carlsbad. Whether it’s the impact of coastal weather or wear and tear from frequent use, we’ll guide you through troubleshooting and offer solutions to keep your garage door operating smoothly.

Chapter 5: Security Solutions – Safeguarding Your Carlsbad Home

Carlsbad’s reputation as a safe community doesn’t mean you should overlook security measures for your home. Explore the latest in garage door security technology, from smart access systems to reinforced materials. Discover how upgrading your garage door can enhance your home’s security and provide peace of mind for you and your family.

Chapter 6: Energy Efficiency by the Coast – Sustainable Garage Doors in Carlsbad

In a city that values environmental sustainability, optimizing your home’s energy efficiency is essential. Learn about energy-efficient garage doors tailored to Carlsbad’s climate. Explore insulation options, weather sealing, and cutting-edge features that not only reduce your carbon footprint but also contribute to lower energy bills.

Conclusion:

As a proud homeowner in Carlsbad, your choice of a garage door goes beyond functionality – it’s an investment in the beauty, security, and sustainability of your property. By following our comprehensive guide, you’re equipped to make informed decisions that enhance your home’s curb appeal, ensure top-notch security, and contribute to the energy efficiency of your living space. Elevate your Carlsbad home with a garage door that reflects the charm of this coastal community.

Denzel Garage Door Repair
2380 Camino Vida Roble, Carlsbad, CA 92011, United States
+17609708179

How To Fix Garage Door Chain – Denzel Garage Door Repair

Repairing a Carlsbad Garage Door Repair involves addressing issues that may arise due to wear, misalignment, or lack of lubrication.

A well-maintained chain is crucial for the smooth and efficient operation of your garage door. In this detailed guide, I’ll walk you through the steps to fix a garage door chain, helping you troubleshoot common problems and ensure optimal performance.

: Safety First

Before working on your garage door, prioritize safety. Disconnect the power to the garage door opener by unplugging it or turning off the circuit breaker. This prevents any accidental activation while you’re making repairs.

: Inspect the Chain for Wear and Tear

Carefully examine the garage door chain for signs of wear, such as elongation, rust, or damaged links. If the chain is severely worn or damaged, it may need replacement. A damaged chain can compromise the safety and functionality of your garage door.

: Tighten Loose Chain Bolts

Check for any loose bolts or nuts securing the chain to the garage door opener trolley. Use a wrench to tighten these bolts to ensure a secure connection. Loose bolts can cause the chain to slip or create unnecessary noise during operation.

: Lubricate the Garage Door Chain

Proper lubrication is essential for the smooth movement of the garage door chain. Use a garage door lubricant or a silicone-based spray to apply a thin, even coat of lubricant along the entire length of the chain. Focus on the chain’s rollers and pins. Lubrication reduces friction, minimizes wear, and helps prevent noisy operation.

: Check Chain Tension

A well-adjusted chain should have the right amount of tension. Too much or too little tension can lead to operational issues. Refer to your garage door opener’s manual for specific instructions on adjusting chain tension. Most openers have an adjustment feature that allows you to fine-tune the tension.

: Inspect the Sprocket and Gear Assembly

The sprocket and gear assembly on the garage door opener is a critical component that engages with the chain. Inspect this assembly for any signs of wear, chipping, or misalignment. If you notice issues, such as worn teeth on the sprocket or damaged gears, it may be necessary to replace these components.

: Align the Chain

A misaligned chain can cause operational problems and contribute to excessive wear. Ensure that the garage door chain is aligned with the sprocket and gear assembly. Adjust the chain’s position if needed, following the instructions provided in the opener’s manual.

: Test the Garage Door Operation

After making adjustments and lubricating the chain, reconnect the power to the garage door opener and test its operation. Pay attention to any unusual sounds, such as grinding or excessive noise. If the noise persists, further adjustments may be necessary.

: Inspect the Chain for Additional Issues

During the testing phase, carefully observe the garage door chain for any signs of skipping, jumping, or irregular movement. These issues may indicate underlying problems that require additional attention. If you notice any abnormalities, address them promptly to prevent further damage.

: Regular Maintenance

Incorporate regular maintenance into your routine to keep the garage door chain in optimal condition. Periodically inspect the chain, lubricate moving parts, and address any emerging issues promptly. Regular maintenance contributes to the longevity and efficient operation of your garage door system.

: Seek Professional Assistance if Needed

If you encounter challenges or if the garage door chain issues persist despite your efforts, consider seeking professional assistance. Garage door technicians have the expertise to diagnose and address more complex problems, ensuring the reliable and safe operation of your garage door.

Conclusion:

Fixing a Carlsbad Garage Door Repair involves a combination of inspections, adjustments, and maintenance tasks. By systematically addressing wear, lubricating moving parts, and ensuring proper alignment and tension, you can maintain a well-functioning garage door chain. Regular upkeep and timely repairs contribute to the longevity and efficiency of your garage door system, providing reliable and smooth operation for years to come.

Denzel Garage Door Repair

2380 Camino Vida Roble, Carlsbad, CA 92011, United States

1-760-970-8179

Custom Garage Door Services for Unique Home Designs – Denzel Garage Door Repair

In my quest for a home that stands out, I discovered an often-overlooked canvas for personal expression—the garage door. The notion of custom garage door services transformed this utilitarian element into a statement piece, a harmonious extension of my unique home design.

I share my personal journey, exploring the world of custom garage door services and the profound impact they can have on shaping the identity of a home according to Garage Door Repair.

The Gateway to Personal Expression

The garage door, often seen as a functional necessity, holds immense potential as a design element. Custom garage door services open up a realm of possibilities to infuse personal style, reflecting the essence of individuality and elevating the overall aesthetic appeal of the home.

**1. A Unique Reflection of Style:

Custom garage doors are a canvas for personal expression. Whether I envisioned a modern masterpiece or a rustic charm, the ability to choose every design element allowed me to create a door that resonated with my unique style.

2. Integration with Architectural Identity:

Every home has its distinct architectural identity. Customization allows the garage door to seamlessly integrate into the overall design, contributing to a cohesive and visually pleasing exterior.

3. Curb Appeal Enhancement:

Curb appeal is the first impression, and a custom garage door becomes a focal point that enhances the overall attractiveness of the property. The investment in customization extends beyond aesthetics to the intrinsic value it adds to the home.

4. Keeping Pace with Trends:

Design trends evolve, and the ability to customize ensures that my home remains on the cutting edge of exterior aesthetics. Whether adopting a classic style or embracing contemporary elements, my garage door becomes a trendsetter in its own right.

Navigating the Customization Process

Embarking on the journey of custom garage door services involves a collaborative process that transforms concepts into reality. Here’s a glimpse into the key steps of this fascinating journey:

1. Design Consultation:

The process begins with a design consultation, where I had the opportunity to articulate my vision. Working closely with skilled artisans and designers, we discussed materials, styles, decorative features, and any unique elements I wanted to incorporate.

2. Material Selection:

Choosing the right material is foundational to the customization process. From the warmth of wood to the sleekness of aluminum, the material sets the tone for the entire design. I opted for a rich, mahogany wood for its timeless appeal and character.

3. Style Exploration:

The range of styles available is vast, from classic carriage house designs to modern flush panels. Exploring different styles allowed me to align the garage door with the architectural narrative of my home, ensuring a harmonious integration.

4. Decorative Flourishes:

Attention to detail is paramount in customization. Elements such as ornate hardware, window inserts, and unique panel configurations added the finishing touches that elevated the garage door from a functional feature to a work of art.

5. Color Palette Selection:

The color palette plays a crucial role in achieving the desired aesthetic. Whether opting for natural wood stains or bold painted hues, selecting the right colors ensured that the garage door seamlessly blended with the overall color scheme of my home.

6. Insulation and Functionality:

Beyond aesthetics, customization extends to functionality. Insulation options were considered to enhance energy efficiency, and customizable hardware and automation features were incorporated for added convenience and security.

A Personal Exploration: Crafting the Perfect Garage Door

1. Conceptualization:

My journey began with conceptualization. Inspired by the architectural elements of my home and a desire for a timeless aesthetic, I envisioned a garage door that seamlessly blended tradition with contemporary flair.

2. Material Selection:

The allure of mahogany wood captured my imagination. Its deep, reddish-brown tones and pronounced grain pattern resonated with my vision of a garage door that exuded warmth and character.

3. Style Exploration:

Considering the architectural nuances of my home, I explored various styles. The classic elegance of carriage house doors stood out, providing a timeless appeal that complemented the existing design elements of my property.

4. Decorative Flourishes:

The devil, as they say, is in the details. Carefully selecting decorative elements, such as wrought iron hardware and arched window inserts, added a touch of sophistication that elevated the garage door to a focal point of my home’s exterior.

5. Expert Craftsmanship:

Witnessing the transformation of my vision into reality required the expertise of skilled craftsmen. The meticulous craftsmanship, from the precision of panel construction to the artistry of hand-applied finishes, underscored the bespoke nature of the custom garage door.

6. Seamless Integration:

The installation process was a seamless integration of art and engineering. The custom garage door seamlessly melded with the architecture of my home, becoming a defining feature that enhanced both form and function.

The Impact: Beyond Aesthetics to Everyday Elegance

1. Aesthetic Harmony:

The custom garage door achieved the perfect harmony I envisioned. Its design seamlessly blended with the architectural elements of my home, creating a cohesive and visually striking exterior.

2. Increased Property Value:

Beyond the immediate aesthetic impact, a well-designed and custom-crafted garage door contributes to the overall value of the property. The investment in customization became a strategic move to enhance the market value of my home.

3. Personal Satisfaction:

The daily satisfaction derived from seeing the custom garage door is immeasurable. It has become more than just an entry point; it’s a testament to personal style and a curated approach to homeownership.

4. Functional Excellence:

Beyond its aesthetic appeal, the custom garage door excels in functionality. Its insulation properties contribute to energy efficiency, and the automated features enhance convenience, making it a practical and luxurious addition to my home.

Conclusion: A Tailored Masterpiece

In the realm of home customization, the garage door emerged as a canvas for personal expression and architectural enhancement. The journey of exploring custom garage door services became a testament to the transformative power of bespoke design.

Based from Garage Door Repair, the meticulous process of conceptualization, design consultation, material selection, and expert craftsmanship culminated in a garage door that surpassed mere functionality—it became a work of art that reflected my individuality and elevated the aesthetic appeal of my home. As I continue to revel in the daily elegance bestowed by my custom garage door, I am reminded that true craftsmanship extends beyond trends; it embodies the timeless essence of tailored design and personal expression—one door at a time.

Denzel Garage Door Repair

2380 Camino Vida Roble, Carlsbad, CA 92011, United States

760-970-8179

How To Program Overhead Garage Door Opener Remote – Carlsbad Garage Door & Gate Repairs

Programming an overhead Garage Door Repair Carlsbad CA is a crucial step to ensure convenient and secure access to your garage.

The process may vary based on the specific brand and model of your garage door opener. Here’s a comprehensive guide to help you through the programming process:

: Gather Information Before you start, gather essential information about your garage door opener, including the brand and model. Locate the “learn” button on the garage door opener unit.

: Read the Opener and Remote Manuals Refer to the manuals provided with both the overhead garage door opener and the remote control. These manuals contain specific instructions and information that will be crucial during the programming process.

: Install Batteries in the Remote If the batteries are not already installed in the remote control, open the battery compartment and insert the recommended batteries. Follow the polarity indicated in the remote’s battery compartment.

: Identify the “Learn” Button on the Opener Unit Locate the “learn” button on the garage door opener unit. This button is typically on the back or side of the motor unit. Pressing this button puts the opener into programming mode.

: Clear Existing Programming (if needed) If there are existing remote codes programmed into the garage door opener, it’s advisable to clear them. Press and hold the “learn” button on the opener until the indicator light blinks, indicating that the memory has been cleared.

: Program the Remote Consult the remote control manual to find out how to put the remote into programming mode. This often involves pressing a specific combination of buttons on the remote. Once in programming mode, the remote’s indicator light may flash.

: Press the “Learn” Button on the Opener Unit Within 30 seconds of putting the remote into programming mode, go to the garage door opener unit and press the “learn” button. The indicator light on the opener should flash, indicating that it is ready to receive the new remote code.

: Press a Button on the Remote Press any button on the remote control that you want to program to the garage door opener. The opener unit should acknowledge the signal by flashing its indicator light or emitting a sound.

: Test the Remote Test the remote by pressing the programmed button. The garage door should respond by moving up or down. If it doesn’t, repeat steps 6-8.

: Program Additional Remotes (if applicable) If you have additional remote controls, repeat steps 6-9 for each additional remote you want to program.

: Final Testing and Troubleshooting Perform a final test of all programmed remotes to ensure they operate the garage door correctly. If any issues arise, consult the troubleshooting section of the garage door opener or remote control manual.

Conclusion:

By following these detailed steps, you should be able to successfully program your Garage Door Repair Carlsbad CA. Remember to consult the specific manuals for your garage door opener and remote control, as instructions may vary. This comprehensive guide aims to assist you in seamlessly integrating your remote control with your garage door opener, providing convenient and efficient access to your garage.

Carlsbad Garage Door & Gate Repairs

760-350-3536

How To Clear Homelink Garage Door Opener – Denzel Garage Door of Carlsbad

learing the HomeLink Garage Door Repair Carlsbad CA involves erasing the existing programming stored in the HomeLink system so that it can be reprogrammed with a new garage door or gate opener.

HomeLink is a universal remote control system often integrated into vehicles’ rearview mirrors or overhead consoles. To clear and reprogram HomeLink, follow these steps:

: Park Your Vehicle

Ensure your vehicle is parked safely in front of your garage or gate, where you intend to program the HomeLink system.

: Locate the HomeLink Buttons

Locate the HomeLink buttons in your vehicle. They are typically found on the rearview mirror, overhead console, or in some newer models, on the dashboard or center console. HomeLink buttons are usually labeled as 1, 2, and 3.

: Clear Existing Programming

  1. Turn the ignition to the “ON” position without starting the engine. Make sure the vehicle is in “Park” for automatic transmissions or in neutral with the parking brake engaged for manual transmissions.
  2. Hold down the first and third HomeLink buttons (buttons 1 and 3) simultaneously for about 20 seconds. During this time, the indicator light on the HomeLink buttons will change from a slow blink to a rapid blink and then turn off. Release the buttons once the light goes off.
  3. This step erases all previously programmed codes, and the HomeLink system is now cleared.

: Programming Your Garage Door or Gate Opener

Now that your HomeLink system is cleared, you can proceed to program it with your garage door or gate opener:

  1. Depending on your garage door opener, you might need to locate the “Learn” button on your garage door opener unit. This button is often found on the ceiling of your garage near the opener motor.
  2. Press the “Learn” button on your garage door opener and quickly return to your vehicle.
  3. Within 30 seconds of pressing the “Learn” button, press and hold the HomeLink button you want to program (e.g., button 1) in your vehicle. Hold the button until the HomeLink indicator light flashes rapidly, then release it.
  4. Test the HomeLink button by pressing it. The garage door or gate should respond by opening or closing. If not, you may need to repeat the programming process, ensuring you followed the instructions correctly.
  5. If you have a rolling code garage door opener (which changes the code each time it’s used for security reasons), you may need to perform additional steps, including a second press of the “Learn” button on the garage door opener and HomeLink button within 30 seconds. Consult your garage door opener manual for specific instructions on programming rolling code systems.
  6. Repeat the programming process for additional HomeLink buttons if you have a multi-door or gate system.

: Test the HomeLink System

Test each programmed HomeLink button to ensure they operate the garage door or gate as intended. If any buttons do not work, repeat the programming process for those buttons.

: Finalize Programming

Once all HomeLink buttons are programmed and working correctly, you can finalize the process:

  1. Secure any exposed wires or programming buttons on your garage door opener for safety.
  2. Store the garage door opener remote control in a safe place, as you may no longer need it.

: Troubleshooting

If you encounter issues during programming, refer to your vehicle’s owner’s manual or the manufacturer’s instructions for HomeLink. Troubleshooting steps may vary depending on the vehicle and garage door opener model.

In conclusion, clearing and reprogramming a HomeLink Garage Door Repair Carlsbad CA involves erasing existing programming and then following a series of steps to program it with your garage door or gate opener. Always refer to your vehicle and garage door opener manuals for specific instructions, as the process may vary depending on the make and model.

Denzel Garage Door of Carlsbad

300 Carlsbad Village Dr 108a 205, Carlsbad, CA 92008, United States

1-760-378-7470

How Much Does It Cost For A New Garage Door – Carlsbad Garage Door & Gate Repairs

The cost of a new Carlsbad Garage Door Repair can vary widely depending on several factors.

These factors include the type of garage door you choose, its size, material, design, insulation, and additional features. To provide you with a comprehensive understanding of the cost of a new garage door, we’ll explore these factors in detail.

1. Type of Garage Door:

There are several types of garage doors available, each with its own price range:

  • Sectional Garage Doors: These are the most common type of garage doors and are made up of several horizontal panels that roll up and down along tracks. They come in various materials like steel, aluminum, or wood.
  • Roll-Up Garage Doors: Roll-up doors are typically used in commercial settings but can also be used in residential garages. They are made of metal and roll up into a compact coil when opened.
  • Swing-Out Garage Doors: These doors swing outward to open, similar to traditional carriage house doors. They are often made of wood and have a rustic appearance.
  • Slide-to-Side Garage Doors: These doors slide to the side rather than rolling up or swinging out. They are less common but can be a good option for certain garage layouts.

2. Size of the Garage Door:

The size of the garage door plays a significant role in its cost. Standard single-car garage doors are typically 8 to 9 feet wide and 7 to 8 feet tall, while double-car garage doors are around 16 feet wide and 7 to 8 feet tall. Custom sizes will incur higher costs.

3. Material:

The choice of material for your garage door also affects the cost:

  • Steel: Steel doors are durable, low-maintenance, and relatively affordable. They come in various thicknesses and insulation levels.
  • Aluminum: Aluminum doors are lightweight and resistant to rust. They are an excellent choice for coastal areas.
  • Wood: Wooden garage doors offer a classic and elegant look but tend to be more expensive and require regular maintenance.
  • Composite: Composite doors combine the aesthetics of wood with the durability of steel or aluminum. They are a mid-range option in terms of cost.

4. Design and Style:

The design and style of the garage door can significantly impact the cost. Custom designs, decorative elements, and special finishes will increase the price.

5. Insulation:

Insulated garage doors provide better temperature control and noise reduction. While they are more expensive upfront, they can lead to energy savings in the long run.

6. Additional Features:

Garage doors can come with various optional features that affect the cost:

  • Windows: Adding windows to your garage door can enhance its appearance but will increase the cost.
  • Automatic Opener: An automatic garage door opener with remote control adds convenience but is an additional expense.
  • Security Features: Enhanced security features like smart locks and alarms may also be available at an extra cost.

7. Installation Costs:

Don’t forget to account for installation costs. Professional installation is essential to ensure the garage door operates safely and efficiently. Installation costs can vary depending on the complexity of the job and your location.

8. Location and Regional Pricing:

Prices for garage doors can vary by location and region. Urban areas and regions with higher living costs tend to have higher prices for goods and services.

9. Warranty and Maintenance:

Consider the warranty offered by the manufacturer and whether there are any maintenance costs associated with your chosen garage door material.

In conclusion, the cost of a new Carlsbad Garage Door Repair can range from a few hundred dollars for a basic, single-car, non-insulated steel door to several thousand dollars for a custom-designed, double-car, insulated wooden door with all the bells and whistles. It’s crucial to carefully consider your budget, needs, and preferences when choosing a garage door to ensure you get the best value for your investment. Additionally, obtaining multiple quotes from reputable garage door companies in your area will help you make an informed decision and potentially save money.

Denzel Garage Door of Carlsbad

300 Carlsbad Village Dr 108a 205, Carlsbad, CA 92008, United States

1-760-378-7470

How To Line Up Garage Door Sensors – Carlsbad Garage Door & Gate Repairs

Aligning Garage Door Repair Carlsbad CA sensors is a critical task to ensure the safe and proper operation of your garage door system. These sensors prevent the door from closing if an object or obstruction is detected in its path. If the sensors are misaligned, the door may not close or function as intended.

Here’s a comprehensive guide on how to line up garage door sensors:

1. Gather Necessary Tools:
Before you start, gather the following tools:

  • Tape measure
  • Level
  • Screwdriver or wrench (if needed for adjustments)
  • Cleaning cloth or alcohol wipes
  • Safety goggles and gloves

2. Understand Sensor Components:
Garage door sensors consist of two units – a sending unit and a receiving unit. The sending unit emits an infrared beam to the receiving unit. If the beam is blocked, the sensors trigger the safety mechanism to prevent the door from closing.

3. Check for Obstructions:
Inspect the area around the sensors for any obstacles, dirt, debris, or cobwebs that could block the infrared beam. Clear away any obstructions to ensure clear communication between the sensors.

4. Check the Sensor Alignment:
Look at the sensors to see if they’re properly aligned. They should be facing each other directly, with no obstructions in their line of sight. If the alignment is off, the indicator lights on the sensors might be blinking.

5. Measure Sensor Height:
Use a tape measure to measure the height of both sensors from the ground. Make sure they are at the same height on each side of the garage door.

6. Use a Level:
Place a level horizontally on each sensor unit to ensure they are level with each other. If they’re not level, you’ll need to make adjustments to bring them into alignment.

7. Adjust Sensor Alignment:
If the sensors are not aligned, follow these steps to adjust them:

A. Adjust the Sending Unit:

  • Loosen the screws that secure the sending unit to its mounting bracket.
  • Gently move the sending unit while observing the indicator light. The light should become steady when aligned properly.

B. Adjust the Receiving Unit:

  • Loosen the screws that secure the receiving unit to its mounting bracket.
  • Gently move the receiving unit while observing the indicator light. The light should become steady when aligned properly.

8. Maintain Parallel Alignment:
Ensure that the sending and receiving units are aligned both vertically and horizontally. They should be parallel to each other.

9. Secure Sensor Units:
Once the sensors are properly aligned, tighten the screws to secure the sensor units in their adjusted positions. Double-check the alignment after tightening.

10. Test the Alignment:
Test the alignment by closing the garage door using the remote or wall button. The door should stop and reverse if the sensors detect an obstruction. If the door does not reverse, recheck the alignment and make necessary adjustments.

11. Clean the Lenses:
Clean the lenses of both sensors with a soft cleaning cloth or alcohol wipes. Dust, dirt, or smudges on the lenses can affect sensor performance.

12. Test Regularly:
Regularly test the garage door sensors to ensure they continue to work properly. Test them by closing the door and placing an object in their path to trigger the obstruction detection.

13. Consult Manufacturer’s Manual:
Refer to your garage door opener’s manufacturer manual for specific instructions and guidelines regarding sensor alignment and troubleshooting.

14. Professional Assistance:
If you’re having difficulty aligning the sensors or if you’re unsure about the process, consider seeking the help of a professional garage door technician to ensure proper alignment and functionality.

In conclusion, aligning Garage Door Repair Carlsbad CA sensors is a crucial step to maintain the safety and efficiency of your garage door system. By following these steps and ensuring proper alignment, you can prevent malfunctions and ensure that the door operates as intended, providing a safe environment for you and your family.

Carlsbad Garage Door & Gate Repairs

300 Carlsbad Village Dr 108a 205, Carlsbad, CA 92008, United States

760-350-3536

Restoring Garage Door Opener Limit Switches – Carlsbad Garage & Overhead Doors

As someone who relies on the seamless operation of my garage door opener, encountering issues with the limit switches was a frustrating experience. The door’s erratic movements and failure to close properly were not only inconvenient but also raised concerns about safety. Determined to regain control over my garage door and ensure its reliable function, I took matters into my own hands and embarked on a journey to restore the limit switches. Through careful observation, research, and hands-on work, I successfully addressed the issue and restored the precision of my garage door’s movements.

Let me guide you through the steps to identify limit switch problems, understand their importance, and execute practical solutions to restore your garage door opener’s limit switches effectively based from Garage Door Near Me.

Step 1: Observing the Symptoms

My journey began with attentive observation. I closely monitored the behavior of my garage door—how it closed, how it opened, and any irregularities in its movements. Did it hesitate? Did it reverse unexpectedly? These observations were crucial in diagnosing the issue.

Step 2: Locating the Limit Switches

With a little research and the guidance of my garage door opener’s manual, I located the limit switches. These pivotal components are usually found near the motor unit of the opener and play a crucial role in determining the door’s opening and closing points.

Step 3: The Quest for Alignment

Inspecting the limit switches, I assessed whether they were properly aligned and engaged with the garage door opener’s arm or trolley. Misalignment could potentially be causing the issues I was experiencing.

Step 4: Making Precise Adjustments

Most limit switches come with adjustment screws that allow for fine-tuning. Armed with a screwdriver, I made minor adjustments to these screws, aiming to achieve the correct alignment of the switches.

Step 5: Testing the Changes

After making the adjustments, I put my garage door to the test. I opened and closed it several times to see if the movements were now precise and in line with my expectations. Adjustments sometimes require trial and error, so I remained patient.

Step 6: A Clean Start

I understood that dust and debris could hinder proper functioning. Armed with a soft cloth and a mild cleaner, I carefully cleaned the limit switches, ensuring they were free from any build-up that might impede their operation. A touch of lubrication to the moving parts added to their smooth operation.

Step 7: Calibrating Force Settings

I consulted my garage door opener’s manual to calibrate the force settings. I needed to make sure they were adjusted according to the manufacturer’s recommendations to avoid any undue stress on the limit switches.

Step 8: Prioritizing Safety Reversal

Testing the safety reversal mechanism was a must. Placing an object in the door’s path while it was closing, I observed whether the door reversed promptly upon contact. This was a vital safety feature that needed to function flawlessly.

Step 9: The Reset Option

Some garage door openers offer a reset option. I decided to utilize this feature, resetting the opener to its default settings. This can sometimes resolve electronic glitches affecting the limit switches.

When to Seek Professional Help:

While my DIY efforts yielded positive results, I acknowledged the instances when professional assistance is essential:

  • Electrical Complexities: For any issues related to electrical components or wiring, I knew it was wise to consult a professional to avoid any safety risks.
  • Persistent Challenges: If my fixes and adjustments didn’t resolve the problem, I recognized that a more intricate issue might be at play, necessitating the expertise of a professional.

Overall, based from Garage Door Near Me and my journey of restoring garage door opener limit switches taught me the importance of precision and patience. By following the steps above and prioritizing safety, I was able to diagnose and address the problem effectively. Regular maintenance, proper adjustments, and staying attuned to potential issues are vital in preventing future limit switch complications. With operational limit switches, I’ve reclaimed the smooth and reliable functionality of my garage door opener.

Carlsbad Garage & Overhead Doors

300 Carlsbad Village Dr 108a 205, Carlsbad, CA 92008, United States

760-350-3536

How To Add A Garage Door Keypad – Carlsbad Garage & Overhead Doors

A Garage Door Repair Carlsbad CA keypad is a convenient and secure way to access your garage without the need for a physical key or remote control. It allows you to enter a unique PIN code to open and close your garage door effortlessly.

In this comprehensive guide, we will walk you through the process of installing a garage door keypad step-by-step. Before you begin, ensure that you have read the manufacturer’s instructions and gathered all the necessary tools and materials.

Step 1: Choose the Right Location

The first step is to select the ideal location for your garage door keypad. It should be mounted near the garage entry door but high enough to be out of the reach of small children. Make sure the surface is clean and dry to ensure proper adhesion and performance.

Step 2: Check Compatibility and Power Source

Before proceeding with the installation, verify that the garage door opener is compatible with the keypad model you have purchased. Most keypads are designed to work with standard garage door openers, but it’s essential to confirm this to avoid any compatibility issues.

Additionally, check the power source required for the keypad. Some models are battery-operated, while others may need to be wired to the garage door opener’s power supply. Ensure you have the correct power source and any necessary wiring before starting the installation.

Step 3: Gather Tools and Materials

For a successful installation, gather the following tools and materials:

  1. Garage door keypad kit (including keypad and mounting hardware)
  2. Screwdriver
  3. Drill and appropriate bits
  4. Level
  5. Pencil
  6. Batteries (if required)
  7. Wire strippers (if required)

Step 4: Install Batteries (If Applicable)

If your garage door keypad is battery-operated, insert the required batteries into the designated compartment. Follow the manufacturer’s instructions for proper battery installation.

Step 5: Prepare the Mounting Surface

Hold the keypad against the chosen location and use a pencil to mark the spots where you will attach the keypad. Ensure it is level and aligned correctly. If the keypad has a mounting template provided by the manufacturer, use it to simplify the process.

Step 6: Drill Holes and Mount the Keypad

Using the appropriate drill bit, create holes at the marked spots. Insert wall anchors if your mounting surface requires them. Next, align the keypad with the holes and use screws to secure it in place. Double-check that it is level and firmly attached.

Step 7: Wiring (If Required)

If your garage door keypad requires wiring, follow the manufacturer’s instructions to connect it to the power supply of the garage door opener. Use wire strippers to strip the wire ends and connect them securely according to the provided guidelines. Exercise caution when working with electrical connections to avoid accidents.

Step 8: Program the Keypad

After mounting the keypad, it’s time to program it with a unique PIN code. Follow the instructions in the user manual to set your desired PIN. Make sure to choose a code that is easy for you to remember but difficult for others to guess. Avoid using obvious combinations like birthdates or repeating digits.

Step 9: Test the Keypad

Once the keypad is installed and programmed, test it to ensure it operates smoothly. Enter your PIN code and check if the garage door opens and closes correctly. If there are any issues, refer to the troubleshooting section in the manual or contact customer support for assistance.

Conclusion:

Installing a Garage Door Repair Carlsbad CA keypad is a straightforward process that can enhance the convenience and security of your garage. By following this step-by-step guide and carefully adhering to the manufacturer’s instructions, you can successfully add a garage door keypad to your home. Enjoy the ease of access and peace of mind that comes with this practical upgrade.

Carlsbad Garage & Overhead Doors

300 Carlsbad Village Dr 108a 205, Carlsbad, CA 92008, United States

760-350-3536

How to Monitor Garage Door? – Carlsbad Garage & Overhead Doors

Monitoring your garage door can provide peace of mind and enhanced security for your home. There are several methods to monitor your garage door, including traditional methods and modern smart technology solutions.

When it comes to monitoring my garage door, I follow these steps from Garage Door Carlsbad CA to ensure its security and proper functioning:

  1. Traditional Methods:a. Visual Inspection: I regularly perform visual inspections of my garage door. I carefully examine it for any signs of damage, misalignment, or wear and tear. This allows me to identify potential issues early on and take necessary action.b. Listening for Unusual Noises: I pay close attention to any unusual or unfamiliar sounds when operating my garage door. If I hear grinding, scraping, or squeaking noises, I know it’s time for maintenance or repair.c. Checking for Balanced Operation: To test the balance of my garage door, I disconnect the automatic opener (if applicable) and manually open and close the door. I ensure it moves smoothly and stays in position when partially opened. If the door doesn’t stay in place or shows imbalanced movement, I know it requires adjustment.
  2. Smart Technology Solutions:a. Installing a Garage Door Sensor: To enhance monitoring, I’ve installed a garage door sensor. This device detects the position of my garage door and sends me alerts if it’s opened or closed. I can choose between wired or wireless sensors that communicate with a central hub or my smartphone.b. Using a Smart Garage Door Opener: Upgrading to a smart garage door opener has been a game-changer. With its connection to my home’s Wi-Fi network, I can monitor and control my garage door remotely using a smartphone app. Real-time notifications inform me of the door’s status, and I have the ability to open or close it from anywhere.c. Connecting to a Home Security System: I’ve integrated my garage door with my home security system for added peace of mind. The security system provides monitoring capabilities, sending me alerts, allowing me to check the door’s status, and granting control through their app or control panel.d. Utilizing Video Surveillance: For visual monitoring, I’ve installed video surveillance cameras in and around my garage. This enables me to keep a close eye on my garage door in real-time and review footage if any suspicious activity occurs.
  3. Regular Maintenance and Testing:a. Performing Routine Maintenance: I understand the importance of regular maintenance for my garage door. I make sure to lubricate moving parts, inspect cables and springs for wear, and keep the tracks clean. These practices contribute to smooth operation and help me identify any potential issues.b. Testing the Safety Features: Safety is paramount, so I regularly test the safety features of my garage door. I place an object in the door’s path while closing it to ensure the auto-reverse mechanism functions properly. If the door doesn’t immediately reverse upon contact, I know that the safety sensors may require adjustment or replacement.c. Replacing Batteries: For wireless devices or sensors, I periodically check and replace the batteries as needed to ensure they function properly.
  4. Professional Inspection:a. Scheduling Professional Maintenance: To ensure a thorough inspection and proper maintenance, I schedule regular appointments with a professional garage door technician. They have the expertise to conduct a comprehensive assessment of my garage door, opener, and safety features, ensuring they’re in optimal working order.

In summary, by following these steps from Garage Door Carlsbad CA, I can effectively monitor my garage door, ensuring its security and functionality. Whether through traditional methods or modern smart technology solutions, monitoring my garage door allows me to stay informed and take necessary actions promptly.

Carlsbad Garage & Overhead Doors

300 Carlsbad Village Dr 108a 205, Carlsbad, CA 92008, United States

760-350-3536

Page 1 of 2

Powered by WordPress & Theme by Anders Norén