Local Businesses Blog in Texas

Tag: garage door repair Southlake TX Page 1 of 2

How Tight Should A Garage Door Opener Belt Be – First Responder Garage Doors

Garage Door Repair Southlake TX play a crucial role in the smooth functioning of your garage door system. Proper tension ensures efficient operation and prolongs the lifespan of your opener.

In this guide, we’ll delve into the optimal tension for a garage door opener belt and how to achieve it.

Understanding the Importance of Belt Tension

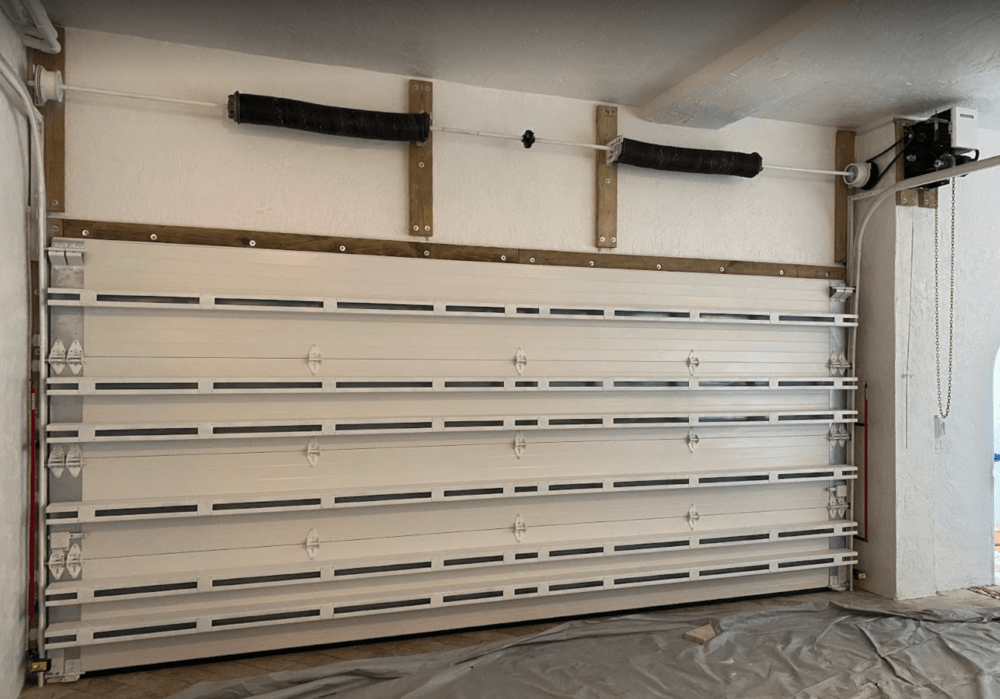
The correct tension of a garage door opener belt is vital for smooth and reliable door operation. If the belt is too loose, it may slip or skip teeth on the pulley, resulting in jerky movements or even complete failure. Conversely, if the belt is too tight, it can strain the motor and other components, leading to premature wear and potential damage.

Determining the Right Tension

Achieving the correct tension for your garage door opener belt requires a balance between too loose and too tight. Here’s how to determine the optimal tension:

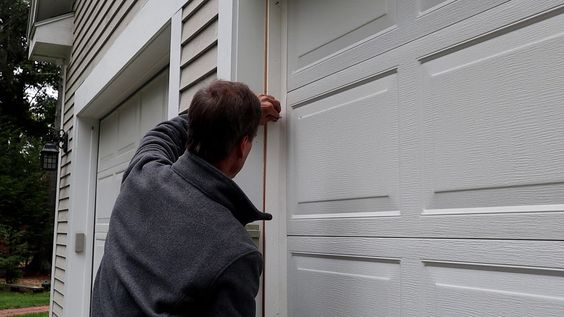
  1. Consult the Manufacturer’s Guidelines: Start by referring to the manufacturer’s instructions or owner’s manual for specific guidance on belt tension. Different models may have varying recommendations, so it’s essential to follow the instructions provided.
  2. Check Belt Deflection: Belt deflection refers to the amount of slack or movement in the belt when pressure is applied. Typically, the recommended deflection for a garage door opener belt is around 1/4 to 1/2 inch. To check the deflection, press down on the midpoint of the belt with moderate force. The belt should give slightly but not excessively.
  3. Adjust Tension Accordingly: If the belt is too loose, it will sag excessively when pressure is applied, indicating the need for tightening. Conversely, if the belt is too tight, there will be minimal or no deflection, suggesting the need for loosening. Adjust the tension as needed using the adjustment mechanism provided by the manufacturer.
  4. Test Door Operation: After adjusting the belt tension, test the operation of the garage door to ensure smooth and consistent movement. The door should open and close without any hesitation or jerking motion. If you notice any issues, readjust the tension until optimal performance is achieved.

Common Mistakes to Avoid

When adjusting the tension of your garage door opener belt, avoid the following common mistakes:

  • Over-Tightening: Excessive tension can strain the motor and other components, leading to premature wear and potential damage. Aim for a moderate amount of tension that allows for smooth operation without unnecessary strain.
  • Under-Tightening: If the belt is too loose, it may slip or skip teeth on the pulley, resulting in unreliable door operation. Ensure that the belt is tightened sufficiently to prevent slippage while still allowing for smooth movement.

Conclusion:

Achieving the correct tension for your garage door opener belt is essential for optimal performance and longevity of your opener system. By following the guidelines outlined in this guide and consulting the manufacturer’s instructions, you can ensure that your garage door operates smoothly and reliably for years to come.

First Responder Garage Doors

180 State St Suite 225, Southlake, TX 76092, United States

1-817-991-5551

How To Program Car To Chamberlain Garage Door Opener – First Responder Garage Doors


Garage Door Repair Southlake TX  Follow these step-by-step instructions to program your car to a Chamberlain garage door opener:

1. Prepare Your Car:

  • Ensure your car is parked outside the garage and is within range of the Chamberlain garage door opener. Turn the ignition to the “On” position without starting the engine.

2. Locate the HomeLink® Buttons:

  • In your car, locate the HomeLink® buttons, which are usually located on the overhead console, visor, or rearview mirror. These buttons may be labeled with icons resembling a house or garage door.

3. Clear Existing Programming (if necessary):

  • If you’re programming a new garage door opener or replacing an existing one, you may need to clear the memory of the HomeLink® system in your car. Consult your car’s owner’s manual for instructions on how to clear existing programming.

4. Put Your Car’s HomeLink® System in Programming Mode:

  • Press and hold the first HomeLink® button (usually labeled “1”) and the “HomeLink®” button simultaneously for about 10 seconds until the indicator light begins to flash rapidly. This indicates that the HomeLink® system is in programming mode.

5. Program Your Car to the Chamberlain Garage Door Opener:

  • With your car’s HomeLink® system in programming mode, hold your Chamberlain garage door opener remote control within a few inches of the HomeLink® buttons. Press and hold the button on your remote control that you wish to program to the corresponding HomeLink® button in your car.

6. Test the Programming:

  • After programming, press the programmed HomeLink® button in your car to test if it operates your Chamberlain garage door opener. If the door opens or closes as expected, the programming was successful. If not, repeat the programming process and ensure that you’re following the instructions accurately.

7. Repeat for Additional Buttons (if necessary):

  • If your car has multiple HomeLink® buttons, repeat the programming process for each additional button to program additional garage door openers or other devices.

8. Secure Battery Cover and Store Remote Safely:

  • After programming your car’s HomeLink® system, securely replace the battery cover on your remote control and store it in a safe and easily accessible location within your car.

Conclusion:

Garage Door Repair Southlake TX  If you encounter any difficulties during the programming process, consult your car’s owner’s manual or contact customer support for assistance.

First Responder Garage Doors

180 State St Suite 225, Southlake, TX 76092, United States

1-817-991-5551

Reviving Your Garage Door Opener: A Comprehensive Guide to Motor Gear Replacement – First Responder Garage Doors

As a homeowner who relies heavily on my garage door opener for convenience and security, encountering issues with its motor gear is not only frustrating but also concerning. The motor gear is a crucial component responsible for translating electrical energy into mechanical motion, allowing the smooth operation of the garage door. When this gear wears out or malfunctions, it can disrupt the entire system, rendering the opener ineffective/

In this article, I’ll share insights into the importance of the motor gear, signs of its deterioration, and a step-by-step guide to replacing it, ensuring your garage door opener stays in top condition by following Garage Door Repair Southlake TX.

Understanding the Significance of Garage Door Opener Motor Gear

Before delving into replacement procedures, let’s first grasp why the motor gear holds such importance in the functionality of your garage door opener. The motor gear, often referred to as the drive gear or main gear, is the component that transfers power from the motor to the drive system, typically consisting of a chain or belt. This gear reduction system amplifies the torque generated by the motor, enabling smooth and efficient operation of the garage door.

Signs of Motor Gear Deterioration

Identifying signs of motor gear wear or damage is crucial for timely intervention to prevent further complications. Here are some common indicators that your garage door opener’s motor gear may need replacement:

  1. Unusual Noises: Grinding, scraping, or rattling sounds emanating from the opener during operation can signify worn or damaged motor gear teeth.
  2. Inconsistent Operation: If your garage door opener exhibits erratic behavior such as starting and stopping abruptly or failing to complete opening or closing cycles, it could indicate issues with the motor gear.
  3. Slipping or Jerking Movements: The garage door may exhibit jerky movements or appear to slip during operation, suggesting inadequate engagement or worn teeth on the motor gear.
  4. Visual Inspection: Upon visual inspection, if you notice worn, chipped, or missing teeth on the motor gear, it’s a clear indication that replacement is necessary.

Replacing the Motor Gear: Step-by-Step Guide

Now that we’ve identified the need for motor gear replacement let’s walk through the process step by step to ensure a smooth and successful operation:

Step 1: Preparation

Begin by disconnecting the power to the garage door opener to prevent accidental activation during the replacement process. Also, ensure you have the necessary tools and replacement parts, including a new motor gear kit compatible with your garage door opener model.

Step 2: Accessing the Motor Gear

Access the motor gear assembly by removing the cover or housing enclosing the opener’s motor. This may involve unscrewing or unclipping the cover, depending on the design of your garage door opener.

Step 3: Removing the Old Motor Gear

Once you have access to the motor gear assembly, locate the motor gear and its associated components, such as the drive shaft and retaining clip. Carefully remove any retaining clips or fasteners securing the motor gear in place, then slide the old gear off the drive shaft.

Step 4: Installing the New Motor Gear

Slide the new motor gear onto the drive shaft, ensuring proper alignment with any associated gears or sprockets. Secure the motor gear in place using the provided retaining clip or fasteners, making sure it is firmly seated on the shaft.

Step 5: Lubrication and Testing

Apply lubricant to the motor gear and associated moving parts to reduce friction and ensure smooth operation. Reassemble the garage door opener, including replacing the cover or housing, and restore power to the unit. Test the garage door opener to verify that the new motor gear functions correctly and the garage door operates smoothly.

Step 6: Adjustment and Fine-Tuning

If necessary, make any adjustments to the tension or alignment of the garage door opener’s drive system to optimize performance. This may involve adjusting the tension on the drive chain or belt and ensuring proper alignment of the garage door tracks.

Conclusion

Overall, according to Garage Door Repair Southlake TX, the motor gear is a critical component of your garage door opener, responsible for translating electrical energy into mechanical motion to operate the door smoothly. Recognizing the signs of motor gear wear or damage and promptly replacing it when necessary is essential for maintaining the functionality and longevity of your garage door opener. By following the step-by-step guide outlined in this article, you can confidently replace the motor gear and restore your garage door opener to optimal working condition, ensuring reliable operation for years to come.

First Responder Garage Doors

180 State St Suite 225, Southlake, TX 76092, United States

817-991-5551

How To Open Garage Door In Power Outage – First Responder Garage Doors


Garage Door Repair Southlake TX Here’s a detailed guide on how to open a garage door during a power outage:

1. Locate the Manual Release Mechanism: Most garage door openers are equipped with a manual release mechanism that allows you to disengage the opener and operate the door manually. The manual release is typically a red cord or lever hanging from the opener motor unit. Locate this mechanism before the power outage occurs so you know where to find it in case of emergency.

2. Pull the Manual Release Handle: When the power goes out, locate the manual release handle and pull it down or towards the door to disengage the opener. This action disconnects the trolley from the drive system, allowing you to operate the door manually.

3. Lift the Garage Door Manually: With the opener disengaged, you can now lift the garage door manually. Place your hands on the bottom edge of the door, near the sides, and lift it straight up. Use your legs to help support the weight of the door and avoid straining your back. Be cautious as the door may be heavy, especially if it’s made of wood or has insulation.

4. Secure the Door in the Open Position: If you need to keep the garage door open for an extended period during the power outage, use clamps, blocks, or other supports to hold the door securely in the open position. This will prevent it from closing unexpectedly while you’re working or moving items in and out of the garage.

5. Close the Door Manually: When the power is restored, you’ll need to close the garage door manually as well. To do this, lower the door carefully until it reaches the closed position. Avoid letting the door slam shut, as this could cause damage to the door or tracks.

6. Re-engage the Opener: Once the power is back on and you’ve closed the garage door manually, you’ll need to re-engage the opener mechanism. Locate the manual release handle once again and push it back into its original position. This action reconnects the trolley to the drive system, allowing the opener to operate the door automatically once again.

7. Perform Regular Maintenance: To ensure smooth and reliable operation of your garage door during power outages and under normal circumstances, perform regular maintenance tasks such as lubricating moving parts, tightening loose hardware, and inspecting for signs of wear or damage. Address any issues promptly to prevent further damage to the door or opener.

Garage Door Repair Southlake TX Remember to prioritize safety at all times and consult a professional if you encounter any difficulties or if the door is not functioning correctly.

First Responder Garage Doors

180 State St Suite 225, Southlake, TX 76092, United States

1-817-991-5551

How To Add Second Garage Door To MYQ – Southlake Garage Door & Gate Repairs

Expanding your MyQ system to include a second Garage Door Repair Southlake TX involves a series of steps to seamlessly integrate the new door opener into your existing setup.

Here’s a comprehensive guide with detailed instructions.

1. Start with Compatibility Checks: Before proceeding, ensure that your second garage door opener is compatible with MyQ technology. Refer to the official MyQ compatibility list or reach out to customer support for specific details on supported models.

2. Acquire Additional MyQ Gateway: If your current MyQ system is designed for a single garage door, you’ll need to purchase an additional MyQ Smart Garage Hub or Gateway. This device acts as the bridge between your garage door opener and the MyQ system.

3. Gateway Installation: Begin by carefully following the installation instructions provided with the MyQ Gateway. Typically, this involves connecting the Gateway to your home Wi-Fi network. Follow the step-by-step guide to ensure a proper and secure connection.

4. Initiate Second Garage Door Opener Pairing: Locate the “Learn” button on the second garage door opener. Press this button to activate the programming mode. Simultaneously, open the MyQ app on your smartphone or follow the instructions on the MyQ Gateway to initiate the pairing process.

5. Pairing Process: The MyQ system will guide you through the pairing process. This usually involves selecting the option to add a new device, specifying the type of device (garage door opener), and following on-screen prompts. At the appropriate stage, press the “Learn” button on the second garage door opener as instructed.

6. Configure Door Settings: Once the second garage door opener is successfully added, access the MyQ app to configure specific settings for the new door. You may want to assign a distinct name to differentiate between the two doors and set preferences such as notifications, alerts, and operating schedules.

7. Testing Remote Control: Verify the functionality of the MyQ system by testing remote control operations for both garage doors. Use the app to individually open and close each door. Confirm that the system accurately reflects the status of each door.

8. Troubleshooting Guidelines: If you encounter any issues during the setup process, consult the troubleshooting section in the MyQ manual or visit the official MyQ support website. Common problems may include Wi-Fi connectivity challenges or compatibility issues with certain garage door opener models.

9. Additional Features Exploration: Take advantage of additional features offered by the MyQ system, such as real-time monitoring of garage door status, setting up customized alerts, and integrating with other smart home devices for a comprehensive home automation experience.

10. Documentation and Security Measures: Keep user manuals for both your garage door openers and the MyQ Gateway in a readily accessible location. Additionally, prioritize the security of your MyQ system by using strong, unique passwords, and regularly updating firmware to address potential vulnerabilities.

By following these detailed steps, you’ll successfully add a second Garage Door Repair Southlake TX to your MyQ system, enhancing the convenience and smart functionality of your garage door automation.

Southlake Garage Door & Gate Repairs

817-587-0445

How To Set Garage Door Remote – Southlake Garage Door & Gate Repairs

Setting up a Southlake Garage Door Repair is a task that, while it may seem complex, can be broken down into simple, manageable steps. By following these instructions carefully, you can ensure that your garage door remote is programmed correctly and functions smoothly. This comprehensive guide will walk you through the process in detail, providing clarity at each stage.

Identify Your Garage Door Opener

Before delving into the programming process, it’s crucial to identify the make and model of your garage door opener. This information is typically found on the motor unit, which is usually mounted on the ceiling of your garage.

Gather Necessary Tools

To successfully program your garage door remote, gather the tools you’ll need: a ladder to reach the motor unit, a screwdriver for any necessary adjustments, and, of course, the remote control you intend to set up.

Access the Motor Unit

Using the ladder, safely reach the motor unit of your garage door opener. Ensure that you have a clear view and access to the unit, which is often located near the center of the garage ceiling.

Locate the Learn Button

Most garage door openers have a designated “Learn” or “Program” button. This button is typically small and may have a distinctive color. Find and take note of its location on the motor unit.

Clear Existing Codes

To ensure a clean slate for programming, press and hold the “Learn” button until the indicator light on the motor unit turns off. This action clears any existing codes from the system.

Press the Learn Button Again

Following the code-clearing step, press the “Learn” button again. Release it once you notice the indicator light blinking. This indicates that the garage door opener is now ready to learn and store a new remote code.

Program the Remote

Take the remote control you wish to program and press the button you want to use for operating the garage door. Hold down this button until you observe the indicator light on the motor unit flashing.

Test the Remote

After programming the remote, it’s crucial to test its functionality. Press the button on the remote to check if it successfully opens or closes the garage door. If it doesn’t work as expected, repeat the programming steps.

Repeat for Additional Remotes

If you have multiple remotes, you’ll need to repeat steps 6-8 for each one. Ensure that each remote is programmed successfully and independently tested.

Set Limits and Force Adjustments

Some garage door openers may require additional adjustments for travel limits and force settings. Consult your opener’s manual for specific instructions on how to set these parameters correctly.

Secure the Remote

Once all remotes are programmed and tested successfully, securely mount the motor unit back onto the ceiling. Ensure that it is properly fastened to avoid any safety hazards.

Troubleshooting

If any issues arise, such as the remote not working, start by checking the batteries. If problems persist, consult your garage door opener’s manual for troubleshooting tips. Additionally, reaching out to the manufacturer’s customer support can provide valuable assistance.

In conclusion, setting up a Southlake Garage Door Repair involves a systematic approach that includes identifying your opener, accessing the motor unit, locating the Learn button, programming the remote, testing its functionality, and securing the system. Remember to consult your opener’s manual for model-specific instructions and troubleshooting guidance. By following these steps diligently, you can enjoy the convenience of a properly programmed garage door remote.

Southlake Garage Door & Gate Repairs

817-587-0445

How Do I Reset My Chamberlain Garage Door Opener Remote – First Responder Garage Doors

Resetting a Chamberlain Garage Door Repair Southlake TX is a journey into the realm of wireless communication and synchronization.

In this comprehensive guide, we’ll navigate through the steps to reset your Chamberlain garage door opener remote, ensuring a seamless connection between your remote and the garage door opener.

: Preliminary Checks

Before diving into the reset process, conduct preliminary checks. Ensure that the garage door is closed and that the area around it is clear. A safe environment sets the stage for a smooth and secure reset operation.

: Identify the “Learn” Button

Locate the “Learn” button on your Chamberlain garage door opener. This button is typically found on the motor unit and is crucial for programming new remotes. It may be labeled as “Learn,” “Smart,” or have an icon indicating its function.

: Clear the Slate

Press and release the “Learn” button. This action initiates the clearing of existing codes from the garage door opener’s memory, creating a clean slate for the new remote programming.

: Blinking Indicator Light

After pressing the “Learn” button, observe the indicator light on the motor unit. It will typically start blinking, indicating that the garage door opener is in programming mode, eagerly awaiting the synchronization with the new remote.

: Remote Pairing Process

With the garage door opener in programming mode, it’s time to pair the remote. Press and hold the button on the remote that you want to program. Hold it until the indicator light on the motor unit blinks, confirming the successful pairing of the remote with the garage door opener.

: Test the Remote

After pairing, conduct a quick test. Stand back and press the button on the remote. The garage door should respond by either opening or closing, confirming that the remote is now synchronized with the garage door opener.

: Repeat for Additional Remotes

If you have multiple remotes, repeat the process for each remote. Each remote must be individually paired with the garage door opener to ensure a seamless operation.

: Keypad and Additional Accessories

If your Chamberlain garage door system includes a wireless keypad or other accessories, follow the manufacturer’s instructions to pair them with the garage door opener. This ensures that all components work in harmony.

: Sensor Alignment Check

As part of the reset process, perform a safety check. Ensure that the safety sensors near the garage door are aligned and unobstructed. These sensors are vital for preventing accidents and ensuring safe garage door operation.

: Documentation and Security

Document the new remote codes in a secure place. Having a record of the codes is essential for future reference. Additionally, consider periodically changing the remote codes for enhanced security.

: Troubleshooting Touch

In the rare event of issues, consult the remote and garage door opener manuals for troubleshooting tips. Ensure that the batteries in the remote are fresh and that there are no obstructions blocking the signal.

: Professional Assistance

If, after following the steps, the remote or garage door opener continues to exhibit issues, consider seeking professional assistance. Certified technicians have the expertise to diagnose and address more complex problems.

In conclusion, this comprehensive guide serves as your roadmap to resetting your Chamberlain Garage Door Repair Southlake TX. For model-specific nuances and additional insights, always refer to the remote and garage door opener manuals—valuable resources for troubleshooting and maintenance. With these steps, you’ll navigate the reset process with confidence, ensuring a reliable connection between your remote and the garage door opener.

First Responder Garage Doors

180 State St Suite 225, Southlake, TX 76092

1-817-991-5551

How To Repair A Garage Door Opener – Southlake Garage Door & Gate Repairs

A Garage Door Repair Southlake TX is a convenient device that allows you to open and close your garage door with ease. However, like any mechanical device, garage door openers can experience problems and breakdowns over time.

When your garage door opener malfunctions, it can be frustrating and inconvenient. In this guide, we will walk you through the process of repairing your garage door opener, step by step.

Note: Before attempting any repairs on your garage door opener, ensure that you have disconnected the power source and taken all necessary safety precautions. If you are not comfortable with the repair process, it is always best to seek the assistance of a professional garage door technician.

: Identify the Problem

The first step in repairing your garage door opener is to identify the problem. Common issues with garage door openers include:

  1. The garage door doesn’t open or close.
  2. The garage door reverses immediately after closing.
  3. The motor runs but the door doesn’t move.
  4. The garage door opener is making unusual noises.

Understanding the specific issue will help you determine the appropriate repair steps.

: Check for Power Supply Issues

Sometimes, the problem might not be with the garage door opener itself but with the power supply. Make sure that the opener is plugged in and that there is power to the outlet. If the opener has a backup battery, ensure it is functioning correctly.

: Inspect the Remote Control

If the garage door opener responds to the wall switch but not the remote control, the issue may be with the remote. Replace the remote control batteries and reprogram it to the opener according to the manufacturer’s instructions.

: Examine the Safety Sensors

Modern garage door openers are equipped with safety sensors located near the garage floor. These sensors prevent the door from closing if an object or person is in the way. If the sensors are misaligned or obstructed, they can prevent the door from closing properly. Adjust the sensor alignment and clear any obstructions in their path.

: Lubricate Moving Parts

Lack of lubrication can cause the garage door opener to operate noisily or become sluggish. Apply a garage door lubricant to the moving parts such as the rollers, tracks, and hinges to ensure smooth operation. Refer to your opener’s manual for specific lubrication points.

: Inspect the Drive System

Garage door openers typically have one of three drive systems: chain, belt, or screw. Each may require different maintenance. Check for loose or damaged parts in the drive system and replace them as needed. Tighten any loose bolts or nuts.

: Test the Limit Switches

The limit switches control how far the garage door opens and closes. If these switches are misadjusted, the door may not open or close fully. Consult your opener’s manual to locate the limit switch adjustment screws and make the necessary adjustments.

: Replace Worn Gears or Sprockets

If your garage door opener’s motor runs but the door doesn’t move, it may be due to worn gears or sprockets. These components can wear out over time. You may need to disassemble the opener to access and replace them. Refer to your manual for guidance on this procedure.

: Check the Tension Springs

Tension springs help counterbalance the weight of the garage door. If the springs are damaged or broken, it can affect the door’s operation. Replacing tension springs can be dangerous, and it’s recommended to hire a professional for this task.

: Call a Professional

If you’ve followed the previous steps and the garage door opener still doesn’t work correctly, or if you encounter any problems that you’re not comfortable addressing, it’s time to call a professional garage door technician. They have the expertise and tools to diagnose and repair complex issues safely.

Conclusion:

Repairing a Garage Door Repair Southlake TX can be a challenging task, but with the right knowledge and tools, many issues can be resolved. Always prioritize safety when working on your garage door opener and consider seeking professional assistance when necessary. Regular maintenance and occasional troubleshooting can help extend the life of your garage door opener, ensuring it continues to provide convenient access to your garage for years to come.

Southlake Garage Door & Gate Repairs

817-587-0445

Can A Garage Door Be Taller Than The Opening – Southlake Garage Door & Gate Repairs

In most cases, a Southlake Garage Door & Gate Repairs should not be taller than the opening it’s installed in. The door needs to fit within the opening properly to ensure smooth operation, proper sealing, and security. However, there are certain situations where a taller garage door may be used, but this requires careful consideration and appropriate modifications to the opening and the door.

Here’s a detailed explanation:

Standard Garage Door Sizes:

Garage doors come in standard sizes to fit common residential and commercial garage openings. The most common residential sizes are typically 8 feet and 7 feet in height. Commercial garage doors can be larger, ranging from 10 feet to 14 feet or more in height.

Why a Garage Door Should Match the Opening:

  1. Proper Operation: A garage door needs to fit snugly within the opening to operate smoothly. If a door is too tall, it might not move properly along the tracks, leading to issues such as binding, uneven movement, or even damage to the door and tracks.
  2. Weather Sealing: Garage doors are designed to provide weather protection. If a door is taller than the opening, it can leave gaps at the bottom, compromising the door’s ability to keep out rain, snow, dust, and other elements.
  3. Security: An ill-fitting garage door can pose security risks. Gaps around the door can be exploited by intruders or pests to gain access to the garage.

Instances When a Taller Garage Door May Be Used:

While it’s generally recommended to match the door’s height to the opening’s height, there are situations where a taller garage door may be considered:

  1. Commercial or Custom Doors: In commercial settings or for specialized applications, custom-made garage doors can be designed to fit specific requirements. In these cases, the door manufacturer will work closely with the installer to ensure proper fit and operation.
  2. High Ceilings: Some residential garages have exceptionally high ceilings. In such cases, a taller garage door might be chosen to maintain the proportionality of the garage’s overall appearance. However, even in these situations, careful planning and professional installation are essential to ensure the door functions correctly.

Important Considerations:

If you’re considering installing a taller garage door, it’s crucial to follow these steps:

  1. Consult Professionals: Work with experienced garage door manufacturers and installers who can assess the feasibility of installing a taller door in your specific situation.
  2. Structural Modifications: Installing a taller door might require structural modifications to the opening, including adjustments to the header above the door. These modifications should be carried out by professionals to ensure safety and structural integrity.
  3. Custom Manufacturing: If you’re going for a non-standard size, the door will likely need to be custom-made. Custom doors require precise measurements and accurate specifications to ensure proper fit and operation.
  4. Professional Installation: Proper installation is key to the safe and reliable operation of any garage door. The installation process should be carried out by trained and experienced technicians.

Conclusion:

In the vast majority of cases, a Southlake Garage Door & Gate Repairs should not be taller than the opening. Proper fit, operation, weather protection, and security are compromised when a door does not match the opening’s dimensions. If you have specific requirements that necessitate a taller door, consult with professionals who can guide you through the process of selecting, manufacturing, and installing a custom door that meets your needs while ensuring safety and functionality.

Southlake Garage Door & Gate Repairs

2106 E State Hwy 114 #105, Southlake, TX 76092, United States

1-817-587-0445

Do Craftsman Garage Door Openers Have a Lifetime Warranty-Southlake Automatic Gates LLC


Craftsman Garage Door Repair Southlake TX openers have long been recognized as reliable and durable products in the market. While they are known for their high-quality craftsmanship, it is important to note that the warranty policies of Craftsman garage door openers may vary depending on the specific model and the region in which they are purchased.

However, as of my knowledge cutoff in September 2021, Craftsman garage door openers generally do not come with a lifetime warranty.

Warranty coverage is a crucial factor to consider when purchasing any product, especially one as essential as a garage door opener. It provides customers with peace of mind and protects them against potential defects or malfunctions. Craftsman, being a reputable brand in the garage door opener industry, offers warranty coverage for their products, albeit with certain limitations.

Typically, Craftsman garage door openers come with a limited warranty that covers manufacturing defects and faulty workmanship. This means that if your garage door opener fails due to a defect in materials or workmanship within a specific period, usually ranging from one to ten years, Craftsman will repair or replace the product free of charge. However, it is important to carefully read the warranty terms and conditions provided by the manufacturer to understand the exact coverage and duration of the warranty for the specific model you are interested in.

Craftsman’s warranty policies may also vary depending on the region and the retailer from which you purchase the product. It is recommended to check the warranty information specific to your region or consult with the retailer or Craftsman customer service for detailed and up-to-date information.

While Craftsman garage door openers do not generally come with a lifetime warranty, it is worth noting that the lifespan of a garage door opener can vary depending on factors such as usage, maintenance, and environmental conditions. With proper installation, regular maintenance, and appropriate usage, a Craftsman garage door opener can last for many years, providing reliable and convenient operation for your garage door.

To ensure that your Craftsman garage door opener remains in optimal condition, it is advisable to follow the manufacturer’s guidelines for installation, operation, and maintenance. This includes regular inspections, lubrication of moving parts, and checking for any signs of wear or damage. Additionally, it is important to avoid overloading the opener with excessive weight or using it beyond its recommended capacity.

In case you encounter any issues with your Craftsman garage door opener during the warranty period, it is essential to contact Craftsman customer service or the retailer from which you made the purchase. They will guide you through the warranty claim process and provide the necessary assistance to resolve the problem. Keep in mind that warranty coverage may require proof of purchase and compliance with the warranty terms, so it is advisable to retain your purchase receipt and any relevant documentation.

In summary, while Craftsman Garage Door Repair Southlake TX openers do not typically come with a lifetime warranty, they offer limited warranty coverage for manufacturing defects and faulty workmanship. The specific warranty terms, duration, and coverage may vary depending on the model and the region of purchase. It is essential to read and understand the warranty information provided by Craftsman and to follow proper installation, operation, and maintenance practices to ensure the longevity and optimal performance of your garage door opener.

Southlake Automatic Gates LLC

100 N Carroll Ave, Southlake, TX 76092, United States

1-817-631-4158

Page 1 of 2

Powered by WordPress & Theme by Anders Norén