
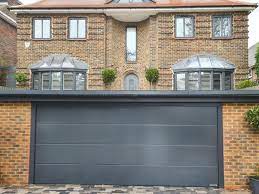
Framing a Garage Door Repair Wise County TX is an essential step in the construction or renovation of a garage. It involves creating a sturdy and secure structure that will support the weight of the door and provide a proper seal against the elements.
Here’s a comprehensive guide on how to frame a garage door.
- Planning and Preparation: Before starting the framing process, gather all the necessary tools and materials. These typically include measuring tape, a circular saw, a hammer, nails, a level, a framing square, pressure-treated lumber, plywood, and metal brackets. Ensure that you have accurate measurements of the garage door size and the rough opening dimensions.
- Marking the Rough Opening: Begin by marking the rough opening on the garage wall. Measure and mark the width and height of the door, accounting for the space needed for the door frame and hardware. Use a level and framing square to ensure that the lines are straight and square.
- Building the Header: The header is a horizontal beam that spans the top of the rough opening, supporting the weight of the garage door. Cut two pieces of pressure-treated lumber to the width of the rough opening. Place them vertically on each side of the opening, and attach a horizontal piece across the top, securing them with nails or metal brackets.
- Constructing the Side Jambs: Measure and cut two pieces of lumber to the height of the rough opening, minus the thickness of the header. These pieces will serve as the side jambs. Attach them vertically to the sides of the rough opening, ensuring they are plumb and secure.
- Installing the Bottom Plate: Cut a piece of pressure-treated lumber to the width of the rough opening, minus the thickness of the side jambs. This will be the bottom plate. Place it horizontally along the bottom of the rough opening and secure it to the floor with nails or concrete anchors.
- Adding the King Studs and Trimmer Studs: Measure and cut two vertical studs, known as king studs, to the height of the rough opening. Place them on each side of the opening, against the side jambs, and secure them to the header and bottom plate. Next, measure and cut two shorter studs, known as trimmer studs, to fit between the header and bottom plate, connecting the king studs.
- Installing the Jack Studs: Measure and cut two additional studs, called jack studs, to fit between the header and the top plate of the wall. Install one on each side of the rough opening, next to the king studs. These will provide extra support for the header.
- Adding Support Bracing: To reinforce the frame, add diagonal support bracing between the top plate and the header. Cut two pieces of lumber at a 45-degree angle to fit from the top plate to the header on each side of the opening. Attach them securely using nails or metal brackets.
- Securing the Frame: Once all the components are in place, use a level to ensure everything is plumb and level. Secure the frame by nailing or screwing the components together at appropriate intervals. Check for any gaps or unevenness and make adjustments as necessary.
- Installing the Sheathing: Finally, cover the frame with plywood or another suitable sheathing material. Cut the sheathing to fit the frame and attach it securely using nails or screws. This will provide additional strength and stability to the garage door frame.
Remember to consult local building codes and regulations before framing a Garage Door Repair Wise County TX, as requirements may vary. If you’re unsure about any step of the process, it’s recommended to seek professional assistance to ensure the job is done correctly and safely.
Wise County Door Company
1-940-304-0821