
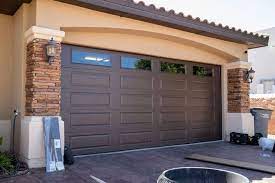
Opening a Garage Door Repair manually can be necessary in situations when the power is out, the remote control is not working, or the automatic opener is malfunctioning. Although the process may vary slightly depending on the type of garage door you have, the following steps will provide a general guideline for manually opening a garage door.
Please note that safety should always be a top priority, and if you’re unsure or uncomfortable with any step, it’s best to consult a professional.
- Verify Safety: Before attempting to manually open the garage door, ensure that it is safe to do so. Make sure there are no obstructions in the door’s path and that there are no visible signs of damage or mechanical issues.
- Disconnect the Automatic Opener: Locate the power source of your garage door opener. In most cases, this will be a power cord attached to an electrical outlet in the ceiling of the garage or a power switch nearby. Unplug the power cord or switch off the power supply to disable the automatic opener.
- Locate the Emergency Release Cord: The emergency release cord is a red cord hanging from the garage door opener mechanism. It is usually located near the center of the garage door, close to the top. Pulling this cord will disengage the garage door from the automatic opener, allowing you to open it manually.
- Pull the Emergency Release Cord: Grasp the emergency release cord firmly and pull it straight down with a steady, controlled motion. This action will release the garage door from the automatic opener’s drive mechanism, allowing you to operate the door manually.
- Test the Manual Operation: Once you have pulled the emergency release cord, you should be able to manually lift the garage door. Use both hands to grasp the door at a sturdy point, such as the handles or the bottom edges, and lift it slowly and evenly. Be cautious as the door may be heavy, especially if it’s a larger door or made of solid materials like wood.
- Secure the Garage Door: After manually opening the garage door, you need to ensure that it stays open securely. Use a clamp or a locking mechanism designed for garage doors to prevent the door from closing unexpectedly while you’re working or entering/exiting the garage.
- Check for Proper Functioning: Once the door is open, inspect it for any signs of damage, misalignment, or worn-out parts. Pay attention to the rollers, tracks, springs, and hinges. If you notice any issues, it’s recommended to contact a professional garage door repair service for assistance.
- Reconnecting the Automatic Opener: When the power is restored or the issue with the automatic opener is resolved, it’s important to reconnect the garage door to the opener. Simply pull the emergency release cord towards the door until you hear or feel it snap back into place. This will re-engage the garage door with the automatic opener mechanism.
- Test the Automatic Operation: After re-engaging the garage door with the automatic opener, test the door’s operation by using the remote control or wall-mounted switch. Make sure the door opens and closes smoothly without any unusual noises or interruptions.
- Regular Maintenance: To ensure the longevity and smooth operation of your garage door, it’s recommended to perform regular maintenance. This includes lubricating the moving parts, inspecting and tightening hardware, and addressing any issues promptly.
Remember, the above steps provide a general guideline for manually opening a Garage Door Repair. It’s crucial to consult the manufacturer’s instructions or seek professional assistance if you’re unsure or if your garage door has specific features or requirements. Safety should always be a priority when working with garage doors.
Ohio Garage Door Repair
7201 Longview Dr, Solon, OH 44139
1-440-773-2246