
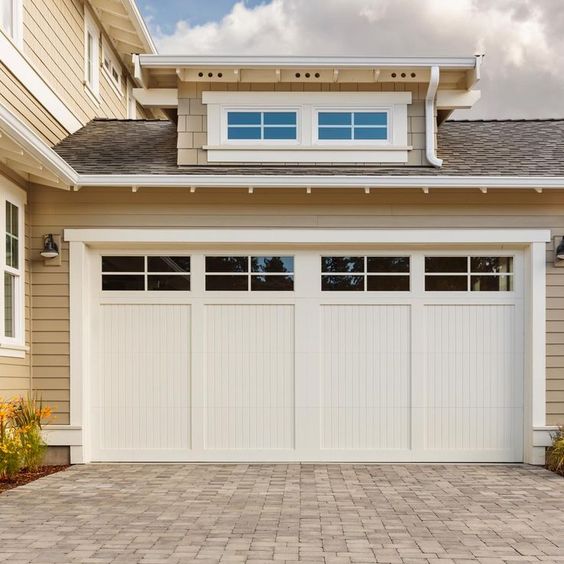
As a dedicated homeowner who takes great pride in the appearance and functionality of my property, I’ve encountered my fair share of challenges when it comes to maintenance and repairs. Recently, I was faced with the disheartening sight of cracked and broken windows on my garage door. Not only did this compromise the overall aesthetic of my home, but it also raised concerns about security and insulation. Instead of immediately jumping to the option of a costly replacement, I decided to take matters into my own hands and explore the world of DIY window repair.
In this guide, I’ll share my personal journey and insights on how to effectively repair cracked or broken garage door windows, all while restoring the charm and functionality of my home’s exterior as stated from Garage Door Near Me.
Recognizing the Urgency of Repair
Before delving into the process of repairing garage door windows, it’s crucial to understand why addressing this issue promptly is essential:
- Enhanced Curb Appeal: Garage door windows contribute significantly to the overall visual appeal of a home’s exterior. Repairing damaged windows ensures that the exterior maintains its well-groomed and inviting appearance.
- Security Matters: Broken windows compromise the security of your garage, potentially providing easy access to potential intruders. Repairing the windows promptly reinstates a sense of safety.
- Preserving Insulation and Comfort: Damaged windows can allow drafts, moisture, and unwanted outdoor elements to infiltrate the garage. By addressing the issue, you’re effectively maintaining insulation and ensuring a comfortable indoor environment.
Assessing the Extent of Damage
My journey to repairing garage door windows began with a thorough assessment of the damage:
- Cracks: For windows with minor cracks that hadn’t resulted in complete shattering, I considered the possibility of repair instead of immediate replacement.
- Shattered Glass: In cases where the glass was shattered, I carefully removed the broken pieces and examined the frame and surroundings to determine the full scope of the issue.
- Frame Condition: I closely inspected the window frame, looking for signs of wear, rot, or any structural damage that could impact the effectiveness of the repair.
Gathering Tools and Materials
To embark on this DIY project successfully, I made sure to gather the necessary tools and materials:
- Safety Gear: Safety glasses and gloves were my first line of defense against glass fragments and potential injuries.
- Utility Knife: A utility knife proved invaluable for safely removing broken glass and any remaining adhesive.
- Putty Knife: A putty knife was my go-to tool for carefully applying and removing adhesive during the repair process.
- Replacement Glass: Sourcing replacement glass that matched the size and style of the existing windows was essential.
- Adhesive or Sealant: I chose a high-quality adhesive specifically designed for outdoor use and capable of securely adhering glass to the frame.
- Caulk Gun: A caulk gun made it easy to apply adhesive with precision and consistency.
- Painter’s Tape: Painter’s tape played a crucial role in protecting the surrounding area during repairs.
Step-by-Step Repair Process
Here’s how I tackled the repair of cracked or broken garage door windows:
- Prioritizing Safety: I made sure to don safety glasses and gloves before embarking on the repair process.
- Removing Broken Glass: Using a utility knife, I carefully removed any remaining broken glass from the window frame. To ensure safety, I disposed of the glass fragments in a puncture-resistant container.
- Cleaning the Frame: I took the time to thoroughly clean the window frame and the surrounding area using a damp cloth. This step ensured a clean and adhesive-ready surface.
- Applying Adhesive: With the help of a caulk gun, I applied a thin and even layer of adhesive or sealant along the edges of the window frame. I followed the instructions provided by the adhesive manufacturer for proper application.
- Inserting Replacement Glass: Gently and carefully, I inserted the replacement glass pane into the adhesive-covered frame. I applied gentle pressure to ensure a secure bond between the glass and the adhesive.
- Securing the Glass: I used painter’s tape to hold the replacement glass in place while the adhesive cured. Adhering to the recommended curing time specified by the adhesive manufacturer was essential for a successful repair.
- Sealing the Edges: Once the adhesive had fully cured, I removed the painter’s tape and used a putty knife to apply additional adhesive around the edges of the glass. This extra step ensured a secure and watertight seal.
- Cleaning Excess Adhesive: A quick wipe with a damp cloth helped me remove any excess adhesive that may have oozed out during the repair process.
Tips for a Successful Repair
To make sure my repair endeavor was a success, I kept these tips in mind:
- Accurate Measurements: When ordering replacement glass, precise measurements are crucial to ensure a perfect fit.
- Selecting the Right Adhesive: I opted for an adhesive or sealant designed for outdoor use and glass applications, paying close attention to its strength and weather resistance.
- Adhering to Instructions: Following the recommended curing and drying times specified by the adhesive manufacturer is key to achieving optimal results.
- Ideal Working Conditions: I chose a dry and mild day for the repair to allow the adhesive to cure effectively. Extreme temperatures or adverse weather conditions were avoided.
- Professional Consultation: If the window frame exhibited extensive damage or the repair seemed beyond my capabilities, I was open to seeking professional assistance.
Conclusion: A DIY Triumph That Shines Through
According from Garage Door Near Me, tackling the repair of cracked or broken garage door windows wasn’t just a practical necessity for me—it became a satisfying DIY achievement. Armed with a step-by-step approach, the right tools, and a commitment to precision, I successfully restored the visual appeal and functionality of my garage door windows. By addressing this issue in a timely manner, I’ve not only enhanced the external appearance of my home but also bolstered its security and insulation. This DIY repair project serves as a testament to my dedication to maintaining my property and a tangible reminder of how a bit of effort can go a long way in preserving the beauty and integrity of my home.
Arlington Overhead & Garage Doors
700 Secretary Dr, Arlington, TX 76015, United States
817-646-2532